34
5.3.7 Weather Alert Frequency Adjustment (RECEIVER)
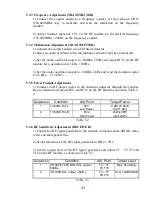
1) Connect an RF signal generator to the antenna connector. Set the RF signal
generator as follows:
Frequency: 162.550MHz with no modulation
Output level: 60dB
µ
2) Select the weather channel WX1.
3) Connect a frequency counter to TP1 on the RF Board and adjust RV6 to
obtain 1/-5Hz on the frequency counter.
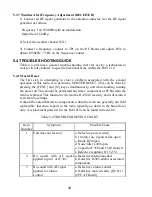
5.4 TROUBLE SHOOTING GUIDE
Table 5-4 provides a general trouble-shooting chart for use by a technician to
isolate circuitry failures to specific functional areas within the RAY 210.
5.4.1 Master Reset
The first step in attempting to clear a problem associated with the general
operation of this radio is to perform a MASTER RESET. This can be done by
pressing the [FUNC] and [16] keys simultaneously, and while holding, turning
the power on. This should be performed anytime a component or PCB within the
radio is replaced. This function will clear the RAY210 memory and will return it
to its factory settings.
It should be noted that micro-components within the radio are generally not field
replaceable, therefore, repairs to the radio typically go down to the board level
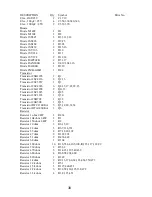
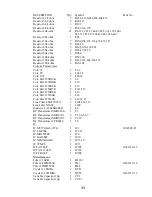
only. A replacement parts list for the RAY210 can be found in Section 6.
Table 5-4 TROUBLESHOOTING CHART
Item
Number
Symptom
Possible Cause
1
Unit does not turn on
a. Defective power switch
b. 10 amp. fuse in power line open
c. Diode D24 open
d. Noise filter L309 open
e. Capacitor C358 and C369 shorted
f. Defective regulator IC15 (5V)
2
No sound with AF signal
applied to pin 1 of IC305
a. Defective internal speaker
b. Defective IC305 and/or associated
components
3
No sound with AF signal
applied to volume
control
a. Defective volume control
b. Defective mute circuitry (Q6 IC1)
[CPU AF Board]
Summary of Contents for RAY 210VHF
Page 2: ......
Page 3: ......
Page 4: ......
Page 6: ......
Page 8: ......
Page 10: ......
Page 12: ......
Page 19: ...7 Figure 2 2 Outline and Mounting Dimensions...
Page 30: ...18 Figure 3 1 Layout of Controls and Connectors...
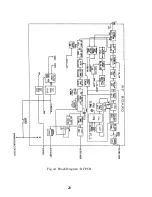
Page 40: ...28 Fig 4 1 Block Diagram RF PCB...
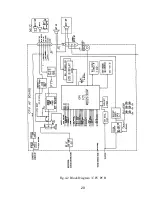
Page 41: ...29 Fig 4 2 Block Diagram CPU PCB...
Page 55: ...43 6 2 RAY210 ASSEMBLY DRAWING...
Page 57: ...45 6 3 SCHEMATIC DIAGRAM Fig 6 1 Schematic diagram RF PCB...
Page 58: ...46 Fig 6 2 Schematic diagram CPU PCB l...
Page 59: ...47 Fig 6 2 Schematic diagram CPU PCB 2...
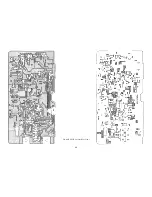
Page 60: ...48 Fig 6 3 RF PCB Layout Top View...
Page 61: ...49 Fig 6 4 RF PCB Layout Rear View...
Page 62: ...50 Fig 6 5 CPU PCB Layout Top view...
Page 63: ...51 Fig 6 5 CPU PCB Layout Rear View...
Page 64: ...52...
Page 75: ...63...


