Note:
* Menu items not available when radio has ATIS
enabled or if the radio has been pre-programed in
MARCOM-C mode.
** The menu name and sub-options depend on the
peripheral devices connected to the radio.
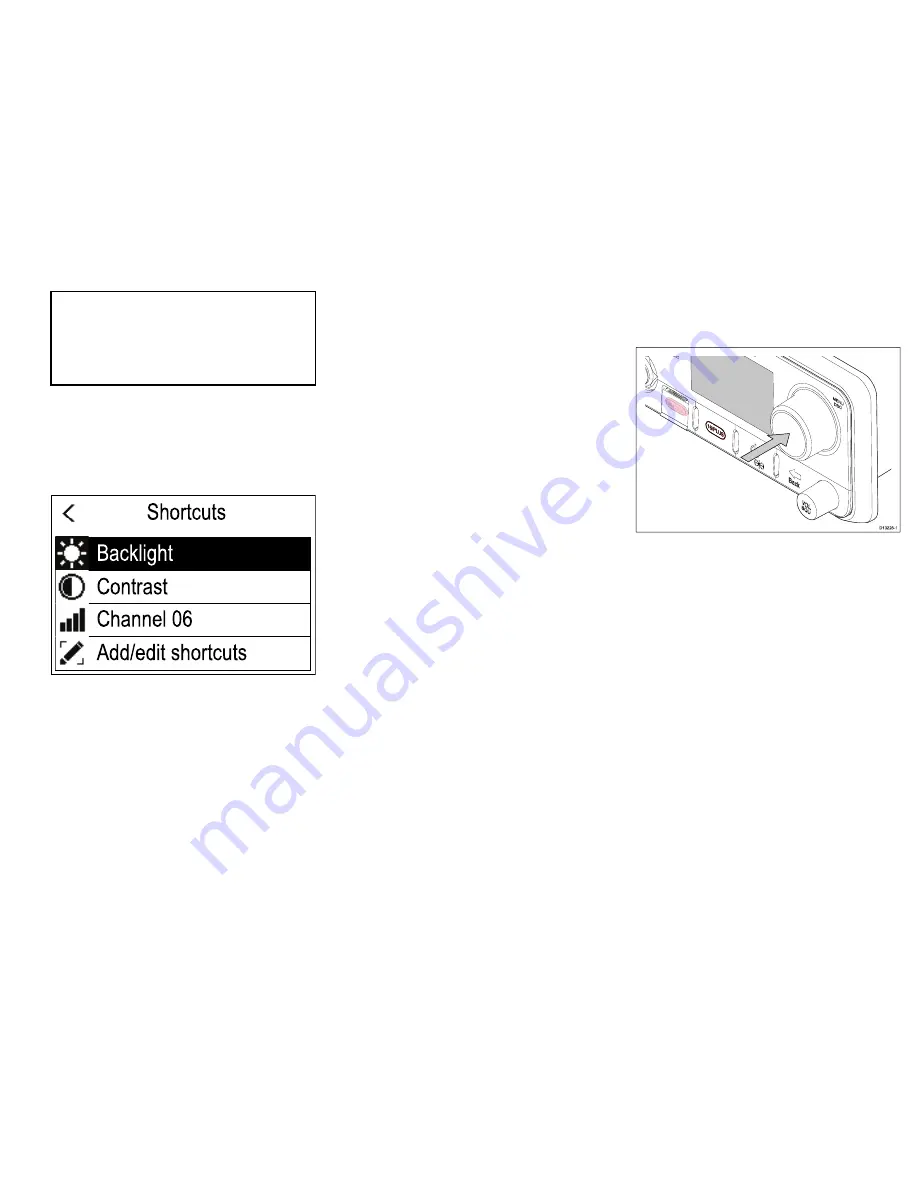
Shortcut list
Pressing the
Power
button once while the radio is
switched on will open the
Shortcuts list
. The Shortcuts
list can be used to adjust the brightness, contrast and
access frequently used functions.
Shortcuts
Contrast
Channel 06
Add/edit shortcuts
Backlight
Frequently used functions can be added by selecting
Add/edit shortcuts.
Adjusting Brightness and Contrast
The LCD Brightness and Contrast can be adjusted
using the Shortcuts list.
From any screen:
1. Press the
Power
button.
2. Select
Brightness
or
Contrast
.
3. Use the
Rotary knob
to adjust the Brightness or
Contrast to the desired level.
4. Press the
Power
button again to return to the
previous screen.
Initial startup
Unless your radio has been pre-programmed; the first
time you power-up your radio you will be requested to
select certain options. With the exception of your MMSI
and ATIS ID, you will also be requested to enter these
options after a factory reset.
After acknowledging the startup screen, unless
previously set you will be prompted to make the
following selections:
1.
Language selection
See
Selecting a language
for available languages.
2.
Turn on AIS reception — Ray70 only
Enables the built-in AIS receiver. This step is only
applicable to radios with a built-in AIS receiver. See
Switching on the AIS receiver
for more information.
3.
Select network type
Selects which connection to transmit AIS and DSC
information to connected equipment on. This step
is only applicable if the AIS receiver was turned on
in the previous step. See
Selecting a network type
for available options.
4.
Enter MMSI number
Required to enable DSC functions. This option is
not required after a factory reset, or if the radio has
been pre-programed in MARCOM-C mode, or has
ATIS enabled. See
Entering an MMSI number
for
more information. If not already selected you will
also be prompted to select your network type.
5.
Enter ATIS ID
Required when the radio will be used in the
inland waterways of Europe. This step is only
applicable if the radio has been pre-programed in
MARCOM-C mode. See
Entering an ATIS ID
for
more information.
6.
Frequency band selection
Sets the relevant channels for your region. This
step is not applicable if the radio has been
pre-programed in MARCOM-C mode. See
Changing the radio region
for more information.
Accessing the menu
The radio’s various options and settings are contained
within the menu.
D13228-1
From the Homescreen.
1. Press the
Rotary knob
’s
OK
push button.
Selecting a language
The language the radio uses can be changed.
From the Main menu:
1. Select
Set-up
.
2. Select
Language
.
The languages available are:
•
English (default)
— English
•
Español
— Spanish
•
Français
— French
•
Deutsch
— German
•
Italiano
— Italian
3. Select the language that you want the radio to be
set to.
The User interface language is changed to the selected
language.
19


