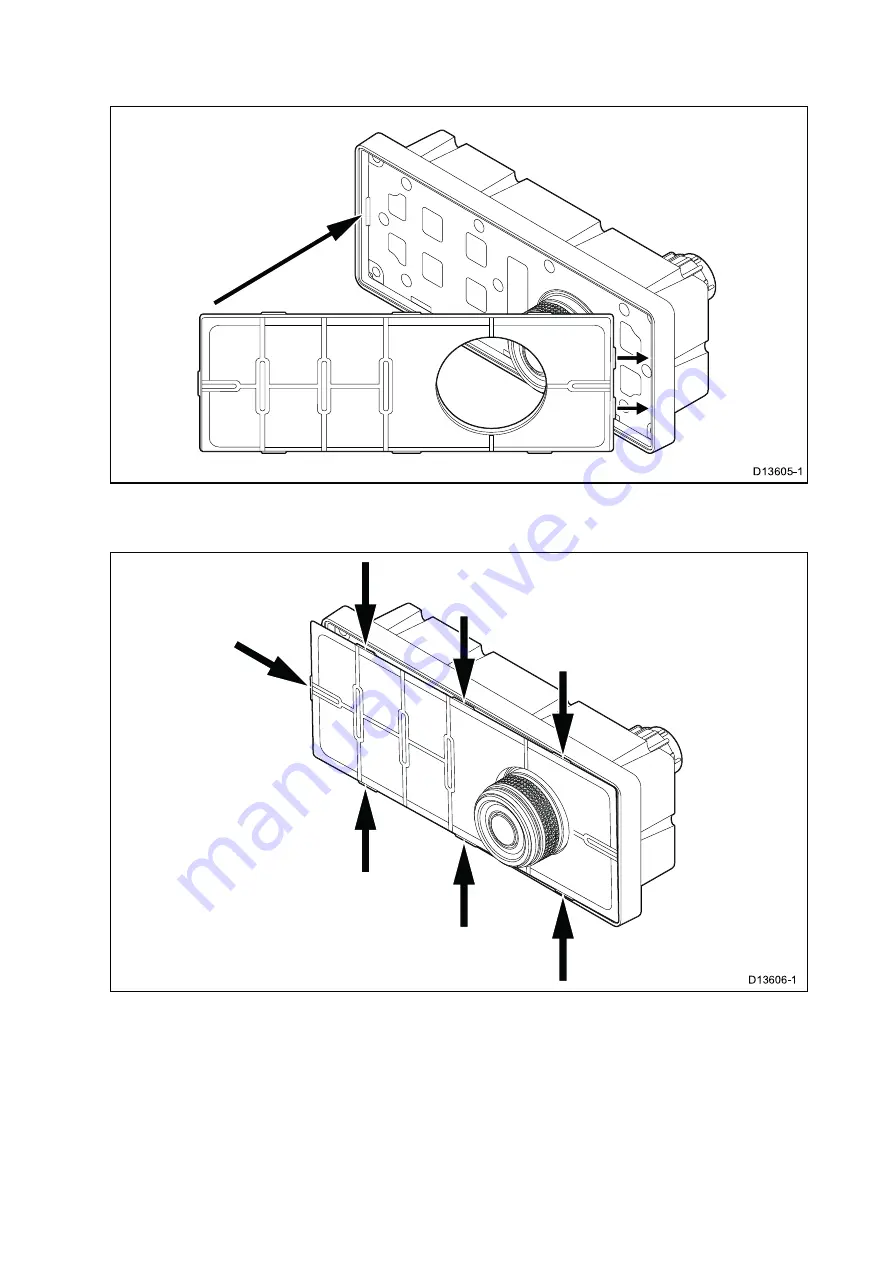
2. Slide the keypad mat’s shorter edge, with the 2 locking tabs, into the end of the keypad that
has 2 notches to accept the tabs.
3. Close the opposite end of the keypad mat into the keypad, ensuring that the tab slides into the
notch provided. Push all of the tabs on the longer sides into their notches (you should hear a
click as each tab engages).
26
Summary of Contents for RMK-10
Page 2: ......
Page 4: ......
Page 10: ...10 ...
Page 14: ...14 ...
Page 15: ...Chapter 3 Parts supplied Chapter contents 3 1 Parts supplied on page 16 Parts supplied 15 ...
Page 21: ...Chapter 6 Installation Chapter contents 6 1 Installation checklist on page 22 Installation 21 ...
Page 34: ...34 ...
Page 42: ...42 ...
Page 50: ...50 ...
Page 54: ......
Page 56: ...W Warranty 48 Water ingress 46 WEEE Directive 8 ...
Page 57: ......


