GPSTrackP - TT-300
Fig. 4: LED’s on the front of the TripTracer indicate power and GPS signal status.
LED Color
Function
Red LED
Indicates power is on and the TripTracer is in RECORD mode.
Green LED (flashing)
Indicates signals received from GPS satellites.
Green LED
(solid, not flashing)
Indicates no signal available from GPS satellites. As the user moves to an area with a more
open view to the sky (as buildings or dense foliage may be blocking GPS satellites), the
GPS should be able to gain signals from GPS satellites. (NOT RECORDING)
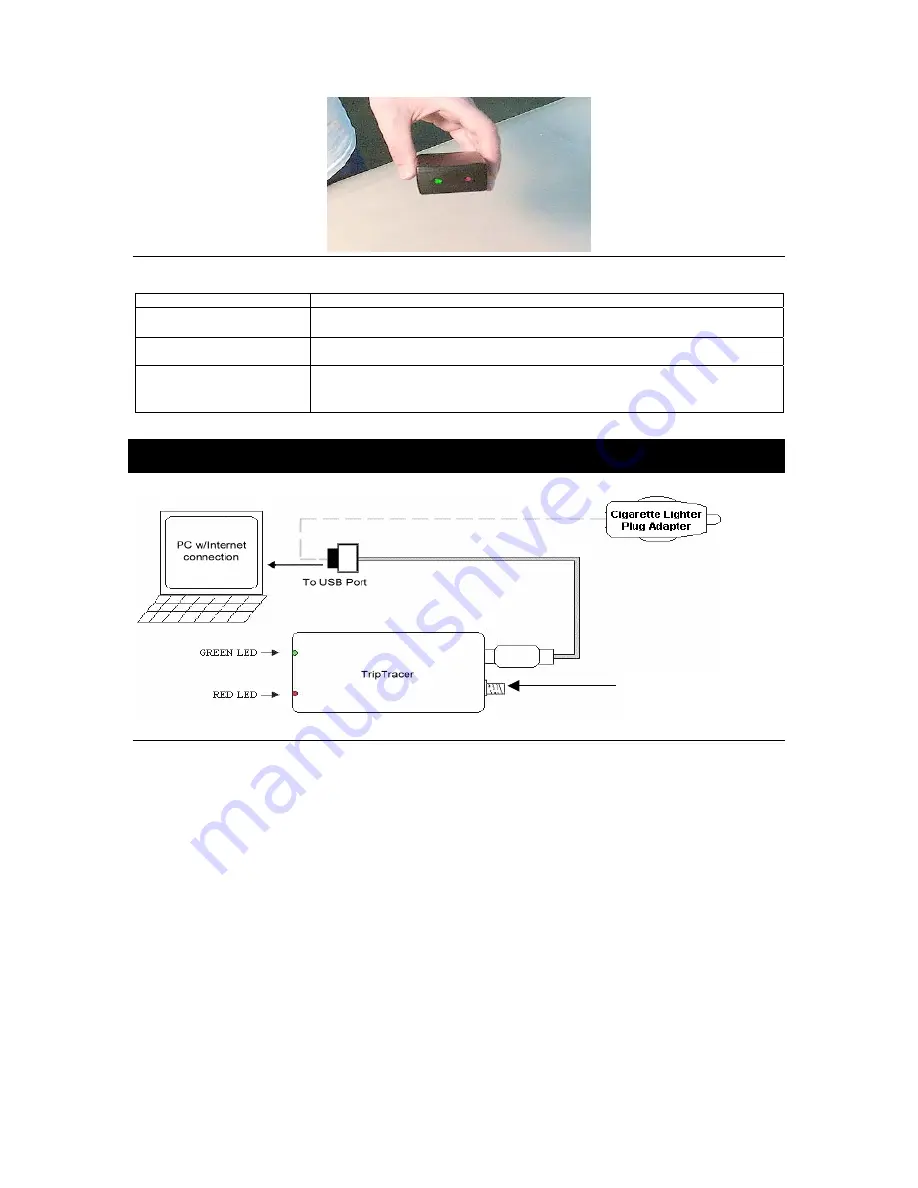
9. CONNECT FOR DOWNLOAD
GPS Antenna connector
Fig. 5 TripTracer connection diagram
When you are ready to view the recorded data stored inside the TripTracer, simply disconnect the
antenna connector by unscrewing counter-clockwise and unplug the USB connector from the back of
the cigarette lighter adapter. (It’s advisable that the cigarette lighter adapter also be removed from the
socket and put into a secure place such as the glove box to avoid damage or loss to the adapter.)
Reconnect the TripTracer’s USB connector to your PC’s USB port. Now click on the GPSTrackP icon
or the TripTracer icon found on your desktop to open the download utility program used to extract the
recorded data from the TripTracer’s memory into your local PC. You should save the file in
<GPSTrackP Installation directory>\data\GPSData\*.gps so that GPSTrackP can see it automatically
for further processing.
Depending on the size of the file (the time since your last download), the process may take several
minutes, but please be patient. Upon confirmation that your data was downloaded to GPSTrackP (able
to be viewed), with the TripTracer unit still connected to the PC and click on the ERASE button. This
will delete all data residing in the unit’s memory to maintain maximum storage capacity.
PAGE 10 OF 14
UG-TT300 (061003)


