13
4.7.3. Electronic Ignition Gas Valves
Figure 11. Location of Gas Pressure Adjustment
4.7.4. Water Connections
The heater requires water flow and positive pressure to
fire and operate properly. It must therefore be installed
downstream of the discharge side of the filter pump. A
typical installation is plumbed as follows:
1. The inlet side of the filter is plumbed directly to the
discharge side of the filter pump;
2. The outlet side of the filter is then plumbed to the
inlet of the heater; and
3. The outlet of the heater is plumbed to the return line
to the pool or spa. The pump, filter and heater are
thus plumbed in series.
Plumbing from the heater back to the pool or spa must not
have any valves or restriction that could prevent flow when
the pump is operating.
Heater must be located so that any water leaks will not
damage the structure of adjacent area. PVC pipe may be
glued directly into supplied CPVC header unions.
Model
Tubing
Input
1/2" (1.27 cm)
3/4" (1.91 cm)
1" (2.54 cm)
NAT
LPG
NAT
LPG
NAT
LPG
106
Cu
105,000 BTU/hr
(30.8 kW)
26' (8 m)
65' (20 m)
99' (30 m)
252' (77 m) 350' (107 m) 892' (272 m)
156
Cu
150,000 BTU/hr
(43.9 kW)
13' (4 m)
34' (10 m)
51' (16 m)
130' (40 m)
180' (55 m) 459' (140 m)
Table capacities are based upon use of sch 40 black iron pipe. For capacities using other materials, consult local code.
* Natural Gas 1000 BTU/FT
3
0.60 Specific Gravity @ 0.5" WC Pressure Drop (Gaz Naturel 3154.5 W/m
3
0.60 Densite @ 0.124 kPa Pressure Drop)
* Natural Gas 2500 BTU/FT
3
1.53 Specific Gravity @ 0.5" WC Pressure Drop (Gaz Naturel 7886.3 W/m
3
0.60 Densite @ 0.124 kPa Pressure Drop)
Table I.
Maximum Equivalent Pipe Length
4.7.5. Flow Rates
Model
Minimum
Maximum
106/156
20 GPM (75 L)
70 GPM (265 L)
Table H. Water Flow Rates
When the flow rates exceed the maximum 70 GPM
(265 L), an external auxiliary bypass valve is required. See
section "External Auxiliary Bypass Valve" on page 14
for details.
4.7.6. Polymer Headers
Before attaching the supplied 2" (5 cm) CPVC unions to
the In/Out header, make sure the O-rings are properly
seated in the grooves. Use AquaLube or equivalent non-
petroleum-based lubricant on the O-ring. Hand tighten the
unions. Glue PVC or CPVC piping directly to the unions.
In/Out Header
O-Ring
Tail Piece
Nut
2” Pipe
(5cm)
Drain Plug
Figure 12. In/Out Header for 2" (5 cm) Installation
In/Out Header
Hose Connector
Hose
Figure 13.
Optional In/Out Header for 1-1/2" (3.8 cm)
or
1-1/4" (3.2 cm) Hose Connection
If there is any possibility of back-siphoning when the
pump stops, it is recommended that a check valve (or
valves) also be installed in the system.
Summary of Contents for 106
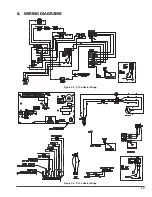
Page 23: ...23 6 WIRING DIAGRAMS Figure 35 P 106 Heater Wiring Figure 36 P 156 Heater Wiring...
Page 34: ...34 NOTES...
Page 35: ...35 NOTES...


