Chapter 2: Installation
2-27
Ch
ec
k f
or
L
eaks
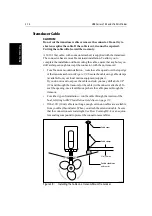
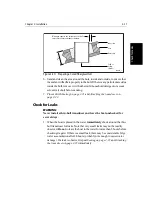
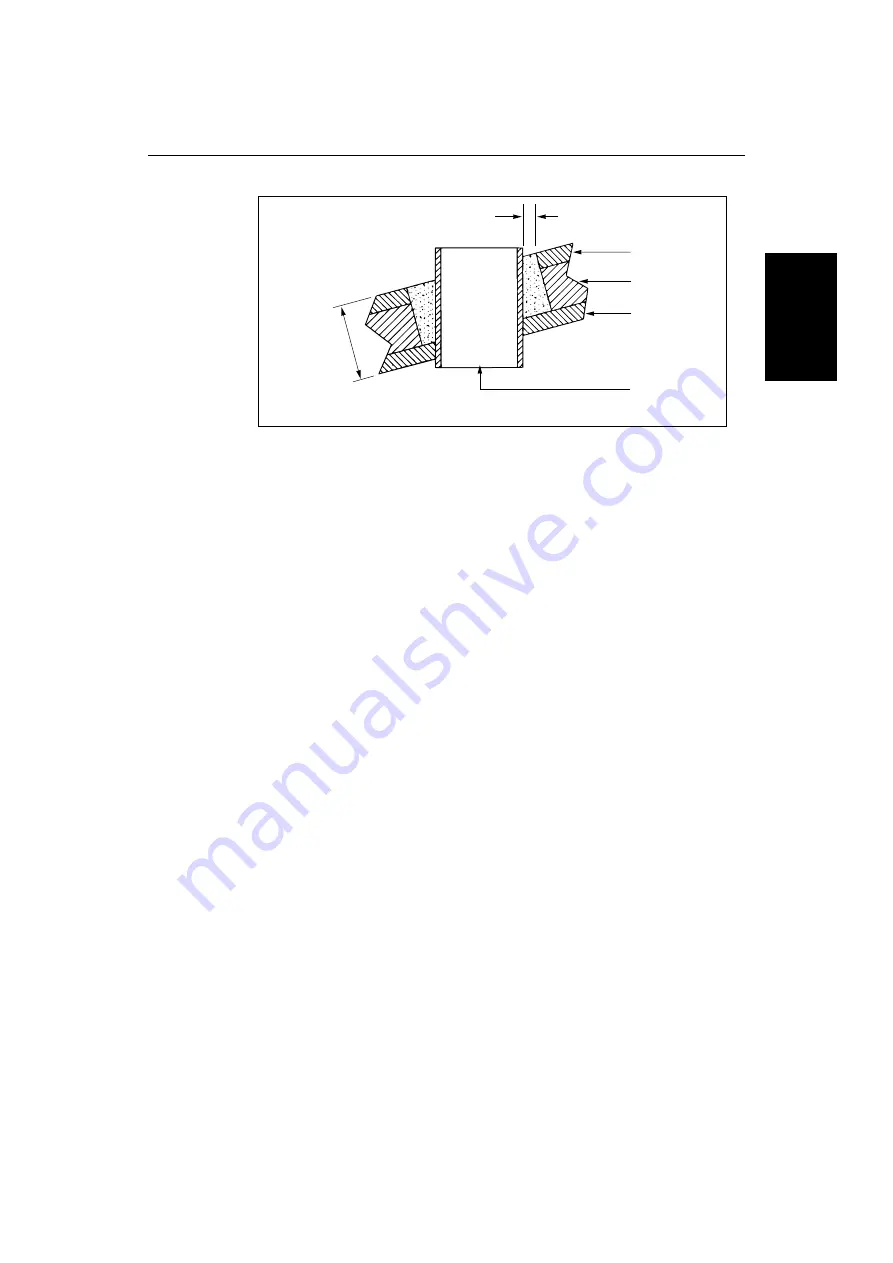
Figure 2-20: Preparing a Cored Fiberglass Hull
6. Sand and clean the area around the hole, inside and outside, to ensure that
the sealant will adhere properly to the hull. If there is any petroleum residue
inside the hull, remove it with either mild household detergent or a weak
solvent (alcohol) before sanding.
7. Proceed with Seating on page 2-21 and Attaching the transducer on
Check for Leaks
WARNING:
Never install a thru-hull transducer and leave the boat unchecked for
several days.
1. When the boat is placed in the water, immediately check around the thru-
hull transducer for leaks. Note that very small leaks may not be readily
observed. Do not to leave the boat in the water for more than 3 hours before
checking it again. If there is a small leak, there may be considerable bilge
water accumulation after 24 hours (probably not enough to cause water
damage). If a leak is observed, repeat Seating on page 2-21 and Attaching
the transducer on page 2-23 immediately.
Hull
Dimension equal to the thickness of the hull's
outer skin to ensure adequate clearance
Inner skin
Outer skin
Core
Solid or
hollow
cylinder
D4865_1
Summary of Contents for HSB L760
Page 2: ......
Page 30: ...1 18 HSB Series L755 and L760 Fishfinder Database Lists...
Page 76: ...2 46 HSB Series L755 and L760 Fishfinder Transmitted Data...
Page 114: ...3 38 HSB Series L755 and L760 Fishfinder Review Your Passage Plan...
Page 128: ...4 14 HSB Series L755 and L760 Fishfinder MOB...
Page 196: ...8 8 HSB Series L755 and L760 Fishfinder Worldwide Support...
Page 200: ...A 4 HSB Series L755 and L760 Fishfinder Appendix A Specifications...
Page 206: ...B 6 HSB Series L755 and L760 Fishfinder Appendix B Using the Auxiliary Junction Box...
Page 212: ...C 6 HSB Series LCD Color Display Appendix C C MAP Chart Card Features...


