V1.0
RayTools AG. © Copy Right
12 | 19
www.raytools.net
BT240S 3KW 2D Laser Cutting Head User Manual
the better) to determine whether the "ex-factory zero focus" is suitable for the "actual zero focus" at
the scene. If the "ex-factory zero focus" and the "actual zero focus" are identical, lock "Screw 2" and
confirm that zero focus is over.
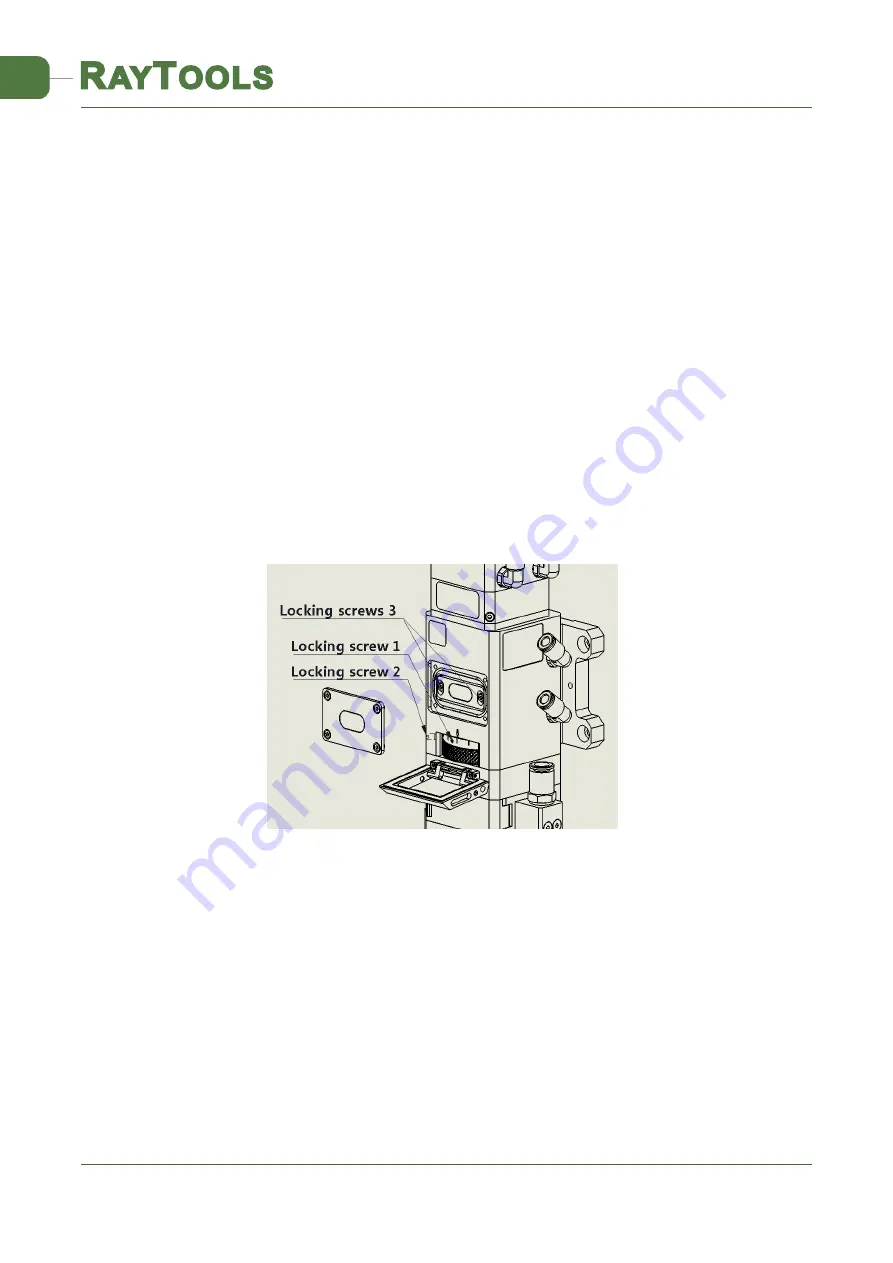
If the actual zero focus and scale zero focus are not the same, do the following operations:
1. Adjust the rotation ring and adjust the focus position to the front of the nozzle;
2. Loosen "Screw 1", rotate the scale ring, align the scale ring "0 scale" to the laser head shell
arrow and lock "Screw 1" again.
3. Loosen the window cover, slightly loosen "Screw 3" to adjust the scale block to the "0" scale
line, and tighten "Screw 2 and Screw 3" again, then the on-site "actual zero focus" is coincident with
the laser head focusing "0" scale indication.
Scale display and focus relationship:
The adjustment range of the focal point is "+8~-12".
For example, the scale is 0, that is, the focus is located at the end of the nozzle.
The scale is +8, that is, the focus is located at the 8mm in the nozzle.
It is necessary to adjust the focus position according to the following steps, as shown in Figure 6:
Unscrew "Screw 2" against clockwise
Toggle the dial and adjust the focal length combined with the scale of the window.
Once the focal point position is adjusted properly, tighten “Screw 2” clockwise so as to
prevent the change of focus position caused by mechanical vibration.
Figure 6 Adjust the Focus Position


