V1.0
RayTools AG. © Copy Right
17 | 19
www.raytools.net
BT240S 3KW 2D Laser Cutting Head User Manual
•
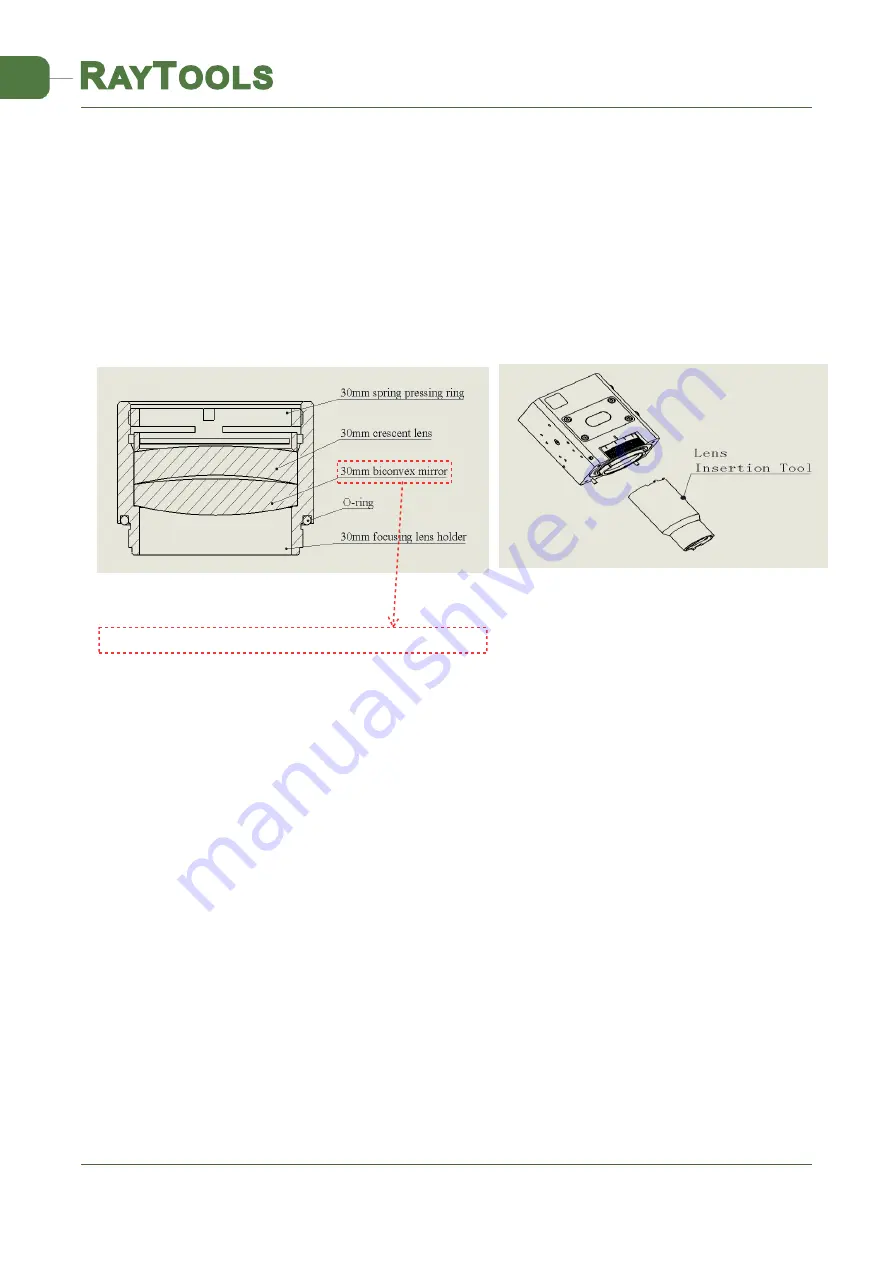
As shown in Figure 13, remove the locking screws from the laser head bottom up in sequence;
•
As shown in Figure 14, take out the lens holder by a lens-taking tool;
•
Move the lens holder to a clean place, invert the lens holder and take out the lens;
•
Replace or clean the focusing lens;
•
As shown in Figure 15, carefully place the focusing lens and the spring pressing ring in the lens
holder;
•
Place the lens holder on the lens-taking tool, rotate it into the focus lens cone with the lens-taking
tool, and tighten the lens holder;
•
Reinstall the parts in order;
•
Check whether the focus position is in the center of the nozzle hole, if it is not in the center, it is
necessary to carry out center-regulating operation again.
3.3 Replace Nozzle Connector
In the process of laser cutting, the laser head will inevitably be hit, so it is necessary to replace the
nozzle connector. For example: replace the ceramic body for the two-dimensional laser head of
BT240S.
Unscrew the nozzle;
Press the ceramic body by hand to make it fixed without deviation so as to unscrew the press
sleeve
Align the two 2mm dowel holes of the new ceramic body with the two dowel pins on the nozzle
connection seat, press the ceramic body by hand and screw the press sleeve.
Screw the nozzle.
Figure 15 Installation diagram of 30 crescent lens
Figure 14 Take out the focusing lens set
Please note that biconvex lens gets 1 big curve face and 1 small curve face. The small curve face shall be next to
concave face of crescent lens


