RQD032ENr02 Rev. Date: 2021-12-24
12
3.0 ADJUSTMENTS
IMPORTANT !
ADJUSTMENTS SHOULD NEVER BE ATTEMPTED WITH THE USER IN THE CHAIR.
3.1 Ischial Pelvic Alignment System (IPAS)
– Adjustment
The seat has approximately 5 cm (2”) of fore/aft adjustment
which allows optimal positioning of the seat
aperture around user’s Ischi
al Tuberosities.
Tool Required: #2 Phillips screwdriver
1.
Release the seat by opening the front seat brackets.
2.
Lift the front of the seat and pull upward and then forward to remove the seat from the chair.
3. Loosen
(but do not remove)
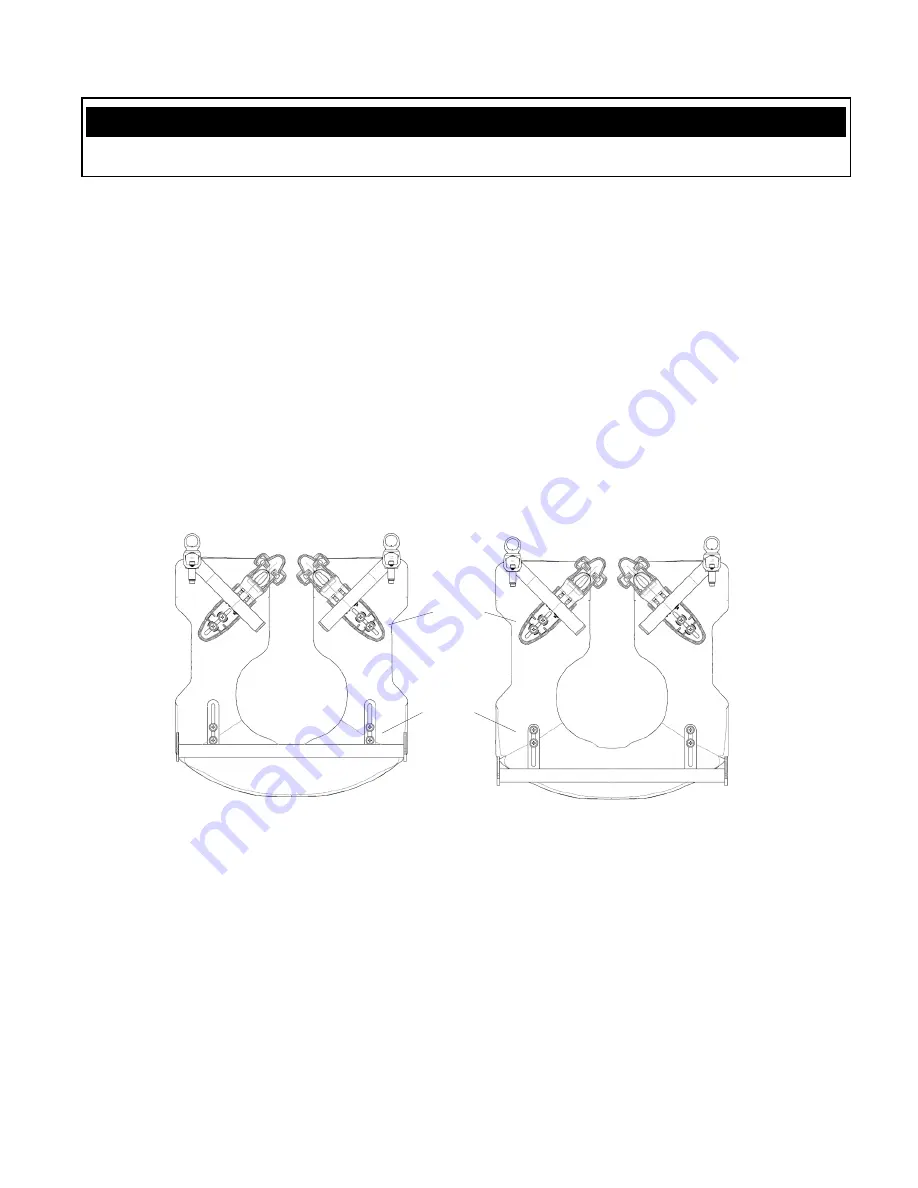
the eight screws attaching the front seat brackets and rear seat brackets to
the underside of the seat.
Note: Rear seat brackets shown below without commode pan brackets for clarity.
4. Place the seat back in position on the frame and close the front seat brackets around the front seat
support tubes.
5. Slide/wiggle the seat to the desired position.
6. Ensure rear seat brackets are firmly positioned against the rear seat support tube.
7. Tighten all eight screws attaching the front and rear seat brackets to the seat to prevent further
movement of the seat.
Note: Ensure the front and rear seat brackets are securely latched around the front and
rear seat support tubes before allowing a user to transfer into the chair.
Front
Seat
Bracket
Rear
Seat
Bracket
Seat in rear position
Seat in forward position


