ADVANCE AND AUTOMATIC CUTTING OF THE NYLON LINE
1 - With the equipment running:
•
Slightly press the spool against the ground. The nylon line will automatically be released. The cutting blade
fixed to the protection device will limit the amount of wire released.
•
Press the spool against the ground as many times as necessary.
•
In order not to damage the equipment or the protection device, only press the metal part of the spool (1)
against the ground.
2 - You may want to carry out this operation manually:
•
Unplug the equipment.
•
Press the metal part of the spool (1) with one hand and with the other pull the nylon line (2) in the necessary
length. If the wire exceeds the ideal length, it will be cut by the blade fixed to the protection device.
FIXING THE EXTENSION CORD TO THE EQUIPMENT
There is a locking system in the lower part of the handle to facilitate usage and to prevent the extension cord from
being disconnected from the wall outlet. To use this system:
•
Put the extension cord in hole.
•
Pass the cord over the lock.
•
Connect the equipment plug to the extension cord.
HOW TO CUT THE GRASS
•
Before begning to cut the grass, set the adjustable support (figure below) according to the grass length.
•
Hold the equipment with one hand by the adjustable handle and press the trigger key with the other.
•
If the grass is very long, the grass should be cut in stages, maintaining a suitable height in relation to the
ground to avoid overloading it.
•
For better performance of your mower, mow the lawn alternating frontward and backward movements, slowly
advancing on the area to be cut (see figure).
•
Never allow the spool to touch the ground, it causes overload and may burn the motor of your mower.
1
2
1
5
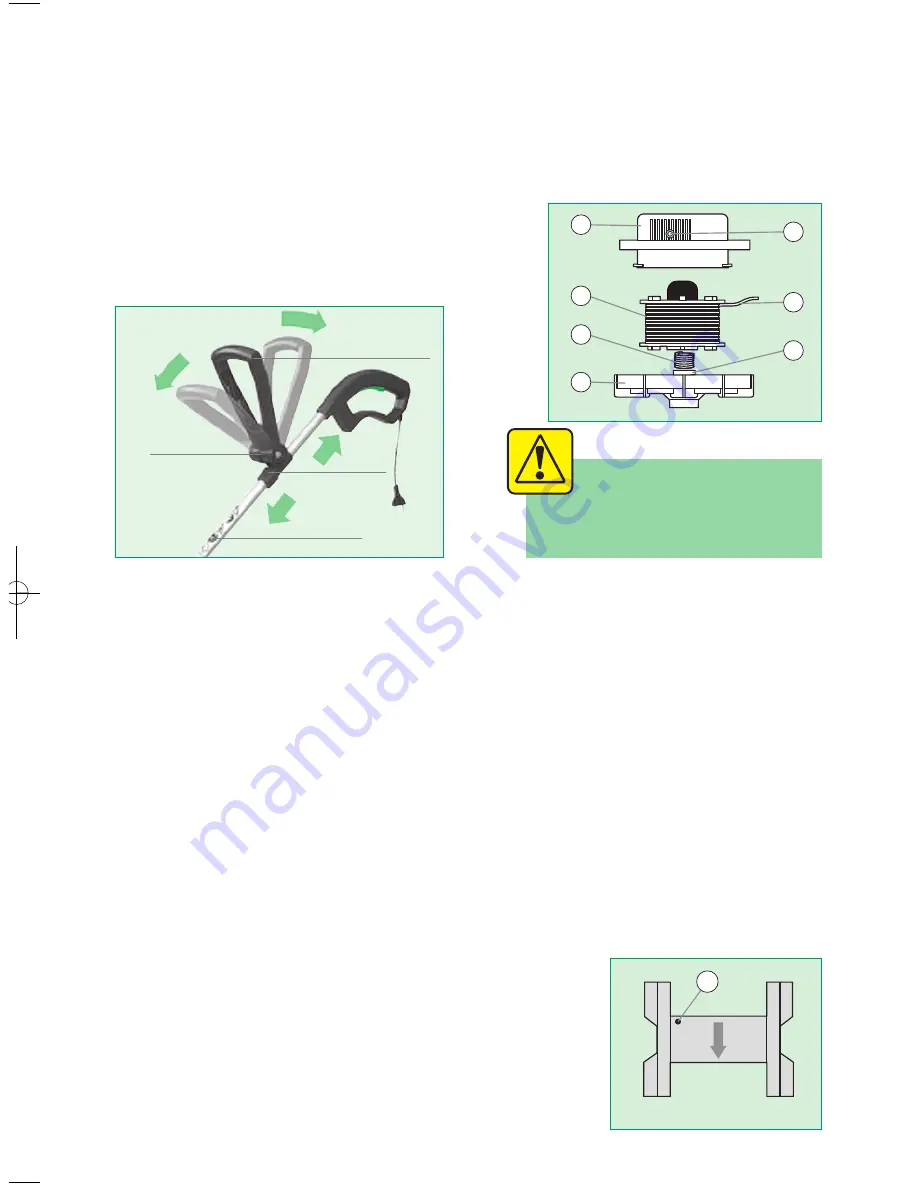
REGULACIÓN DE ALTURA Y ÁNGULO DEL PUÑO AJUSTABLE
Para mayor comodidad y confort durante la manipulación del equipo, el operador puede regular la altura y el
ángulo del puño ajustable, conforme descripción y diseño a seguir.
Ajuste de la altura
1 - Suelte la tuerca plástica (1) que prende el soporte del puño ajustable al mango (2).
2 - Deslice el puño ajustable (3) hacia arriba y hacia abajo, ajustando el alto deseado.
3 - Apriete la tuerca plástica (1).
Ajuste del ángulo
1 - Suelte el manípulo (4).
2 - Realice el ajuste del puño conforme deseado.
3 - Apriete el manípulo (4).
REPOSICIÓN DEL HILO DE NILÓN
•
La duración del hilo de nilón depende de la habilidad del operador para evitar el contacto con piedras, muros,
paredes y aceras. El contacto constante en estos tipos de obstáculos causa el desgaste prematuro del hilo de nilón.
•
Adquiera en los puestos de asistencia técnica
RAZAR
SHARP
o en las tiendas especializadas, el recambio
conteniendo bobina con el hilo de nilón para reposición.
CÓMO RETIRAR O COLOCAR LA BOBINA
•
Asegúrese de que el equipo esté desconectado del tomacorriente.
•
Gire el equipo hacia arriba.
•
Segure la base de la bobina (6) con una de las manos y, con la outra, retire la tapa de la bobina (1), girándola en
el sentido contrario a las agujas del reloj, conforme flecha indicativa en la tapa de la bobina.
•
Después de retirar la bobina (3), limpie bien la base del equipo, tomando siempre el cuidado de no dejar
residuos de césped cayeren dentro del compartimiento del motor.
•
Para reponer la bobina, pase la punta del hilo de nilón (4) por el agujero de salida (2), encaje la bobina en la
tapa (1), ajuste la posición de la tapa de la bobina en la guía de la base (5), presione hacia abajo y gire en el
sentido de las agujas del reloj hasta oír el “click” de encaje.
CÓMO RECARGAR LA BOBINA
•
Utilice solamente hilo de nilón con el diámetro de 1.8 mm.
•
Hilos de nilón fuera del diámetro especificado pueden causar daños al
motor y al sistema de avance automático.
•
Retire la bobina y remueva el residuo de hilo de nilón.
•
Tome una de las extremidades del nuevo hilo y encájela en el agujero (1)
conforme figura.
•
Enrolle el hilo en el sentido indicado por la flecha de la bobina lo más
uniforme posible, obedeciendo el metraje máximo de 8 metros.
1
3
7
6
2
4
5
Atención!
Siempre que efectúe la sustitución de la
bobina (recambio), guarde el resorte (7)
para utilizarlo nuevamente.
Cable (2)
Tuerca
Plá
s
tica
(1)
Puño Aju
s
table (3)
Ma
n
ípulo (4)
1
12
Manual Ultra Trimmer 12/17/09 5:33 PM Page 13


