HEIGHT AND ANGLE OF ADJUSTABLE HANDLE ADJUSTMENT
For greater ease and comfort while handling the equipment the operator can adjust the height and angle of the
handle as described and shown in the following drawing.
Height adjustment
1 - Release the plastic nut (1) that fixes the adjustable handle support to the handle (2).
2 - Slide the adjustable handle (3) upwards or downwards to the desired height.
3 - Tighten the plastic nut (1).
Angle adjustment
1 - Release the lever (4).
2 - Adjust the handle as desired.
3 - Tighten the lever (4).
REPLACEMENT OF THE NYLON LINE
•
To prolong the life of the nylon line avoid contact with stones, walls, fences and sidewalks.
•
To replace it, get a refill containing the spool and the nylon line from
RAZAR
SHARP
technical assistance shop or
from specialized dealers.
HOW TO REMOVE AND REPLACE THE SPOOL
•
Make sure the equipment is unplugged.
•
Turn the equipment upwards.
•
Hold the spool base (6) with one hand and with the other remove the spool cover (1) turning it counter
clockwise (as shown in the spool cover).
•
After removing the spool (3), thoroughly clean the equipment base, taking care not to allow grass to fall in the
motor compartment.
•
To replace the spool, pass the tip of the nylon line (4) through hole (2), fit the spool on cover (1), align the spool
cover on the base guide (5), press it downward and turn it clockwise until you hear a “click”.
HOW TO REFILL THE SPOOL
Should you prefer to refill the spool by yourself:
•
Only use a nylon line with a 1.8 mm diameter.
•
Remove the spool and the rest of the nylon line.
•
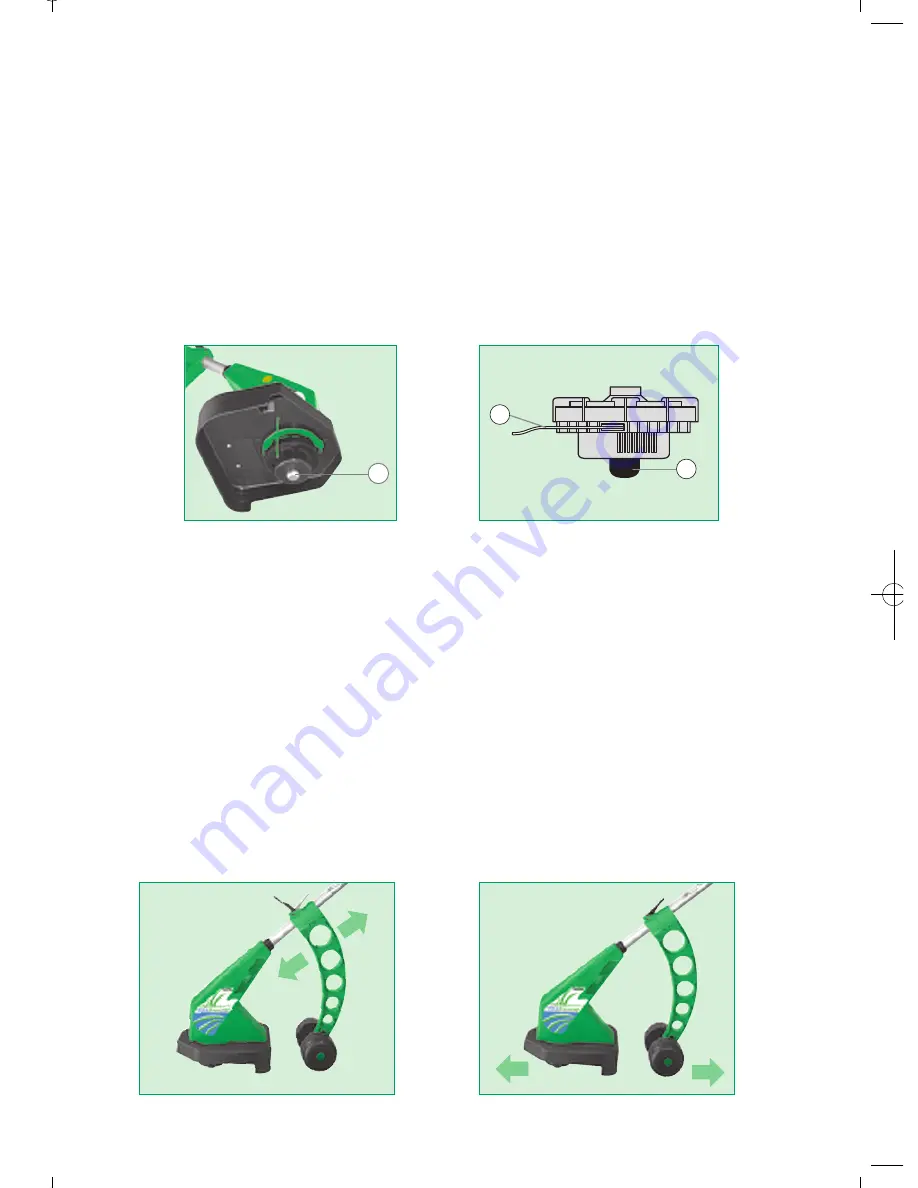
Take one end of the wire and pass it through hole (1) as shown in the picture.
•
Wind the wire in the direction indicated by the arrow.
•
The maximum length recommended for the equipment is 8 meters.
•
Nylon lines other than 8 meters in length may damage the motor and the
automatic advancing system.
1
3
7
6
2
4
5
Attention!
Whenever substituting the spool
(refill), keep the spring (7) to reuse it.
Cable (2)
Pla
s
tic
Nut (1)
Adju
s
table Ha
n
dle (3)
Lever (4)
1
4
AVANCE Y CORTE AUTOMÁTICO DEL HILO DE NILÓN
1 - Con el equipo en funcionamiento:
•
Toque levemente la bobina contra el suelo. Automáticamente, será liberado el hilo de nilón teniendo como
limitador la lámina de corte fija en la falda de protección.
•
Repita el toque cuantas veces sea necesario.
•
Para no damnificar el aparato o la falda de protección, solamente la parte metálica de la bobina (1) debe tocar
el suelo.
2 - Usted puede hacer esta operación manualmente:
•
Desconecte el equipo del tomacorriente.
•
Presione la parte metálica de la bobina (1) con una de las manos y con la otra, tire el hilo de nilón (2) hasta que
esté en el largo necesario. Si el hilo excede el largo ideal, él será cortado por la lámina fijada en la falda de
protección.
FIJACIÓN DE LA EXTENSIÓN ELÉCTRICA DEL EQUIPO
Para facilitar el uso del equipo y evitar que un movimiento brusco desconecte el enchufe del tomacorriente, hay
un sistema de traba en la parte inferior del puño.
•
Introduzca la extensión eléctrica en el orificio.
•
Pase la extensión sobre la traba.
•
Conecte el enchufe del equipo en la extensión eléctrica.
CÓMO CORTAR EL CÉSPED
•
Antes del inicio del corte del césped, ajuste el soporte regulable (figura de abajo) de acuerdo con la altura del
césped.
•
Asegure el equipo con una de las manos en el puño ajustable y con la otra, presione la llave gatillo.
•
Si el césped estuviere muy alto, el corte del mismo debe ser efectuado en etapas, manteniendo la altura
adecuada en relación al suelo, para evitar sobrecarga.
•
Para un mejor desempeño de su cortador, efectúe el corte del césped con movimientos alternados, para
adelante y para atrás, avanzando lentamente sobre el área a ser cortada (vea figura).
•
Nunca deje que el carrete toque el suelo, porque genera sobrecarga y puede quemar el motor de su cortador.
1
2
1
13
Manual Ultra Trimmer 12/17/09 5:33 PM Page 11


