background image

27

9.1.1Visualizer installation software download
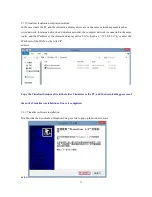
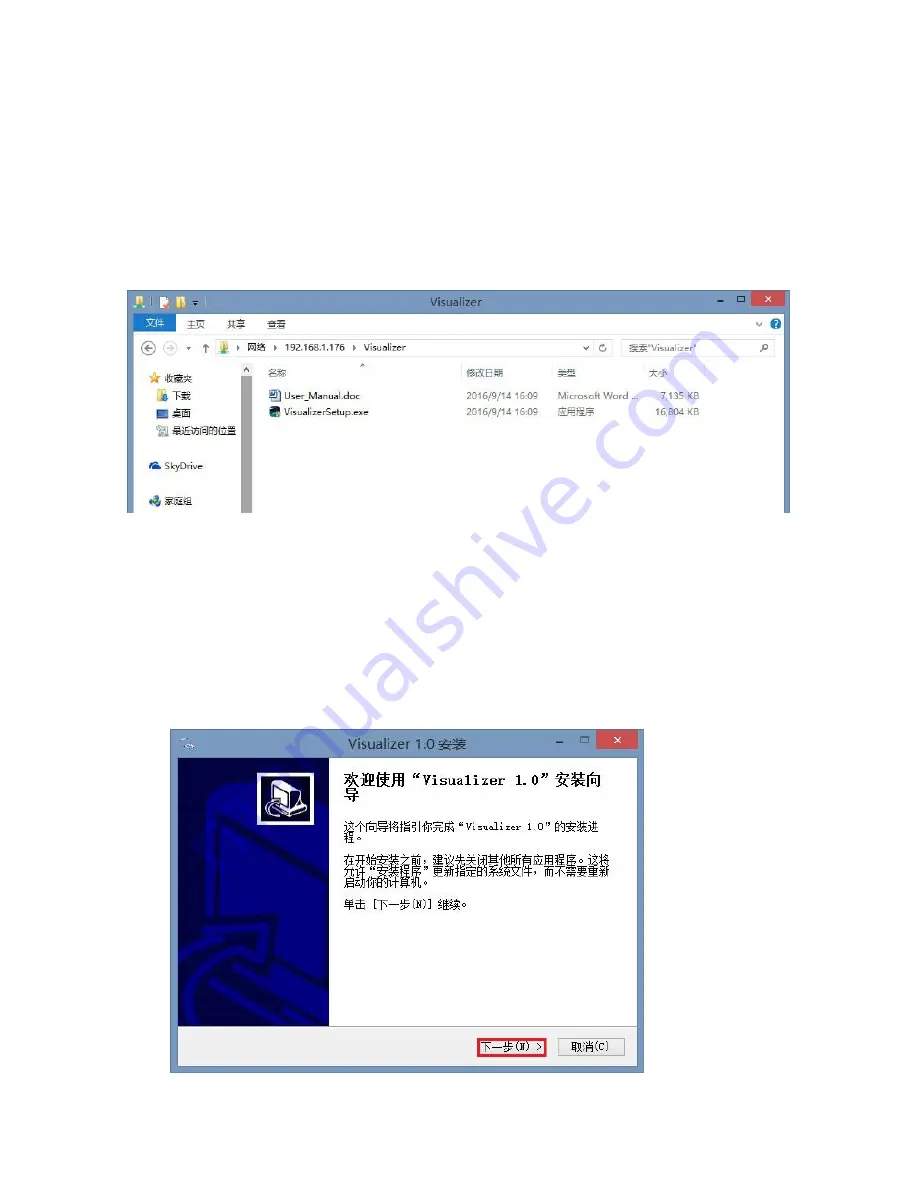
In the case where the PC and the interactive display device are on the same network segment (such as
wired network, local area network, and wireless network), the computer network is connected to the same
router, and the IP address of the interactive display device LAN ( (Such as: \\ 192.168.1.176), or enter the
IP address of the WAN; or the wired IP
address;

Copy the VisualizerSetup.exe file in the folder Visualizer to the PC, and the downloading process of

the entire Visualizer installation software is completed.

9.1.1 Visualizer software installation

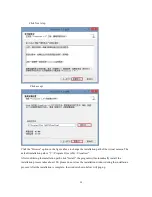
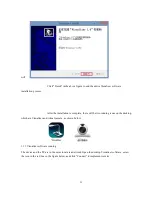
Double-click the downloaded VisualizerSetup.exe file to pop up the window shown

below:

Summary of Contents for PT800

Page 1: ...1 Visualizer Users Manual ...

Page 2: ...duction 10 7 Real time display function introduction 11 7 1 Real time display 11 7 2 Brushes 12 7 3 Eraser 14 7 4 Undo Redo 14 7 5 Recording screens simultaneously 14 7 6 Photo Annotation Mode 15 7 7 Look back 15 7 8 Image Control 17 7 9 Resolution Frame Rate Setting 20 7 10 Manual focus 20 8 System Settings 21 8 1 Basic Settings 21 8 2 Display settings 22 8 3 Network Settings 23 8 4 System Settin...

Page 3: ...ther liquids on the product you must immediately turn off the power and unplug the power After drying restart the machine to check whether it is damaged 8 If cleaning is required wipe with a soft dry cloth or cleaning paper 2 Product declaration 1 Please refer to the actual product and the manual is for reference only 2 This product description may contain technical inaccuracies or typographical e...

Page 4: ...4 3 Appearance Description Front View Rear View ...

Page 5: ...5 TOP VIEW LEFT VIEW ...

Page 6: ...6 BOTTOM VIEW ...

Page 7: ...7 4 Remote control ...

Page 8: ...ke high definition pictures to save display objects support simultaneous recording screen recording multimedia courseware support interactive sharing functions such as Miracast DLNA Visualizer 6 Start using 6 1 HDMI VGA connection 6 1 1 HDMI connection Connect the HDMI input connect to teachers computers HDMI output connect to LCD electronic whiteboards projectors and other devices You can switch ...

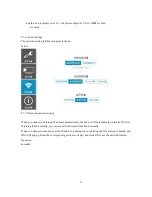
Page 9: ...To configure the network environment for the interactive display click the real time booth HOME button on the menu bar System Settings Network Settings Configure the connection to the wired network When the wired connection setting interface displays the wired IP address the configuration is successful configure the wireless network and set in the WLAN settings WIFI connected to the router When th...

Page 10: ...he local SD card and U disk For detailed function introduction please click File Browser 6 5 6 Web Browser Supports functions such as browsing the web and playing network videos For detailed function introduction please click Web Browser 7 Real time display function introduction 7 1 Real time display Place the books or documents to be displayed under the camera of the interactive display instrumen...

Page 11: ...ick the brush button in the menu bar the following box pops up as follows Click on the brush color to choose a different brush color Click the brush style to select annotations lines rectangles and ellipses ...

Page 12: ...12 Click the brush thickness to adjust the thickness of the brush when annotating 7 3Eraser Click the eraser button in the menu bar the following dialog box pops up ...

Page 13: ...7 5 Synchronized Recording Screen Screen recording is the recording screen and the camera can be recorded together at the same time to generate a video file Click the icon on the real time display interface When the icon changes it indicates that the video is being recorded When you need to stop recording click the icon When the icon changes again it indicates that the recording has stopped To vie...

Page 14: ... file browsing internal storage Pictures and the corresponding photos can be found in the Pictures folder 7 7 look back Click the look back icon to view the pictures and video files in the Pictures and Movies folders under each storage device directory If there is more than one storage device such as a U disk SD card inserted When you look back at the picture a secondary menu is displayed as shown...

Page 15: ...cture in the above picture to review comment etc Look back at the video you can swipe right on the look back photo screen to enter the look back video screen or you can directly click video to enter the screen 可点击上图中的视频文件即可播放 ...

Page 16: ...ode negative mode screen freeze and insert pictures Exposure adjustment Click to decrease the exposure of the camera click to increase the exposure of the camera Area display This mode can highlight the content that needs to be displayed and its effect is shown in the following figure After entering the area display you need to click the area display again to exit the mode ...

Page 17: ...17 对比模式 点击对比模式后 右侧会冻结当前画面 左边为需要对比展示的实时画面与右 侧冻结画面形成对比 按返回键可退出对比模式 标题模式 可将需要固定显示的内容调整至显示屏最上方 点击标题模式则会进入标题模 式 选定内容会成为标题固定显示 其余区域会显示使用者后续实时展示的内容 按返回键可 退出标题模式 ...

Page 18: ...经曝光和显影加工后的影像 其明暗与被摄体相反 其色彩则为被摄体 的补色 当进入负片模式后 需再次点击负片模式才能退出该模式 画面凝固 该模式是将实时显示的画面冻结 冻结后的画面将不能进行任何操作 包括放 大缩小 批注等 按返回键可退出画面凝固 实时旋屏 点击旋转屏幕按钮可使屏幕显示方向旋转 点击一下 图像顺时针旋转 90 度显 示 点击两下 图像顺时针旋转 180 度显示 点击三下 图像顺时针旋转 270 度显示 点击四 ...

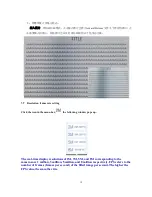
Page 19: ... Click the icon in the menu bar the following window pops up The real time display resolutions of 2M 3M 5M and 8M corresponding to the cameras are 2 million 3 million 5 million and 8 million respectively FPS refers to the number of frames frames per second of the filled image per second The higher the FPS value the smoother it is ...

Page 20: ...k the manual focus button in the menu bar to make the camera focus once 8 System settings Click System Settings in the main interface to enter the setting interface 8 1 Basic settings The basic setting interface is shown below ...

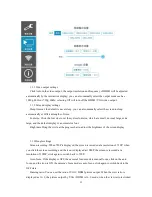
Page 21: ...uage is displayed in Chinese When English is selected the system language is displayed in English The device only supports Simplified Chinese and English display Keyboard settings used to select different software disks English input method Android keyboard Chinese input method Xunfei input method Volume setting Drag the circle on the progress bar to adjust the volume output of the loudspeaker or ...

Page 22: ...fault display is a normal size font Brightness Drag the circle at the progress bar to adjust the brightness of the screen display 1 1 3Doogle settings Screen recording When 720P is displayed the screen is recorded at a resolution of 720P when you click the screen recording and the icon is displayed at 1080P the screen is recorded at a resolution of 1080P click again to switch back to 720P Auto foc...

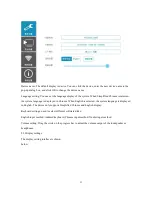
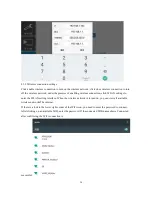
Page 23: ...When you choose to obtain an IP address automatically the device will automatically obtain an IP After obtaining the IP normally you can use network related functions normally When you choose to manually set the IP address a dialog box for entering the IP gateway submask and DNS will pop up Enter the corresponding content correctly and click OK to use the network related functions normally ...

Page 24: ...ection click WLAN settings to enter the WLAN setting interface When the wireless network is turned on you can view all available wireless networks The internet If there is a lock in the lower right corner of the WiFi icon you need to enter the password to connect After clicking on an available WiFi enter the password If the connected WiFi name shows Connected after confirming the WiFi connection i...

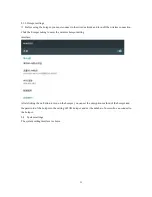
Page 25: ...tspot setting to enter the wireless hotspot setting interface After clicking the on button to turn on the hotspot you can set the encryption method of the hotspot and the password of the hotspot in the setting WLAN hotspot and set the number of users who can connect to the hotspot 8 4 System settings The system setting interface is shown ...

Page 26: ...tcut keys timed reminders etc Restore to the factory settings without deleting the stored data Firmware upgrade Click the firmware upgrade to enter the storage interface select the upgradeable system installation package in the SD card and click OK It will automatically upgrade until the interactive display automatically restarts You can view the upgraded firmware version in the system settings Do...

Page 27: ... to the same router and the IP address of the interactive display device LAN Such as 192 168 1 176 or enter the IP address of the WAN or the wired IP address Copy the VisualizerSetup exe file in the folder Visualizer to the PC and the downloading process of the entire Visualizer installation software is completed 9 1 1 Visualizer software installation Double click the downloaded VisualizerSetup ex...

Page 28: ...efault installation path is C Program Files x86 Visualizer After confirming the installation path click Install the program will automatically install the installation process takes about 10S please do not close the installation window during the installation process After the installation is complete the window shown below will pop up ...

Page 29: ...complete there will be two running icons on the desktop which are Visualizer and virtual camera as shown below 1 1 1 Visualizer software running The device and the PC are in the same local area network Open the desktop Visualizer software select the icon in the red box in the figure below and click Connect to implement reverse ...

Page 30: ...verse projection is as follows Visualizer software running The device and the PC are in the same local area network Open the desktop Visualizer software select the icon in the red box in the figure below and click Connect to implement reverse projection ...

Reviews: