background image

LCD INSTALLATION AND OPERATION INSTRUCTIONS

Page 26

Demand Satisfi ed: 

1.    When the demand for heat is satisfied the low 

operator switch will open, de-energizing relays R2, 
R2R, R8, R9, TD1, TD3, TD4, TD6, the FSM, and 
the pilot, main and safety solenoid valves. The pilot 
and main fl ames are extinguished. 

2.  The blower delay timer TD3 starts the 80 second 

post-purge timing. The blower(s) shut(s) off when 
TD3 times out. 

3.  The pump delay timer TD4 starts the post-purge 

timing. The pump(s) remain on for 0.1 to 10 minutes 
then shut(s) off when TD4 times out.

High Limit, Low Water Flow, Low Gas Pressure, High 
Gas Pressure, Power Venter Interlock Faults

1.  Electrical power to the gas valves, blower(s) and 

power venter will be interrupted if any safety is 
tripped. 

2.   The manual reset high limit can be reset by 

depressing the reset button on the left jacket 
panel.

Low Air (Blocked Flue/Air Inlet) 

•  The pressure switches will monitor blower airfl ow. 
•  Air monitoring will begin at pre-purge. If a low air 

condition is present, power will not be supplied to the 
FSM. The blower(s) will remain on.

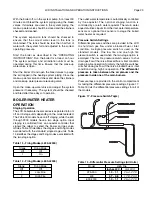
OPERATING INSTRUCTIONS 

FOR YOUR SAFETY READ BEFORE OPERATING

POUR VOTRE SÉCURITÉ LISEZ AVANT DE METTRE 
EN MARCHE

A.  This appliance is equipped with an ignition device 

which automatically lights the pilot. Do not try to light 
the pilot by hand.


Cet appareil est muni d’un dispositif d’allumage qui 
allume automatiquement la veilleuse.  Ne tentez pas 
d’allumer la veilleuse manuellement.

B.   BEFORE OPERATING smell all around the 

appliance area for gas. Be sure to smell next to the 
fl oor because some gas is heavier than air and will 
settle on the fl oor.

DANGER: Propane gas may not always be 
detected by smell. Propane gas is heavier than 
air and can collect in low areas.

Propane gas can ignite or explode if an ignition 
source is present and result in death, serious 
injury and property damage!

FOR YOUR  SAFETY

• Have only qualifi ed licensed professionals install, 

service and maintain this appliance and your gas 
system in accordance with all applicable codes.

• Install a nationally listed combustible gas 

detector(s) in your home.

• If you suspect a leak:

1. Have everyone leave the building immediately.
2. Do not attempt to light any appliance.
3. Do not touch any electrical or electronic switches 

in the building.

4. Do not use any phone in the building.
5. Call your gas supplier from a phone outside of 

the building.

6. If you cannot reach your gas supplier call the fi re 

department.

AVANT DE FAIRE FONCTIONNER, renifl ez tout autour 
de l’appareil pour déceler une odeur de gaz. Renifl ez 
près du plancher, car certains gaz sont plus lourds que 
l’air et peuvent s’accumuler au niveau du sol.

QUE FAIRE SI VOUS SENTEZ UNE ODEUR DE GAZ: 

•  Ne pas tenter d’allumer d’appareil. 
•  Ne touchez à aucun interrupteur; ne pas vous servir

des téléphones se trouvant dans le bâtiment. 

•  Appelez immédiatement votre fournisseur de gaz 

depuis un voisin. Suives les instr uctions du 
fournisseur. 

•  Si vous ne pouvez rejoindre le fournisseur, appelez 

le service de incendies.

C.   Do not use this appliance if any part has been 

under water. Immediately call a qualifi ed service 
technician to inspect the appliance and to replace 
any part of the control system and any gas control 
that has been under water.


N’utilisez pas cet appareil s’il a été plongé dans 
l’eau, même par tiellement. Faites inspecter 
l’appareil par un tecnicien qualifié et remplacez 
toute par tie du système de contrôle et toute 
commande qui ont été plongés dans l’eau.

CAUTION: To prevent being burned, stand clear of 
the boiler during ignition and do not touch any hot 
metal parts.

Summary of Contents for LCD Series

Page 1: ...se gasoline or other flammable vapors and liquids in the vicinity of this or any other appliance WHAT TO DO IF YOU SMELL GAS Do not try to light any appliance Do not touch any electrical switch Do not...

Page 2: ...form to the Standard for Controls and Safety Devices for Automatically Fired Boilers ANSI ASME CSD 1 In Canada the installation must be in accordance with the requirements of CSA B149 1 or 2 Installat...

Page 3: ...acent construction should a leak occur or during routine maintenance If such a location doesn t exist a suitable drain pan that s adequately drained must be installed under the unit 5 DO NOT place thi...

Page 4: ...the minimum clearances listed in Table 1 must be maintained between it and any combustible construction When installed in a confined space without the intake air option Figures 1 2 3 two permanent op...

Page 5: ...l Venting using a Masonry Chimney and Inside Air Figure 3 Horizontal Venting using Inside Air Table 2 305 TO 457 127 TO 254 VENT PIPE DIAMETER 5 TO 10 12 TO 18 MINIMUM VERTICAL RISE OFF THE TOP OF UNI...

Page 6: ...ional area of not less than 1 in2 per 7 000 Btuh 310 mm2 per kW up to and including 1 million Btuh plus 1 in2 per 14 000 Btuh 155 mm2 per kW in excess of 1 million Btuh Intake Air Option General Guide...

Page 7: ...exhaust and combustion air terminals must be installed on the same plane outside wall in order to prevent pressure differences due to prevailing winds In cold climates double wall or insulated inlet p...

Page 8: ...on Air and Venting Metal Chimney System Shown Figure 7 Combination Air Intake And Venting Masonry Chimney Shown 10 FT 3 1 m 4 FT 1 2 m 5 FT 1 5 m 1 5 FT 0 5 m 5 1 2 FT 1 7 m 1 5 FT 5m 10 FT 3 1 m 3 FT...

Page 9: ...venting material must be approved for the application Consult the vent manufacturer s product literature GENERAL VENTING GUIDELINES WARNING The vent installation must be in accordance with Part 7 Ven...

Page 10: ...nector must terminate flush with the inside of the chimney flue Figure 2 Fasten each single wall vent connection with at least 3 corrosion resistant sheet metal screws WARNING Never install a vent pip...

Page 11: ...a 4 ft 1 2 m horizontal distance is maintained from electric meters gas meters regulators and relief equipment and not less than 7 ft 2 1 m from any adjacent public walkway The bottom of the vent term...

Page 12: ...ose all building doors and windows and all doors between the space in which the appliances remaining connected to the common venting system are located and other spaces of the building Turn on clothes...

Page 13: ...vered under the manufacturer s warranty Excessive pitting and erosion of the internal surface of the copper heat exchanger tubes is NOT covered under the manufacturer s warranty if the result of high...

Page 14: ...itch The flow switch supplied with the boiler water heater must be wired to the terminal strip in the control panel to prevent the boiler from firing unless there s adequate water flow through the uni...

Page 15: ...e flow rate required to maintain the desired temperature rise across the boiler heat exchanger The system pump is sized to provide the required flow to the heating system The boiler piping connections...

Page 16: ...g Check with local codes and ordinances for specific requirements Adjustment Procedure To Maintain Inlet Temperature Above Dew Point T1 Temp Min 110 For Atmospheric T1 Temp Min 125 Sealed Combusion 1...

Page 17: ...ng must be sized large enough to handle maximum flow through unit 4 All boilers furnished with factory mounted outlet water temperature gauge 5 Boiler pump purging required Use terminals supplied 6 Va...

Page 18: ...osion of the heat exchanger Water that has a hardness greater than 18 grains per gallon and or a level of dissolved solids exceeding 350 ppm will require a recalculation of the pump size and temperatu...

Page 19: ...g the warranty The method outlined below can be employed to prevent this condition from occurring A balancing valve should be installed on the outlet side of the water heater for purposes of adjusting...

Page 20: ...6 Common piping must be sized for maximum combined heater flow 7 Hot water tanks should be equipped with a combination temperature pressure relief valve 8 MA Code requires an 1 8 hole in check valve...

Page 21: ...valve must be installed in the supply piping It should be installed 5 ft 1 5 m above the floor where required by local codes Provide a sediment trap at the bottom of the vertical section of the gas s...

Page 22: ...trapped in the heating system piping When applicable provisions for vent bleed and gas relief lines must be made in accordance with the latest revision of ANSI Z223 1 NFPA 54 Safe lighting and other p...

Page 23: ...Table 13 identifies the stages and firing modes associated with the standard single stage units Table 14 identifies the stages and firing modes associated with the two stage option Table 13 Firing Mod...

Page 24: ...above The FSM will continue to cycle the unit through steps 3 4 and 6 until the unit lights or the demand for heat is removed Main Burner Once the pilot is proven the MV terminal on the FSM is energi...

Page 25: ...the flame sense module FSM is energized 2 The FSM starts the 10 second ignition trial energizing relay R7 the pilot solenoid valve and the spark generator 3 The pilot valve and spark generator are en...

Page 26: ...gas is heavier than air and can collect in low areas Propane gas can ignite or explode if an ignition source is present and result in death serious injury and property damage FOR YOUR SAFETY Have only...

Page 27: ...should match those listed in Table 15 To adjust the differential air pressure see the AIRFLOW ADJUSTMENT instructions in the CHECKING AND ADJUSTMENTS section Figure 19 Manual Valve Manifold Pressure T...

Page 28: ...faut proc der l entretien 3 Fermer la vanne manuelle d arr t d alimintation de gaz CHECKING ADJUSTMENTS 1 With the burners in operation close the manual shutoff valve in the gas supply line As soon a...

Page 29: ...b to the off position Figure 18 3 Observe the pilot flame through one of the observation ports located at the left and right ends of the unit For L600 L2300 1 Remove the upper front jacket panel 2 Tur...

Page 30: ...pressure switch confirms proper air flow These time delays are set within the separate time delay board connected to the relay board PROPANE GAS Optimum results are obtained when the boiler water heat...

Page 31: ...lem resolved before the boiler water heater is returned to service 7 If there are no signs of damage sooting or corrosion reassemble the unit following the previous steps in reverse order 8 A badly co...

Page 32: ...heat exchanger out of the unit 10 Remove the V baffle straps and V baffles 11 Thoroughly inspect the heat exchanger for signs of damage If there is no damage clean the heat exchanger with water from a...

Page 33: ...ter at normal system pressure If it does contact a qualified service technician to have it inspected NEVER try to clean or repair the relief valve If the valve fails to operate properly have it replac...

Page 34: ...as From Unit shown in connection diagram No Power To Blower s Blower s not plugged in Plug in blower s Defective blower timer TD3 Replace Blower Timer TD3 Blower s malfunctioning Replace blower s Uni...

Page 35: ...rating control set too low Increase control temperature setting Unit Consistently Shuts Down High limit set too low Increase high limit setting On High Limit Bad Combustion Insufficient air Check CO C...

Page 36: ...LCD INSTALLATION AND OPERATION INSTRUCTIONS Page 36 RIOM 23 REV B Figure 23 Exploded View...

Page 37: ...106 1 1 70 3107 1 1 1 70 3108 1 1 70 3109 1 1 70 3110 1 1 3 Jacket Left Panel 03 2155 1 1 1 1 1 1 1 03 1822 1 1 1 1 Jacket Left Panel SS 03 2155 1 1 1 1 1 1 1 1 03 1822 1 1 1 1 1 4 Junction Box Assemb...

Page 38: ...1 03 1802 1 03 1803 1 03 1804 1 03 1806 1 03 1807 1 1 03 1808 1 03 1809 1 03 1810 1 Jacket Top Panel SS 03 1801 1 1 1 03 1802 1 1 03 1803 1 1 03 1804 1 1 03 1806 1 1 03 1807 1 1 1 03 1808 1 1 03 1809...

Page 39: ...1 1 1 1 1 1 Comb Chamber Lower Right Side Panel 70 2773 1 1 1 1 1 1 1 1 1 1 1 18 Comb Chamber Upper Left Side Panel 70 2770 1 1 1 1 1 1 1 1 1 1 1 Comb Chamber Upper Right Side Panel 70 2771 1 1 1 1 1...

Page 40: ...t Orifice NG 10 0089 1 1 1 1 1 1 1 1 1 1 Pilot Orifice LP 10 0090 1 1 1 1 1 1 1 1 1 1 Pilot Orifice NG 10 0093 1 Pilot Orifice LP 10 0120 1 30 Burner Tube 10 0275 2 3 5 7 9 13 15 17 19 25 27 Burner Tu...

Page 41: ...4 4 4 6 6 6 NS Heat Exchanger Support Channel 03 2022 1 03 2023 1 03 2024 1 NS Tube Replacement Assembly 70 3080 2 2 70 3081 2 70 3082 2 70 3083 2 70 3085 2 70 3086 2 36 O Ring Inlet Outlet Return Hea...

Page 42: ...1 1 1 1 1 1 49 Manual Shut Off Valve 1 11 0465 1 1 Manual Shut Off Valve 1 1 4 11 0466 1 1 Manual Shut Off Valve 1 1 2 11 0467 1 1 1 Manual Shut Off Valve 2 11 0454 1 50 Flame Sensor UTC 1003 Ignition...

Page 43: ...idewall Vent Kit HS5 12 0002K1 1 1 1 NS Sidewall Vent Kit with air intake hood HS1 12 0009K 1 1 Sidewall Vent Kit with air intake hood HS2 12 0010AK 1 Sidewall Vent Kit with air intake hood HS2 12 001...

Page 44: ...DED IS VENT VERTICAL THROUGH THE ROOF OUTDOOR AIR SENSOR INSTALLED WIRED IS VENT THROUGH THE WALL ARE UNITS RACKED IS POWER VENT INSTALLED AND WIRED IS RACK ASSEMBLED TIGHTLY SEALED COMBUSTION NO HOLE...

Page 45: ...stion Air Damper Power Vent Proving Switch Barometric Damper COMMISSIONING THE UNIT Customer Instructed Yes No All Covers Replaced Yes No Wiring Secure Tight Yes No Customer Given Manual Yes No Cabine...

Page 46: ...de wall horizontally vented gas fueled equipment is installed in a crawl space or an attic the hard wired carbon monoxide detector with alarm and battery back up may be installed on the next adjacent...

Page 47: ...structions for the installation of the venting system design or the venting system components and 2 A complete parts list for the venting system design or venting system d MANUFACTURER REQUIREMENTS GA...

Page 48: ...hrough the tubes and is not covered by the manufacturer s warranty See Installation Instructions for proper pump performance Chemical corrosion no corrosive chemical freon dry cleaning chemicals degre...

Reviews: