background image

IMPORTANT SAFETY INSTRUCTIONS

Read before operating equipment

1. Read these instructions.
2. Keep these instructions
3. Heed all warnings.
4. Follow all instructions.
5. Do not use this apparatus near water.
6. Clean only with a dry cloth.
7. Do not block any of the ventilation openings. Install in accordance

with the manufacturer’s instructions.

8. Do not install near any heat sources such as radiators, heat registers,

stoves, or other apparatus (including amplifiers) that produce heat.

9. Do not defeat the safety purpose of the polarized or grounding-type

plug. A polarized plug has two blades with one wider than the other.
A grounding type plug has two blades and a third grounding prong.
The wide blade or third prong are provided for your safety. When the
provided plug does not fit into your outlet, consult an electrician for
replacement of the obsolete outlet.

10. Protect the power cord from being walked on or pinched, particularly

at plugs, convenience receptacles, and the point where they exit
from the apparatus.

11. Only use attachments/accessories specified by the manufacturer.
12. Use only with a cart, stand, tripod, bracket, or table specified by the

manufacturer or sold with the apparatus.When a cart is

used,

use caution when moving the cart/apparatus combination to
avoid injury from tip-over.

13. Unplug this apparatus during lightning storms or when unused  for

long periods of time.

14. Refer all servicing to qualified service personnel. Servicing is required

when the apparatus has been damaged in any way,  such as if the
power-supply cord or plug is damaged, liquid has been spilled or
objects have fallen into the apparatus, or if the apparatus has been
exposed to rain or moisture, does not operate normally, or has been
dropped.

15. This product may contain lead and mercury. Disposal of these

materials may be regulated due to environmental considerations.
For disposal or recycling information, please contact your local
authorities or the Electronic Industries Alliance (www.eiae.org).

16. Damage Requiring Service - The appliance should be serviced  by

qualified service personnel when:
A. The power supply cord or the plug has been damaged;

B. Objects have fallen or liquid has been spilled into the appliance;
C. The appliance has been exposed to rain;
D. The appliance does not appear to operate normally or exhibits a
marked change in performance;
E. The appliance has been dropped or the enclosure damaged.

17. Tilt/Stability - All televisions must comply with recommended

international global safety standards for tilt and stability properties
of its cabinet design.
• Do not compromise these design standards by applying excessive
pull force to the front, or top, of the cabinet, which could ultimately
overturn the product.
• Also, do not endanger yourself, or children, by placing electronic
equipment/toys on the top of the cabinet. Such items could
unsuspectingly fall from the top of the set and cause product
damage and/or personal injury.

18. Wall or Ceiling Mounting - The appliance should be mounted to a

wall or ceiling only as recommended by the manufacturer.

19. Power Lines - An outdoor antenna should be located away from

power lines.

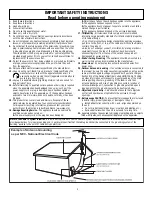
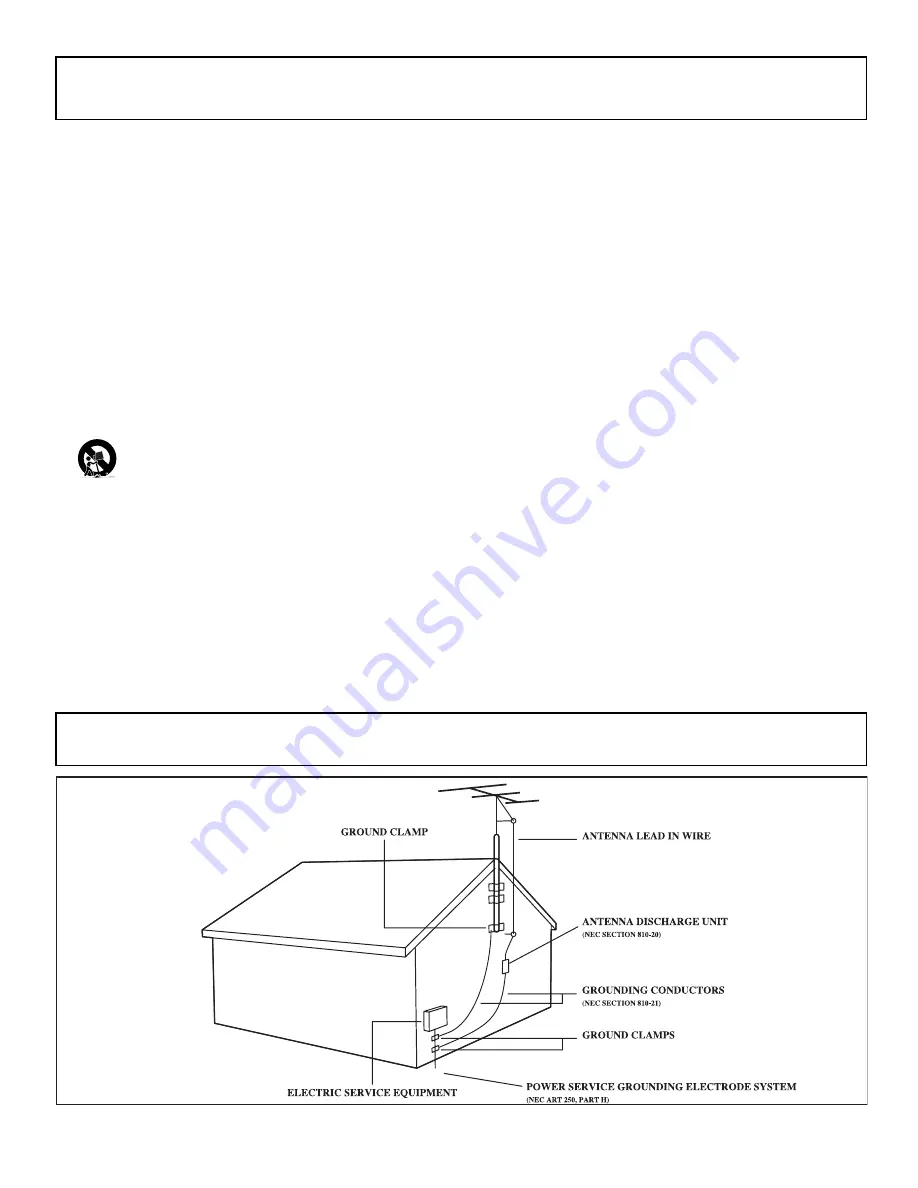
20. Outdoor Antenna Grounding - If an outside antenna is connected to

the receiver, be sure the antenna system is grounded so as to provide
some protection against voltage surges and built up static charges.
Section 810 of the National Electrical Code,ANSI/NFPA No. 70 1984,
provides information with respect to proper grounding of the mast
and supporting structure, grounding of the lead-in wire to an
antenna discharge unit, size of grounding connectors, location of
antenna-discharge unit, connection to grounding electrodes, and
requirements for the grounding electrode. See Figure below.

21. Object and Liquid Entry - Care should be taken so that objects do

not fall and liquids are not spilled into the enclosure through
openings.

22. Battery usage CAUTION - To prevent battery leakage that may result

in bodily injury, property damage, or damage to the unit:
•   Install all batteries correctly, with + and - aligned as marked on
the unit.
•   Do not mix batteries (old and new or carbon and alkaline, etc.).
•   Remove batteries when the unit is not used for a long time.

23. Apparatus shall not be exposed to dripping or splashing and no objects

filled with liquids, such as vases, shall be placed on the apparatus.

Note to the Cable TV system installer: This reminder is provided to call the Cable TV system installer's attention to Article 820-40 of the NEC  that
provides guidelines for proper grounding and, in particular, specifies that the cable ground shall be connected to the grounding system of the
building, as close to the point of cable entry as practical.

Example of Antenna Grounding
as per NEC - National Electrical Code

2

Summary of Contents for 20V500T

Page 1: ...Television User s Guide Television User s Guide Changing Entertainment Again ...

Page 2: ...grounding system of the building as close to the point of cable entry as practical Important Stand and Base Safety Information Choose the location for your TV carefully Place the TV on a stand or base that is of adequate size and strength to prevent the TV from being accidentally tipped over pushed off or pulled off This could cause personal injury and or damage the TV Refer to the Important Safet...

Page 3: ... does not appear to operate normally or exhibits a marked change in performance E The appliance has been dropped or the enclosure damaged 17 Tilt Stability All televisions must comply with recommended international global safety standards for tilt and stability properties of its cabinet design Do not compromise these design standards by applying excessive pull force to the front or top of the cabi...

Page 4: ...PA Lock Locks the buttons on the front of the TV so it cannot be operated accidentally by young children Closed Captioning Allows you to read TV program dialog or voice conversations as on screen text Off Timer Turns off the TV at a preset time On Timer Turns on the TV at a preset time to a designated TV channel or video source On screen Menus On screen text in English French or Spanish for settin...

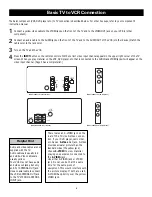
Page 5: ...NTENNA INPUT jack on the rear of the TV 3 Plug the TV s power cord into a power outlet and turn on the TV Set TV CATV to CATV as detailed on page 11 4 Set the TV to channel 3 or 4 the same as the channel 3 4 switch on your Cable Box if applicable Change channels at the Cable Box An RF coaxial cable to connect the Cable Box to the TV may be supplied by the Cable TV company It is not supplied with t...

Page 6: ...n is not bent If it is bent straighten the pin as illustrated then plug the pin into the ANTENNA IN jack Some cable TV systems use scrambled signals and require a special converter to receive these channels Consult your local cable company FCC WARNING This equipment may generate or use radio frequency energy Changes or modifications to this equipment may cause harmful interference unless the modif...

Page 7: ...Audio cables are usually red and white Video cables are usually yellow Your VCR may not have audio and video out jacks but only an RF or ANTENNA OUT jack Use a coaxial cable to connect the VCR s ANTENNA OUT jack to the TV s 75OHM ANTENNA INPUT jack There is also an S VIDEO jack on the rear of the TV Use S Video connec tion if your DVD player camcorder etc has an S Video Out jack S Video provides a...

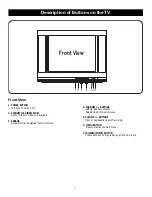
Page 8: ...C power is available 3 SENSOR Receives infra red signals from the remote 4 CHANNEL BUTTONS Selects channel numbers Selects items in the submenus 5 VOLUME BUTTONS Press to decrease increase the volume 6 MENU BUTTON Press to display the main menu 7 TV VIDEO INPUT BUTTON Choose between TV programming and the AV input Front View ...

Page 9: ...b then lift off the lid 2 Place two AA batteries in the remote Be sure the and ends of the batteries line up correctly as marked inside the battery compartment 3 Reattach the battery compartment lid 4 Point the remote control toward the remote sensor on the front of the TV when operating the TV with the remote control Effectively Using the Remote Control ...

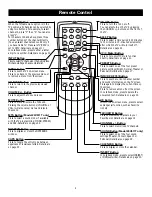
Page 10: ...gle the entry mode between uppercase or lowercase letters Details are on page 33 ON OFF Button Press to turn the TV on or off You can also turn on the TV by pressing the CHANNEL buttons on the front of the TV SLEEP Button Press to select a time period 120 minutes to 10 minutes in 10 minute decrements after which the TV will turn itself off Details are on page 22 CC C Mute Button Press to turn on o...

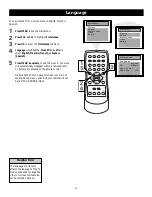
Page 11: ... menu will automatically disappear within a few seconds if no buttons are pressed on the remote control Model 20V500T If you have this model you will not see the Sound menu option and your remote will not have MTS or SOUND buttons Helpful Hint The language control only affects the language of the TV menus It does not change the other on screen text features such as Closed Captions Preferences Setu...

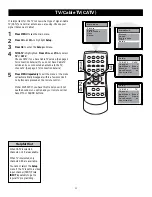
Page 12: ...the menu or the menu will automatically disappear within a few seconds if no buttons are pressed on the remote control Model 20V500T If you have this model you will not see the Sound menu option and your remote will not have MTS or SOUND buttons Helpful Hint When CATV is selected channels 1 125 are available When TV is selected only channels 2 69 are available You cannot select the Setup menu if t...

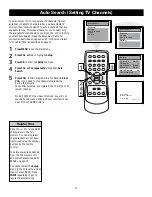
Page 13: ...le TV stations when you press CH or CH Before you start Auto Search make the Antenna or Cable TV connection described on pages 4 and 5 In the menu select TV or Cable CATV as described on page 11 1 Press MENU to see the main menu 2 Press CH or CH to highlight Setup 3 Press OK to enter the Setup submenu 4 Press CH or CH repeatedly to highlight Auto Search 5 Press VOL to start programming TV channels...

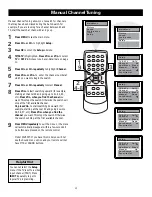
Page 14: ...start searching downward for example starting at channel 60 and going down to 59 58 57 etc Press VOL when you find the channel you want This stops the search Otherwise the search will stop at the first available channel 9 Press MENU repeatedly to exit the menu or the menu will automatically disappear within a few seconds if no buttons are pressed on the remote control Model 20V500T If you have thi...

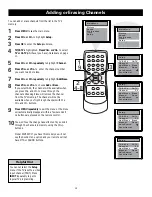
Page 15: ...tion such as CATV 8 Repeat to set the other four favorite channels 8 Press MENU repeatedly to exit the menu or the menu will automatically disappear within a few seconds if no buttons are pressed on the remote control Model 20V500T If you have this model you will not see the Sound menu option and your remote will not have MTS or SOUND buttons Helpful Hint You cannot select the Setup menu if the TV...

Page 16: ...uttons 9 Press MENU repeatedly to exit the menu or the menu will automatically disappear within a few seconds if no buttons are pressed on the remote control 10You won t see the change take effect until you scroll through the channels in memory using the CH buttons Model 20V500T If you have this model you will not see the Sound menu option and your remote will not have MTS or SOUND buttons Helpful...

Page 17: ...tinction between the black and white parts of the picture Sharpness Improve picture detail Blue Back Turn this option On or Off If you choose On a solid blue background screen will appear if the TV is on a weak channel for example if the reception is very poor or if the station has gone off the air for the night After being on such a channel for 15 minutes the TV will turn itself off automatically...

Page 18: ...rightness Color Contrast and Sharpness 1 Press PRESETS on the remote control The current preset picture setting will appear on the screen 2 Press PRESETS repeatedly to select Personal Normal Bright or Theater The Personal setting is what you specify with the picture adjustments as described on page 16 Personal is the only picture setting you can change All others are set at the factory Personal Br...

Page 19: ...our 6 Press MENU repeatedly to exit the menu or the menu will automatically disappear within a few seconds if no buttons are pressed on the remote control Model 20V500T If you have this model you will not see the Sound menu option and your remote will not have MTS or SOUND buttons Helpful Hint If the power fails you must reset the clock Preferences Setup Main Menu Picture Time AM 12 00 On Time Off...

Page 20: ...hannel every day Choose Off to cancel the On timer 10Press CH or CH repeatedly to highlight 0 00 under the line of On Time 11Press VOL or VOL to enter the on time Hold down VOL or VOL to change the time quickly in 10 minute increments press OK The hour is highlighted Use VOL or VOL to set the hour This will be the time at which the TV will turn itself on 12Press MENU repeatedly to exit the menu or...

Page 21: ...L or VOL to enter the off time Hold down VOL or VOL to change the time quickly in 10 minute increments press OK The highlight moves to the hour position Use VOL or VOL to set the hour This will be the time at which the TV will turn itself off 7 Press MENU repeatedly to exit the menu or the menu will automatically disappear within a few seconds if no buttons are pressed on the remote control Model ...

Page 22: ... menu or the menu will automatically disappear within a few seconds if no buttons are pressed on the remote control Model 20V500T If you have this model you will not see the Sound menu option and your remote will not have MTS or SOUND buttons Helpful Hint Not all TV programs and commercials are broadcast with Closed Caption inform ation Neither are all Closed Caption modes transmitted by a station...

Page 23: ...ep timer from 120 to 10 minutes in 10 minute decrements 2 After setting the sleep timer press SLEEP once to display the remaining time 3 To cancel the sleep timer press SLEEP until Off appears 4 Within 1 minute of the time set a clock icon will flash to remind you that the TV will turn itself off soon Sleep 120min Sleep 110min Sleep 10min Sleep 9min Sleep Off ...

Page 24: ...or adult guardian It contains one or more of the following intense violence intense sexual situations strong coarse language or intensely suggestive dialog NC17 No children under the age of 17 will be admitted This type of programming should be viewed by adults only It contains graphic violence explicit sex or crude indecent language X Adult only This type of program ming contains one or more of t...

Page 25: ... Password 6 Press VOL on the remote and CHANNEL on the front of the TV at the same time Enter New Pwd will appear on the screen You must be in the Enter password screen when attempting this 7 Press the number buttons to enter a four digit code The code will appear on the screen as you enter it 8 Press OK to save the code 9 Press MENU repeatedly to exit the menu or the menu will automatically disap...

Page 26: ... block or unblock the rating A checkmark will appear to the left of the rating when blocked When you block a rating higher ratings are blocked automatically To unblock all the ratings select N A 10Press MENU repeatedly to exit the menu or the menu will automatically disappear within a few seconds if no buttons are pressed on the remote control Model 20V500T If you have this model you will not see ...

Page 27: ...12Press OK to enter the Content menu 13Press CH or CH to select a rating then press VOL 14Press CH or CH to select the sub ratings Fantasy V Violence Sexual Language or Dialog then press OK to block or view that sub rating 15Press MENU to return to the Parental Guidelines screen and check your settings A checkmark appears when the sub rating is blocked 16Press MENU repeatedly to exit the menu or t...

Page 28: ... disabled BLOCK UNRATED All unrated programs based on Movie Ratings or TV Ratings will be blocked if this feature is ON and MASTER ENABLE is ON BLOCK NO RATING All programming with no content advisory data will be blocked if this feature is ON and MASTER ENABLE is ON 8 Press VOL or VOL to turn the blocking option On or Off 9 Press MENU repeatedly to exit the menu or the menu will automatically dis...

Page 29: ... can still operate the TV with the remote control You can still use the POWER button on the front of the TV but only to turn off the TV not on Set FPA Lock to Off to cancel this feature so you can use the buttons on the front of the TV again 6 Press MENU repeatedly to exit the menu or the menu will automatically disappear within a few seconds if no buttons are pressed on the remote control Model 2...

Page 30: ...5 Press VOL or VOL to select Personal Theater Concert or Speech 6 Press MENU repeatedly to exit the menu or the menu will automatically disappear within a few seconds if no buttons are pressed on the remote control Helpful Hint You can choose a sound mode setting quickly by pressing the SOUND button on the remote control Sound Preferences Setup Time Main Menu Picture Sound Treble Balance S o u n d...

Page 31: ...tion 6 Press MENU repeatedly to exit the menu or the menu will automatically disappear within a few seconds if no buttons are pressed on the remote control Helpful Hint Bass Enhances the low frequency sounds Treble Enhances the high frequency sounds Balance Distributes the sound between the left and right speakers of the TV Sound Preferences Setup Time Main Menu Picture Sound Treble Balance 50 00 ...

Page 32: ...or off 6 Press MENU repeatedly to exit the menu or the menu will automatically disappear within a few seconds if no buttons are pressed on the remote control Helpful Hint Bass Enhances the low frequency sounds Treble Enhances the high frequency sounds Balance Distributes the sound between the left and right speakers of the TV Sound Preferences Setup Time Main Menu Picture Sound Treble Balance S o ...

Page 33: ... will not always carry programs that have all the MTS options If STEREO appears on the screen when you select a channel stereo broadcasting is available with the current TV program You can hear sound from the left and right speakers of the TV If the broadcast is not strong or clear stereo sound is not available Press the MTS button to change to MONO This should eliminate the noise If MONO appears ...

Page 34: ...rsa If you select this icon the notebook window with the stored message will be displayed on the screen first when the TV is turned on If you select this icon the notebook window with the stored message will not be displayed on the screen when the TV is turned on If you want to display the message at a specified time select the icon and proceed with these steps 8 Press CH CH and VOL VOL to select ...

Page 35: ...the calendar Press VOL or VOL to display a previous or future month e g MAY Press CH or CH to to display a previous or future year e g 2004 Press MENU repeatedly to exit the menu or the menu will automatically disappear within a few seconds if no buttons are pressed on the remote control ...

Page 36: ...rect mode press the TV VCR button on your VCR Noisy stereo reception Model 24V511T Only May be a weak station Press MTS on the remote and choose Mono instructions on page 32 No picture no sound but TV is on Maybe the signal type is set wrong Go to the INPUT button description on page 9 Sound okay picture poor Check antenna connections Make sure all of the cables are firmly connected to the jacks T...

Page 37: ...t we will do Pay any Authorized RCA Television Service Center the labor charges to repair your television Pay any Authorized RCA Television Service Center for the new or at our option refurbished replacement parts and picture tubes required to repair your television How you get service For screen sizes of 26 and smaller Take your RCA television to any Authorized RCA Television Service Center and p...

Page 38: ...REMEDY OF THE CONSUMER TTE TECHNOLOGY INC SHALL NOT BE LIABLE FOR INCIDENTAL OR CONSEQUENTIAL DAMAGES RESULTING FROM THE USE OF THIS PRODUCT OR ARISING OUT OF ANY BREACH OF ANY EXPRESS OR IMPLIED WARRANTY ON THIS PRODUCT THIS DISCLAIMER OF WARRANTIES AND LIMITED WARRANTY ARE GOVERNED BY THE LAWS OF THE STATE OF INDIANA EXCEPT TO THE EXTENT PROHIBITED BY APPLICABLE LAW ANY IMPLIED WARRANTY OF MERCH...

Page 39: ......

Page 40: ...is will only add delays in service for your product TTE Technology Inc 10330 North Meridian Street Indianapolis IN 46290 2004 TTE Technology Inc RCA and the RCA logos are trademarks of THOMSON S A used under license to TTE Technology Inc Printed in China TOCOM 1641305A Visit the RCA website at www rca com ...

Reviews: