background image

This page intentionally left blank.

Summary of Contents for 27V514T

Page 1: ...ng Entertainment Again Changing Entertainment Again Changing Entertainment Again Changing Entertainment Again Changing Entertainment Again Changing Entertainment Again Changing Entertainment Again Changing Entertainment Again Changing Entertainment Again Changing Entertainment Again Changing Entertainment Again Changing Entertainment Again Changing Entertainment Again Changing Entertainment Again ...

Page 2: ...of the building as close to the point of cable entry as practical Important Stand and Base Safety Information Choose the location for your TV carefully Place the TV on a stand or base that is of adequate size and strength to prevent the TV from being accidentally tipped over pushed off or pulled off This could cause personal injury and or damage the TV Refer to the Important Safety Instructions on...

Page 3: ...tability All televisions must comply with recommended international global safety standards for tilt and stability proper ties of its cabinet design Do not compromise these design standards by applying excessive pull force to the front or top of the cabinet which could ultimately overturn the product Also do not endanger yourself or children by placing electronic equipment toys on the top of the c...

Page 4: ... Initial Setup 10 Turn on the TV 10 Complete the Initial Setup 11 Choose the Menu Language 11 Tuning to a Channel 11 What to Expect 12 Watching TV 12 Remote Buttons 13 Using the INPUT Button 14 Explanation of Jacks 15 The Front of Your TV 16 Chapter 2 Using the TV Features Channel Banner 17 Parental Controls and V Chip 18 How V Chip Works 18 Activate Parental Control 18 Resetting the Password 18 S...

Page 5: ...27 Setup Menu 28 Parental Control Menu 33 Time Menu 34 Notepad Menu 35 Chapter 4 Other Information USA V Chip Rating System 36 Canadian English V Chip Rating System 37 Canadian French V Chip Rating System 37 Troubleshooting 38 Limited Warranty 40 Care and Cleaning 42 FCC Information 43 ...

Page 6: ...ices so that air can circulate freely Don t stack devices If you place devices in a stand make sure you allow adequate ventilation If you connect an audio receiver or amplifier place it on the top shelf so the heated air from it won t flow around other devices Position Cables Properly to Avoid Audio Interference Position Cables Properly to Avoid Audio Interference Insert each cable firmly into the de...

Page 7: ... page 13 for more information When using both of these jacks use the ANTENNA button on the remote to toggle between the digital and analog signals or Receiving Digital Channels Coaxial cable Indoor or Outdoor Antenna ANTENNA CABLE ANALOG INPUT S VIDEO VIDEO AUDIO VIDEO IN ANTENNA CABLE DIGITAL INPUT Continues on next page Note You may experience a delay of several seconds before digital pictures a...

Page 8: ...eady to watch analog channels make sure you are tuned to the analog input Press the ANTENNA button to tune to the analog input Go to page 13 for more information What You Need Antenna rabbit ears or outdoor antenna with coaxial cable Plug the antenna or coaxial cable from the wall outlet into the ANTENNA CABLE ANALOG INPUT to receive analog channels OR Coaxial cable from a cable outlet Plug the co...

Page 9: ...VD player is connected to the TV s S Video and audio jacks located on the TV To view this device 1 Turn on the TV and the DVD player 2 Use the INPUT button on the remote control to toggle through the Video Input Channels until you see SVID displayed in the channel banner VID displayed in the channel banner VID Remember If you use the S Video connection described here you cannot use the Video jack ...

Page 10: ...g the example of a DVD player 1 Connect your cable and or antenna as described on page 5 2 Connect your S Video cables S Video cables fit into a special shaped jack which is labeled S Video Connect the S Video cable to the jack on the TV and the jack on the DVD player 3 Connect your audio cables Connect the audio white and red cables to the R and L Audio jacks on the TV and to the audio output jack...

Page 11: ...ideo game console that has Audio Video jacks Refer to the illustration below which uses audio and video cables Using the example of a video game console 1 Connect your cable and or antenna as described on page 5 2 Connect your video cable Video cables are usually yellow Connect the Video cable to the Video jack on the side of the TV and the jack on the video game console 3 Connect your audio cable...

Page 12: ...on how you move through the on screen menus The method is the same throughout the menu screens highlight your choice and select it To highlight a menu item press the arrow buttons on the remote to highlight one of the items listed on the screen Use the up or down arrow button to move up or down Use the right or left arrow button to move right or left To select the item that you ve highlighted pres...

Page 13: ... may appear reminding you that the time setting is incorrect Go to page 34 for more information Choose the Menu Language To set the language use the arrow buttons to highlight Language The default language is English To choose another language press the right arrow button on the remote choose the language and press OK Continues on next page Tuning to a Channel Analog station numbers display on you...

Page 14: ...4 3 16 9 or stretch This is also known as the aspect ratio Go to page 33 for examples of screen formats Remember If you have a digital signal connected to your ANTENNA CABLE DIGITAL INPUT then view digital channels on your Digital Input The ANTENNA button on the remote tunes to the analog digital inputs Most digital channels are sent in a 16 9 format it depends on how the station is formatting the...

Page 15: ...ewing FAV Favorite Press to browse the channels in your Favorite List Refer to page 32 for more information GO BACK Returns you to the previous channel or menu INFO Brings up the channel banner Press again to remove Refer to page 17 for more information INPUT Toggles through the available Video Input Channels VID1 FRNT SVID and current channel MENU Brings up the MAIN MENU system MUTE Reduces the T...

Page 16: ...ut Channels to view components you have connected to the TV 1 Make sure the component you want to view is turned ON 2 Press INPUT to tune to an available Video Input Channel and view the component 3 To return to the previous channel continue pressing INPUT Connections Setup 14 Chapter 1 ...

Page 17: ...ur TV AUDIO L Provides left audio connection The left audio connector is usually white AUDIO R Provides right audio connection The right audio connector is usually R Provides right audio connection The right audio connector is usually R red To access the device when using these jacks use the INPUT button on your remote until SVID appears VID appears VID Remember If you use the S Video connection d...

Page 18: ...mote until FRNT appears FRNT appears FRNT Front Buttons POWER Turns the TV on and off POWER Turns the TV on and off POWER SENSOR Receives infrared signals from the remote SENSOR Receives infrared signals from the remote SENSOR TV VIDEO INPUT Model 27V414T only Chooses between TV programming and the l 27V414T only Chooses between TV programming and the l 27V414T only available Video Input Channels ...

Page 19: ...ows the amount of time left Skip 0 30 Corresponds to the SKIP button Shows the amount of time left Skip 0 30 before the TV switches back to the previous channel Refer to page 13 07 18 am Displays the current time 07 18 am Displays the current time 07 18 am The following Channel Banner display is available for analog signals only display is available for analog signals only display 11 CNN Displays ...

Page 20: ...gs and content themes you can block are identified and explained in detail in Chapter 4 The following sections give you more details about how to change the status of TV program limits PARENTAL CONTROL Go Back Lock Settings Change Passwrd Parental Control is locked A password is now necessary to change settings Activate Parental Control Note The PASSWORD screen appears the first time you enter the N...

Page 21: ...on to scroll to the rating corresponding with the lowest rating you do not want the child to watch 2 Press the OK button to toggle between view and block The status for the rating listed to the left and all higher ratings automatically changes to block 3 Press the up or down arrow button to highlight Go Back and press Go Back and press Go Back OK 4 After you Block age based ratings you can change ...

Page 22: ...n to move the highlight to a particular content theme status 4 Press the OK button to change its status to B In the example on the previous page you block the language L the previous page you block the language L the previous page you block the language corresponding with TV 14 The language for TV MA is blocked as well 5 After you Block specific content themes you can change some of the content the...

Page 23: ...ons RATING LIMIT screen use the arrow buttons RATING LIMIT and OK on your remote to change the status of a TV program rating from view to block 5 Press the OK button to change its status to block the lock icon appears All ratings above the one you selected change to lock Notes You must remember to activate Parental Control for rating limits to take effect Refer to page 18 If you forget your passwo...

Page 24: ...fer to page 18 V Chip Exempt Program Block The Exempt Prgms option lets you decide if programs that the V Chip Exempt Prgms option lets you decide if programs that the V Chip Exempt Prgms recognizes as unrated can be viewed Unrated TV programs may include news sports political religious local and weather programs emergency bulletins public announcements and programs without ratings The Exempt opti...

Page 25: ... have two options to Block All channels or none Individual channels cannot be blocked with this connection If you are using the ANTENNA CABLE ANALOG INPUT then ANTENNA CABLE ANALOG INPUT then ANTENNA CABLE ANALOG INPUT Block Channel works as described works as described works below as described below as described This option lets you block specific channels 1 From the PARENTAL CONTROL menu press th...

Page 26: ...menu press the down arrow to highlight Lock Fr Panel 2 Press the right or left arrow button to turn on box has check mark or off box doesn t have check mark front panel lock Change Password Selecting this option lets you simply create a new password at any time Once you enter a new password from Change Passwrd in the PARENTAL CONTROL menu it is the password you use until you change it again PARENT...

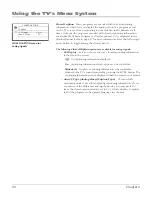
Page 27: ... the available Sound Type Press the right arrow button to scroll through the available Sound Type audio types which control the way the sound comes through your speakers MONO Plays the sound in mono only Use this setting when MONO Plays the sound in mono only Use this setting when MONO receiving broadcasts with weak stereo signals STEREO Splits the incoming stereo audio signal into left and right ...

Page 28: ...the default audio for the program usually English in the U S The default digital channel audio language options are English Spanish German Italian Japanese Chinese and Korean Cur Language Current Digital Channel Audio Language Cur Language Current Digital Channel Audio Language Cur Language Current Digital Channel Audio Lan Press the right arrow button to choose the audio language available for th...

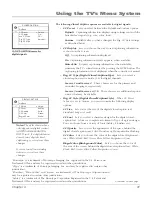
Page 29: ...on to scroll through the color adjustments Cool For a more blue palette of colors Cool For a more blue palette of colors Cool Normal Standard picture color This is the default setting Warm For a more red palette of colors Brightness Adjusts the brightness of the picture Contrast Adjusts the difference between the light and dark areas of the picture Color Adjusts the richness of the color Sharpness...

Page 30: ...ur digital and analog connections Analog Signal Type Choose between Cable or Cable or Cable Antenna if you are connected to the ANTENNA CABLE ANALOG INPUT ANALOG INPUT ANALOG jack If you chose Both above then you ll need to choose a signal type for your digital and analog connections After you have made the selections above use the down arrow button to highlight Start Start Press the right arrow b...

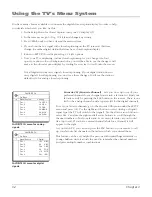
Page 31: ...two times the letter R is three times and the letter S is four times 3 Move spaces with the right and left arrow buttons 4 Use the up arrow button to highlight Go Back and press OK to exit this o Back and press OK to exit this o Back menu when you have finished In List This option allows you to keep or delete a channel from the channel list Follow the procedure for Channel see above to select the C...

Page 32: ...the choices below The following Closed Caption options are available for analog signals CC Display Lets you choose the way closed captioning information is shown on the screen Off No captioning information displayed On Captioning information always appears when available Muted On Displays captioning information when available whenever the TV s sound is muted by pressing the MUTE button The caption...

Page 33: ...an customize the following display options CC Size Lets you set the size of the digital closed caption text Standard Large or Small CC Font Lets you select a character design for the digital closed caption text A font is a complete assortment of type of a given design You can choose from a variety of fonts Ashley Floridian etc CC Opacity Lets you set the appearance of the space behind the digital ...

Page 34: ... Signal Source Digital Fav 1 13 1 NBC Fav 2 8 3 ABC Fav 3 79 4 CBS Fav 4 5 2 FOX Fav 5 17 3 WTR Fav 6 28 1 IND FAVORITE CH menu for analog signals FAVORITE CH menu for digital signals Favorite CH Favorite Channel Lets you store up to six of your preferred channels for each signal source into a favorite list Find your favorites easily by pressing the FAV button on the remote There is one list for t...

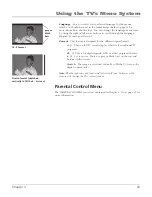
Page 35: ...the different signal formats 4 3 This is a full TV screen display which is for traditional TV programs 16 9 This is for digital signals DVD or video programs that are in 16 9 screen size There are gray or black bars on the top and bottom on the screen Stretch The image is stretched vertically to fill the TV screen for digital content only Note The the right arrow Zoom and left arrow Zoom buttons on...

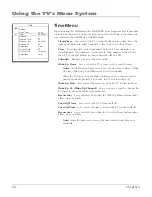
Page 36: ...Up Timer Lets you set the TV to turn on at a specific time Notes Unless Wake Up Timer is set to On the next three options Wake Up Time Wake up Ch and Recurrence aren t available When the TV turns on by the Wake Up Timer and no remote or front panel buttons are pressed for 2 hours the TV will turn itself off Wake Up Time Lets you set the time you want the TV to turn itself on Wake Up Ch Wake Up Chan...

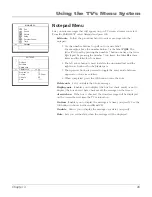
Page 37: ...n is used to delete the unwanted text and the right arrow button is for the blank space 3 The up arrow button is pressed to toggle the entry mode between uppercase or lowercase letters 4 When completed press the OK button to save the note Delete note Lets you delete the whole message Display note Enables you to display the box has check mark or not to display the box doesn t have check mark the me...

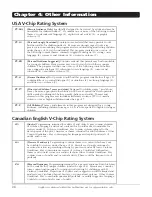
Page 38: ...omedic violence or may frighten children under the age of 7 TV Y All Children Themes and elements in this program are designed for a young audience including children from ages 2 6 It is not expected to frighten younger children 18 Adults Programming intended for adults 18 and older It may contain elements of violence language and sexual content which could make it unsuitable for viewers under 18 ...

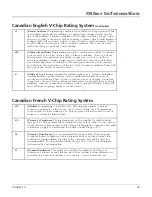
Page 39: ...no realistic scenes of violence Depictions of aggressive behavior will be infrequent and limited to portrayals that are clearly imaginary comedic or unrealistic in nature Other Content Guidelines There will be no offensive language nudity or sexual content Canadian English V Chip Rating System continued Canadian French V Chip Rating System 18 Adults Programming is for adults only This program cont...

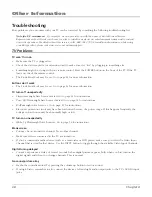
Page 40: ...p timer might have been activated Go to page 34 for instructions Sleep Turn Off Timer might have been activated Go to page 34 for instructions Turn Off Timer might have been activated Go to page 34 for instructions Turn Off Timer KidPass KidPass Kid might have been set Go to page 23 for instructions Pass might have been set Go to page 23 for instructions Pass Electronic protection circuit may have...

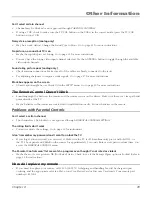
Page 41: ...remote and the remote sensor on the device Make sure there is a clear path and point directly at the TV Maybe batteries in the remote are weak dead or installed incorrectly Put new batteries in the remote Problems with Parental Controls Problems with Parental Controls Can t select a certain channel The channel may be blocked or not approved through PARENTAL CONTROL SETTINGS PARENTAL CONTROL SETTIN...

Page 42: ... to enable the Authorized Service Center to perform service at the Authorized Service Center If your unit is not located within the geographic territory covered by an Authorized Service Center you must take your unit to the Service Center location at your own expense or pay for the cost the Service Center may charge to transport your unit to and from your home To identify your nearest Authorized R...

Page 43: ... OR IMPLIED WARRANTY ON THIS PRODUCT THIS DISCLAIMER OF WARRANTIES AND LIMITED WARRANTY ARE GOVERNED BY THE LAWS OF THE STATE OF INDIANA EXCEPT TO THE EXTENT PROHIBITED BY APPLICABLE LAW ANY IMPLIED WARRANTY OF MERCHANTABILITY OR FITNESS FOR A PARTICULAR PURPOSE ON THIS PRODUCT IS LIMITED TO THE APPLICABLE WARRANTY AND WARRANTY PERIOD SET FORTH ABOVE How state law relates to this warranty Some sta...

Page 44: ... based cleaners or abrasive powder These types of cleaners will damage the TV While cleaning do not spray liquid directly on the screen or allow liquid to run down the screen and inside the TV Also never place drinks or vases with water on top of the TV This could increase the risk of fire or shock hazard or damage to the TV Caution Using video games or any external accessory with fixed images for e...

Page 45: ...tions However there is no guarantee that interference will not occur in a particular installation If this equipment does cause harmful interference to radio or television reception which can be determined by turning the equipment off and on the user is encouraged to try to correct the interference by one or more of the following measures 1 Reorient or relocate the receiving antenna 2 Increase the ...

Page 46: ...This page intentionally left blank ...

Page 47: ...This page intentionally left blank ...

Page 48: ...will only add delays in service for your product TTE Technology Inc 101 West 103rd Street Indianapolis IN 46290 2006 TTE Technology Inc RCA and associated marks are trademarks of THOMSON S A used under license to TTE Corporation Printed in USA TOCOM 16625650 Visit the RCA website at www rca com television ...

Reviews: