4
Copyright © 2020 RCA Communications Systems
www.RCACommunicationsSystems.com
Communications Systems
BRM350D Digital Mobile
Two-Way Radio
INSTRUCTION MANUAL
Fixed Station Operation
In order to use this transceiver in a fixed station operation, you will need a
separate 13.8V DC power supply (not included). The recommended current
capacity of your power supply is 14A or more.
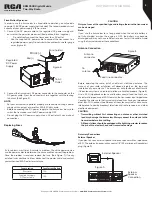
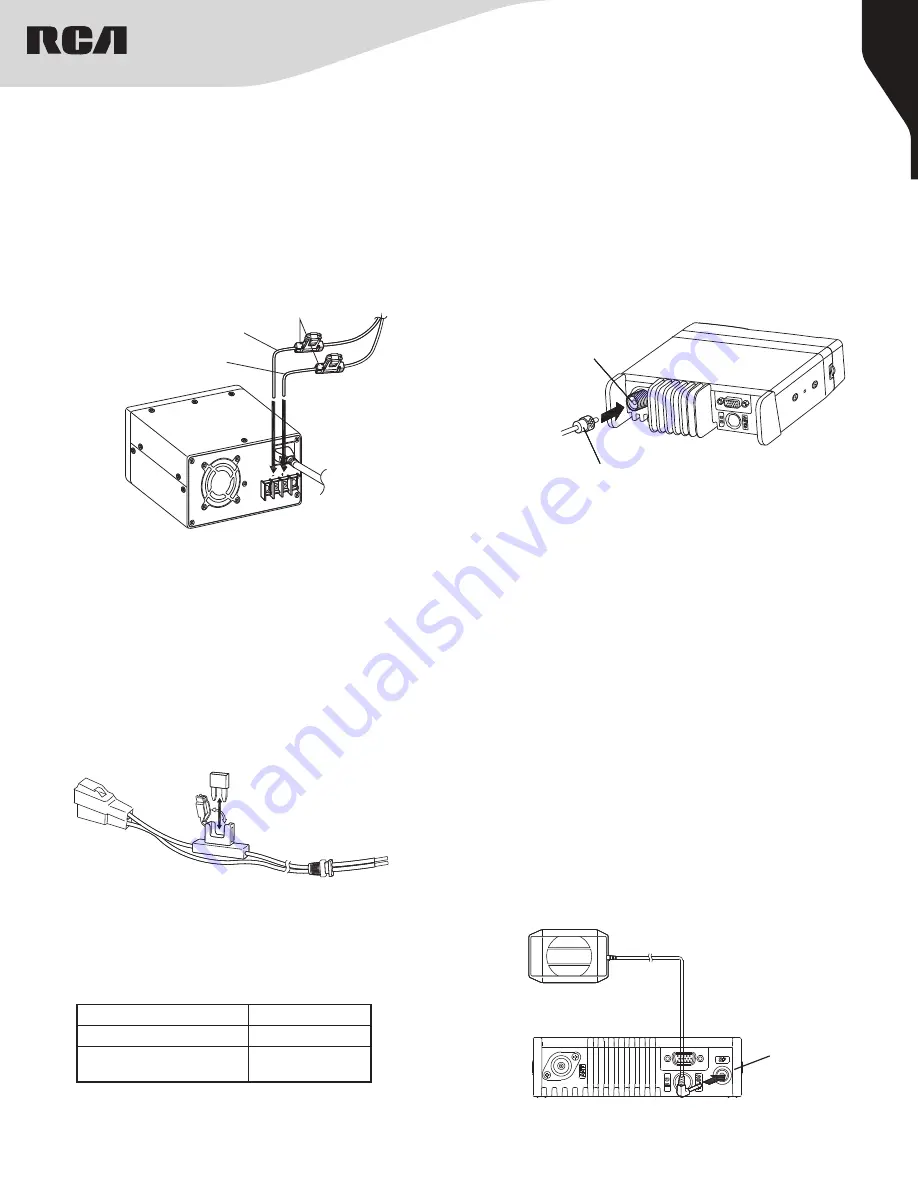
1. Connect the DC power cable to the regulated DC power supply and
ensure that the polarities are correct (Red: positive, Black: negative).
• Do not directly connect the transceiver to an AC outlet.
• Use the supplied DC power cable to connect the transceiver to a
regulated power supply. Do not substitute a cable with smaller gauge
wires. (Figure 6)
Black (-)
Figure 6
Regulated
DC Power
Supply
To AC
Outlet
Red (+)
Fuse holders
2. Connect the transceiver’s DC power connector to the connector on the
DC power cable. Press the connectors firmly together until the locking
tab clicks. (See Figure 5)
NOTE:
• For your transceiver to perform properly, we recommend using a power
supply with an output of more than 23A/25% duty cycle.
• Before connecting the DC power supply to the transceiver. be sure to
switch the transceiver and the DC power supply OFF.
• Do not plug the DC power supply into an AC outlet until you make all
connections.
Replacing Fuses
If a fuse blows, most times it indicates a problem. Check the power source
and the power cables to determine the cause and then correct the problem.
Once the problem is resolved, replace the fuse. (See Figure 7.) If newly
installed fuses continue to blow, disconnect the power cable and contact
your authorized RCA Dealer for assistance.
Fuse Location
Fuse Current Rating
Transceiver
15A
Supplied Accessory
DC Power Cable
15A
CAUTION
Only use fuses of the specified type and rating; otherwise the transceiver
can be damaged.
Note:
If you use the transceiver for a long period when the vehicle battery is
not fully charged or when the engine is OFF, the battery may become
discharged and may not have sufficient reserves to start the vehicle. Avoid
using the transceiver under these conditions.
Figure 8
Antenna
connector
To
antenna
Feed line connector
Antenna Connection
Before operating the radio, install an efficient, well-tuned antenna. The
success of your radio installation will depend largely on the type and
installation of your antenna. The transceiver will provide excellent results
if the antenna system and radio installation are handled properly. (Figure 8)
Use a 50 Ω impedance antenna and low-loss coaxial feed line that has a
characteristic impedance of 50 Ω to match the transceiver input impedance.
Coupling the antenna to the transceiver via feed lines having an impedance
other than 50 Ω reduces the efficiency of the antenna system and can cause
interference to nearby broadcast television and radio receivers, and other
electronic equipment.
CAUTION
• Transmitting without first connecting an antenna or other matched
load may damage the transceiver. Always connect the antenna to the
transceiver before transmitting.
• All fixed stations should be equipped with a lightning arrester to reduce
the risk of fire, electric shock, and transceiver damage.
Accessory Connections
External Speaker
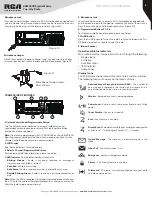
If you plan to use an external speaker, choose a speaker with an impedance
of 8 Ω. The external speaker jack accepts a 1/8” (3.5 mm) mono (2-conductor)
plug. (Figure 9)
Figure 9
External Speaker
External
Speaker
Connection


