6
Copyright © 2020 RCA Communications Systems
www.RCACommunicationsSystems.com
Communications Systems
BRM350D Digital Mobile
Two-Way Radio
INSTRUCTION MANUAL
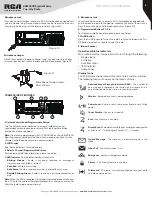
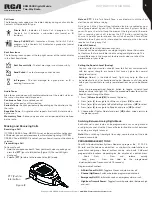
Call Icons
The following icons appear on the radio’s display during a call and in the
Contacts list to indicate ID type.
Private Call -
Indicates a Private Call in progress. In the
Contacts list, it indicates a subscriber alias (name) or ID
(number).
Group Call/All Call -
Indicates a Group Call or All Call in
progress. In the Contacts list, it indicates a group alias (name)
or ID (number).
Sent Item Icons
The following icons appear at the top right corner of the radio’s display
in the Sent Items folder.
Sent Successfully -
The text message is sent successfully.
Send Failed -
The text message cannot be sent.
In-Progress -
The text message to a group alias or ID is
pending transmission.
Audio Tones
Alert tones provide you with audible indications of the radio’s status or
the radio’s response to data received.
Continuous Tone
- A monotone sound.
Sounds continuously until termination.
Periodic Tone
- Sounds periodically depending on the duration set by
the radio.
Repetitive Tone
- A single tone that repeats itself until it is terminated
by the user.
Momentary Tone
- Sounds only once for a short period of time defined
by the radio.
Making and Receiving Calls
Receiving a Call
If CTCSS/CDCSS, 2-Tone, MDC1200 is set on the current channel by your
RCA dealer, you can only receive calls with matched signaling. If CTCSS/
CDCSS, 2-Tone, MDC1200 is not set, you can hear all users on the channel
selected.
Transmitting a Call
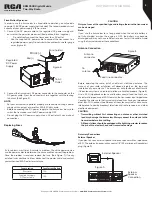
To transmit a call:
1. Hold the microphone about 2” from your mouth when speaking and
press the [
PTT
] (push to talk) button. (Figure 12) The red LED lights
during call.
2. Release [
PTT
] to return to the receive/listen (RX) mode.
Figure 12
PTT (Push to
talk) button
Note on PTT:
If the Talk Permit Tone is enabled, wait until the short
alert tone ends before talking.
During a call, if the Channel Free Indication feature is enabled on your
radio (programmed by your RCA Communications Systems Dealer),
you will hear a short alert tone the moment the target radio (the radio
that is receiving your call) releases the PTT button, indicating the
channel is free for you to respond. You will also hear the Channel Free
Indication tone if your call is interrupted, for example, when the radio
receives an Emergency Call.
Select A Channel
Press [▲] or [▼] to switch between channels.
Channels can be configured as analog or digital channel. Your radio
has features that are available in both analog and digital mode. The
minor differences in the way each feature works does not affect the
performance of your radio.
Setting the Squelch Level (Analog)
You can adjust your radio’s squelch level to filter out unwanted calls
with low signal strength or channels that have a higher than normal
background noise.
Settings:
Normal is the default level. Tight may help to filter out
(unwanted) calls and / or background noise. However, calls from radio
within your system that are in very remote locations may also be filtered
out.
Press the pre-programmed Squelch button to toggle squelch level
between normal and tight. OR - follow the procedure below to adjust the
Squelch Level through the Menu.
1. Press [
Volume Knob (VK)
] to access the menu.
2. Press [▲] or [▼] to navigate to Utilities and press [
VK
] to select.
3. Press [▲] or [▼] to navigate to Radio Settings and press [
VK
] to select.
4. Press [▲] or [▼] to navigate to Squelch and press [
VK
]to select.
5. Choose either Tight or Normal and press [
VK
] button, screen returns to
the previous menu.
Switching Between Analog/Digital Mode
Each channel in your radio can be programmed as an analog channel
or a digital channel. Use the Channel Selector Knob to switch between
an analog or a digital channel.
Note:
When switching from digital to analog, some features of the radio
become unavailable.
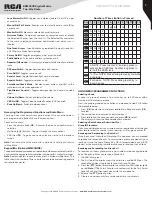
PROGRAMMABLE BUTTONS
Your RCA Communications Systems Dealer can program the P1, P2, P3,
P4, ▲, ▼ and the volume knob button as shortcuts to radio functions or
preset channels/groups. Several buttons can be set up with 2 different
programmable functions depending on the duration of a button press:
- Short Press - Press and release quickly.
- Long press - Press and hold for the programmed
duration (between 1 seconds and 3.75 seconds).
Programmable Functions:
• All Alert Tones On/Off
- Toggles all tones and alerts on or off.
• Channel Up/Down
- Switches between programmed channels.
• Emergency On/Off
- Initiates/cancels an emergency alarm or call.
• High/Low Transmit Power
- Toggles transmit power level between high
and low.


