50
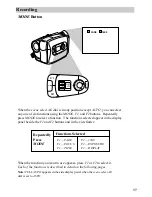
ZOOM
START/STOP
SELF
INT.
TIME
TIME LAPSE
REC
TIME
ANIM.
PAUSE
FF
A.DUB
INSERT
REW
STOP
PLAY
BATT. RELEASE
B
C
AUDIO
RF
DC OUT
VIDEO
LE
N
S
C
O
V
E
R
DATE/TIME/CHAR––SET
T20•30•40
TRACKING
UNTER R/M
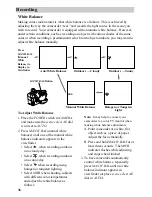
W.BAL.
PLAY/PAUSE
STOP
FF
+
REW
+
–
VCR
CAMERA
POWER
OFF
Recording
To Record Using Animation
1. Use the SP•SLP/T20•30•40 switch to
set the tape speed to SP.
2. Place camcorder in record pause.
(POWER switch must be in CAMERA.)
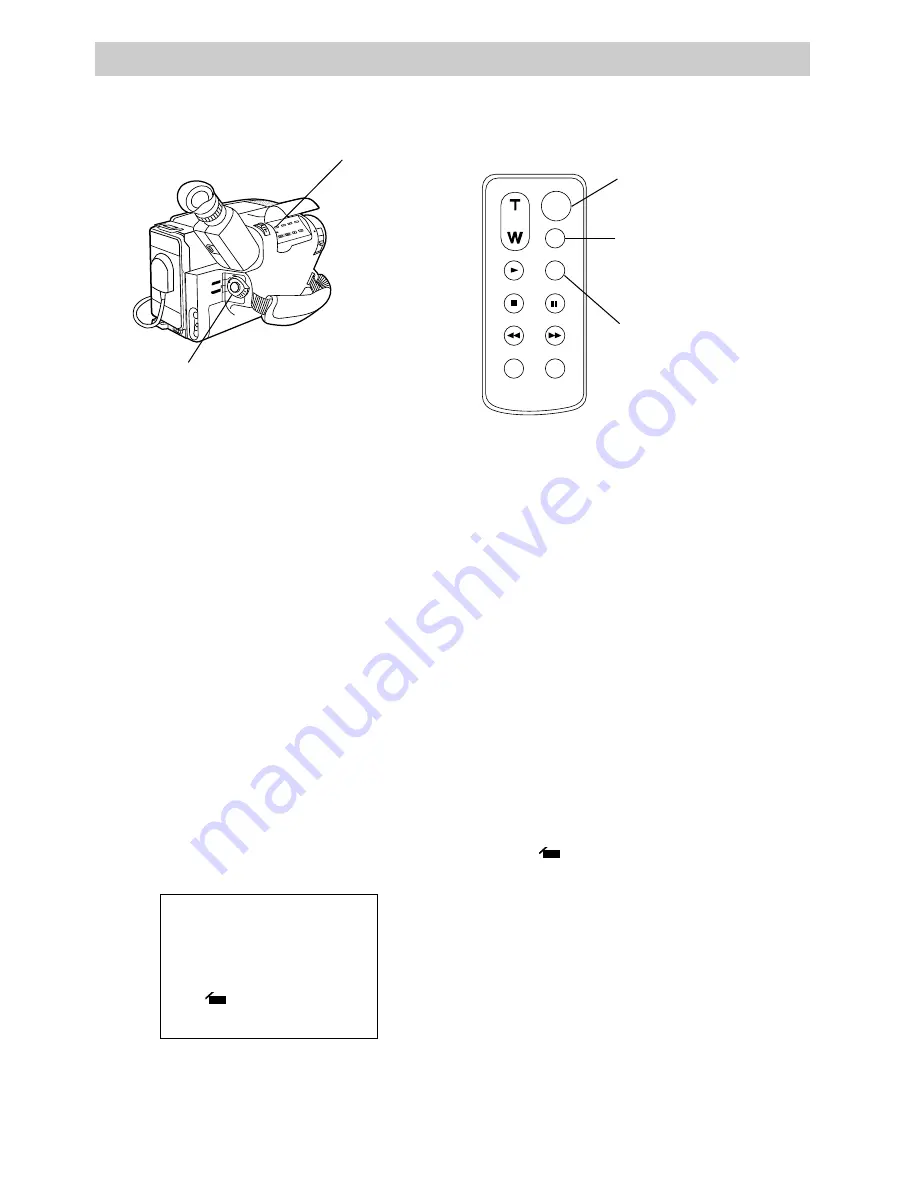
3. Press TIME LAPSE ANIM. REC/TIME
on remote to select the amount of
recording time (1/4, 1/2 or 1 second).
The recording time selected will
appear in the viewfinder.
5. Press the thumb trigger (START/STOP
on remote). Recording stops
automatically after the selected
amount of recording time.
You may want to take two to five
shots of the subject in the same
position.
6. When you are finished, press TIME
LAPSE ANIM. REC/TIME on remote
until
disappears from the view-
finder or place the POWER switch in
VCR.
Notes: If you start animation recording at the
very beginning of a tape, record for about five
seconds so the tape runs smoothly. Using the
fade feature is a good way to begin.
The fade feature will not operate during
animation recording.
Use a tripod to keep the camcorder steady.
30MIN T30 SP
1/4S
SP•SLP/T20•30•40
Switch set to SP
POWER Switch in
CAMERA
START/ STOP
Button
TIME LAPSE SELF
INT./TIME Button
TIME LAPSE
ANIM. REC/TIME
Button
Animation Recording
Animation recording produces an illusion of movement for an otherwise
stationary scene or object by shooting a series of pictures of slightly different
poses (such as cartooning).
Animation and Time-Lapse Recording — Remote Only
4. Focus the camcorder on the subject
you want to record.

