Mounting the Mast
16
Chapter 2
LEVEL
NOT LEVEL
4.
Use a pencil to mark the two center holes and the eight outside corner holes of
the mounting foot.
5.
Remove the mounting foot and drill two 3/16" holes in the two center hole
locations and four 3/16" holes in the four outside corner locations.
6.
Use a wrench to loosen the nuts on the mounting foot so that you can rotate the
mast to access both of the center mounting holes.
7.
Hold the mounting foot over the holes so that the top part of the mast will rotate
and point straight up. The mast needs to be perfectly plumb and level in order for
the dish to receive a satellite signal (see Chapter 3 for more information on how to
use the mast to make sure the mast is plumb and level).
Tip
To locate a stud underneath panel
siding, locate the nails securing the
panel to the wall. The nails usually
align with the center of the stud and
provide an easy guide.
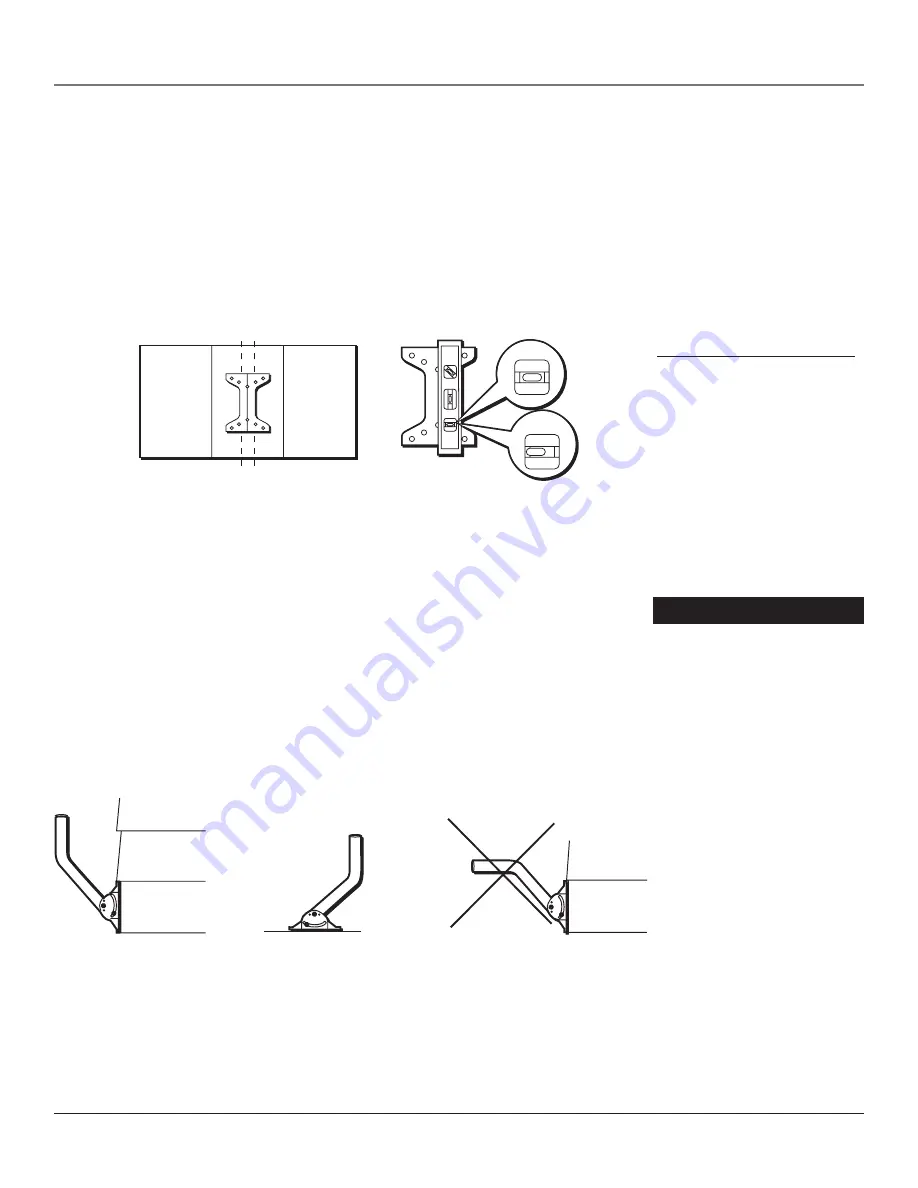
Step 2:
Center the foot on the
stud.
Mounting Instructions
1.
Locate the center of a stud where you want to secure the mounting foot. Make
sure you locate and secure the mounting foot to the center of a wall stud.
Do
not mount the DIRECTV
®
Multi-Satellite dish near the edge of a stud.
2.
Hold the mounting foot in a position so the center line is centered on a stud or
solid wood surface.
3.
If you are mounting on a sloped or vertical surface, use a carpenter’s level to
verify that the center line is perfectly vertical.
Step 3:
Make sure the mounting
foot is level.
Yes
Yes
No
Step 7:
Make sure that the top of the mast is plumb (pointing straight up).
See chapter 3 for more information on how to use the mast to make
sure the mast is plumb and level.
IMPORTANT
The satellite antenna must be
plumb and level. Plumb means
perfectly vertical; straight up
and down. Level means a
horizontal plane.
Summary of Contents for DIRECTV
Page 1: ...DIRECTV Multi Satellite Dish Antenna Installer s Guide Changing Entertainment Again ...
Page 14: ...This page left blank intentionally ...
Page 26: ...This page left blank intentionally ...
Page 44: ...This page left blank intentionally ...
Page 45: ...This page left blank intentionally ...
Page 46: ...This page left blank intentionally ...
Page 47: ......


