background image

15

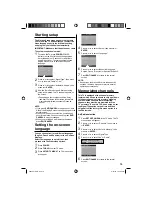
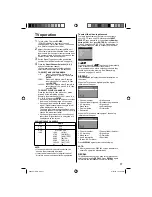
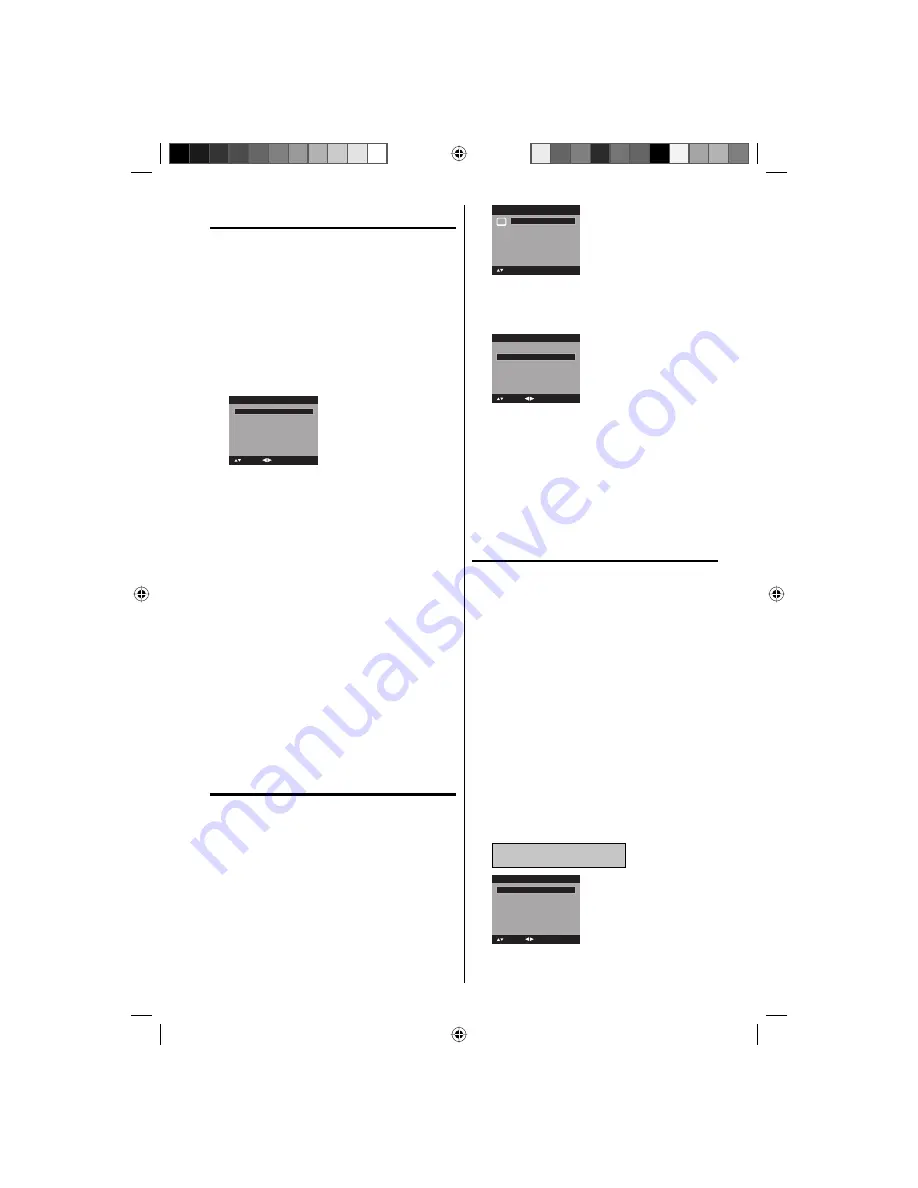
Starting setup

The Starting Setup menu appears the first time 

you turn on the TV, and assists you to select the 

menu language, specify the Air/Cable setting, 

and program your channels automatically.
IMPORTANT: Make sure that the antenna or cable 

TV system connection is made!

1

To turn on the TV, press 

POWER

 (POWER 

indicator on the front of the unit changes green. 

It may take approx. 10 seconds for a picture to 

appear on screen.). The starting setup function 

begins. Press 

 or 

 to select your desired 

language.

Automatic Search

Start

Auto Setup

Language

English

Signal Type

Cable

: Adjust

: Select

2

Press 

 or 

 to select “Signal Type”, then press 

 or 

 to select “Cable” or “Air”.

3

Press 

 or 

 to select “Automatic Search”, then 

press 

 or 

ENTER

4

Now the “Auto Setup” starts. After the starting 

setup is completed, the TV channel appears on 

the screen.
• Depending on the reception condition, it may 

take from 15 minutes to 30 minutes to complete 

memorizing digital cable channels. Please be 

patient.

NOTE:

If you press 

EXIT/CANCEL

 in the process of “Auto 

Setup”, the Starting Setup stops and changes to the 

normal screen. 

When you make a menu selection, your changes 

occur immediately. You do not have to press 

EXIT/

CANCEL

 to see your changes.

When you are finished programming the menus, 

press 

EXIT/CANCEL

.

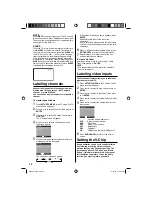
Setting the on-screen 

language

You can choose from three different languages 

(English, French and Spanish) for the on-screen 

displays.

Select the language you prefer first, then 

proceed with the other menu options.

1

Press 

POWER

.

2

Press 

TV/DVD

 to select TV mode.

3

Press 

SETUP/TV MENU

. The TV menu screen 

will appear.

Audio

Channel

Lock

Setup

Main Menu

Picture

>>

: Select

ENTER:Set

4

Press 

 or 

 to select “Setup”, then press 

 or 

ENTER

.

5

Press 

 or 

 to select “Language”.

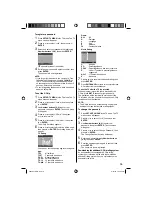
Video Label

>>

Auto Shut Off

Off

Reset

>>

Setup

Closed Caption

>>

Language

English

: Adjust

: Select

6

Press 

 or 

 to select the desired language: 

English, French (Français) or Spanish (Español).

7

Press 

EXIT/CANCEL 

to return to the normal 

screen.

NOTE:

If no buttons are pressed for more than about 60 

seconds, the menu screen will return to normal 

operation automatically.

Memorizing channels

This TV is equipped with a channel memory 

feature which allows channels to skip up or down 

to the next channel set into memory, skipping 

over unwanted channels. Before selecting 

channels, they must be programmed into the 

TV’s memory. To use this TV with an antenna, set 

the Signal Type option to the Air mode. When 

shipped from the factory, this menu option is in 

the Cable mode.

Air/Cable selection

1

Press 

SETUP/TV MENU

 in the TV mode. The TV 

menu screen will appear.

2

Press 

 or 

 to select  “Channel”, then press 


or 

ENTER

.

3

Press 

 or 

 to select “Auto Ch Memory”, then 

press 

 or 

ENTER

.

4

Press 

 or 

 to select “Signal Type”.

5

Press 

 or 

 to select “Air” or “Cable”.

Air 

- VHF/UHF channels

Cable 

- CABLE TV channels

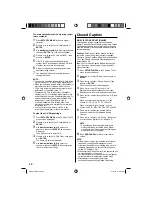
Automatic Search

Start

Auto Ch Memory

Signal Type

Cable

: Adjust

: Select

6

Press 

EXIT/CANCEL 

to return to the normal 

screen.

52D0201A_EN.indd   15

52D0201A_EN.indd   15

6/12/09   1:44:29 PM

6/12/09   1:44:29 PM

Summary of Contents for L22HD34D

Page 1: ... When shipped from the factory the Signal Type option is set to the Cable Cable Television mode If not using Cable TV set this menu option to the Air position Before operating the unit please read this manual thoroughly 22 TFT LCD DIGITAL TV WITH DVD PLAYER OWNER S MANUAL L22HD34D L22HD34DB L22HD34DP 52D0201A_EN indd 1 52D0201A_EN indd 1 6 12 09 1 44 18 PM 6 12 09 1 44 18 PM ...

Page 2: ...ese limits are designed to provide reasonable protection against harmful interference in a residential installation This equipment generates uses and can radiate radio frequency energy and if not installed and used in accordance with the instructions may cause harmful interference to radio communications However there is no guarantee that interference will not occur in a particular installation If...

Page 3: ...l Electrical Code ANSI NFPA 70 provides information with respect to proper grounding of the mast and supporting structure grounding of the lead in wire to an antenna discharge unit size of grounding conductors location of antenna discharge unit connection to grounding electrodes and requirements for the grounding electrode 20 When replacement parts are required be sure the service technician uses ...

Page 4: ... liquid gets in your mouth immediately gargle and consult with your doctor Also if the liquid gets in your eyes or touches your skin consult with your doctor after rinsing for at least 15 minutes or longer in clean water CHILD SAFETY It Makes A Difference How and Where You Use Your Flat Panel Display Congratulations on your purchase As you enjoy your new product please keep these safety tips in mi...

Page 5: ...ERED BY YOUR WARRANTY Never leave your LCD Panel on for long periods of time while it is displaying the following formats or images Fixed Images such as stock tickers video game patterns TV station logos and websites Special Formats that do not use the entire screen For example viewing letterbox style 16 9 media on a normal 4 3 display black bars at top and bottom of screen or viewing normal style...

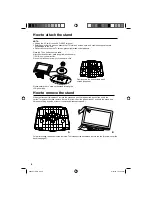
Page 6: ... you hear a click How to remove the stand When you transport this product remove the stand and pack flat against the back of the unit in the carton To remove the stand remove the two 2 screws from the bottom see A and hold the stand on a flat surface lifting one side of the unit until stand disconnects see B For wall mounting the base must be removed To disconnect the base stand remove the two 2 s...

Page 7: ...Features Direct selection of your desired scenes using Title Chapter Time Track You can play back from the desired scene Recalling Up to 3 Scenes You can program up to 3 scenes in memory and recall the marked scenes Frame Advance The PAUSE STILL moves one frame at a time Slow Motion The SLOW moves you back and forth through the program by 4 steps of 1 7 1 2 times Repeat Playback You can repeat cha...

Page 8: ...input source 25 Adjusting the back lighting 25 Checking the digital signal strength 25 Setting the auto shut off 25 Resetting your settings 26 DVD operation Preparation 26 Status display of disc 26 Playback procedure 26 Special playback 27 MP3 WMA JPEG and Audio CD playback 27 Setting the JPEG interval 29 Program playback CD 29 Repeat playback CD 30 Random playback CD 30 Zooming 30 Locating desire...

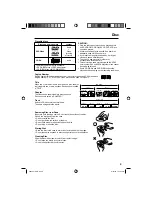
Page 9: ...can be used on this unit Title When two or more movies are recorded on a disc the disc is divided into two or more sections Each section is called a TITLE Chapter The titles can be subdivided into many sections Each section is called a CHAPTER Track An Audio CD can contain several items These are assigned to the tracks Removing Disc from Case Be sure to hold the edge of disc Do not touch the surfa...

Page 10: ...NTER button VOLUME buttons CHANNEL 1 PLAY button MENU button EJECT button Left side CHANNEL 3 STOP button DISC slot Rear side AC INPUT jack HEADPHONE IN jack VIDEO IN jacks VIDEO S VIDEO AUDIO L R PC MONITOR IN jack RF ANT IN jack COMPONENT IN jacks Y Pb Pr AUDIO L R PC HDMI AUDIO IN jack HDMI IN jack DIGITAL AUDIO COAXIAL OUT jack Remote sensor POWER indicator Front 52D0201A_EN indd 10 52D0201A_E...

Page 11: ...t Forward Review playback PLAY Playback SKIP Skip chapter to forward or reverse direction SUBTITLE Set subtitle STOP Stop SLOW Forward Reverse slow motion PAUSE STILL Pause CD sound Still picture of DVD PLAY MODE Select playback mode AUDIO Change sound track language RETURN Remove DVD setup menu REPEAT A B Repeat playback between A and B ANGLE Change playback angle SCREEN SIZE Display PICTURE SIZE...

Page 12: ...e remote control will not be operated for an extended period of time Power source TO USE AC POWER Connect the AC cord plug into this unit s AC IN jack Connect the AC cord into an AC outlet 1 2 NOTE Please make sure to insert the cord securely at both the LCD TV DVD and the wall outlet The AC Cord has a polarized type AC line plug If the supplied AC cord does not match your AC outlet contact a qual...

Page 13: ...ad wire the use of the 300 75 ohm matching transformer may be necessary Connect the UHF 300 ohm twin lead wire to the Combiner not supplied Connect the VHF 300 ohm twin lead wire to the 300 75 ohm Matching Transformer Attach the Transformer to the Combiner then attach the Combiner to the Antenna Jack Connect the VHF 75 ohm cable and UHF 300 ohm twin leadwiretotheCombiner notsupplied Attach the Com...

Page 14: ... Splitter and an A B Switch box available from the Cable TV company or an electronics supply store Follow the connections shown below With the switch in the B position you can directly tune any nonscrambled channels on your TV With the switch in the A position tune your TV to the output of the Converter Descrambler box usually channel 3 or 4 and use the Converter Descrambler box to tune scrambled ...

Page 15: ...creen displays Select the language you prefer first then proceed with the other menu options 1 Press POWER 2 Press TV DVD to select TV mode 3 Press SETUP TV MENU The TV menu screen will appear Audio Channel Lock Setup Main Menu Picture Select ENTER Set 4 Press or to select Setup then press or ENTER 5 Press or to select Language Video Label Auto Shut Off Off Reset Setup Closed Caption Language Engl...

Page 16: ...hannel unregistered you can add the new channel into the channel memory 1 Tune in the new channel 2 Press SETUP TV MENU in the TV mode The TV menu screen will appear 3 Press or to select Channel then press or ENTER 4 Press or to select Add Delete then press or ENTER Add Delete Clear All Add Delete Adding Channel Select ENTER Set 5 Press or to select Adding Channel then press or ENTER The new chann...

Page 17: ...6 94 95 99 A 5 A 1 100 135 100 135 01 4A NOTE If a channel with no broadcast is selected the sound will automatically be muted It may take a few seconds for a digital channel picture to appear on screen after being selected To select the video input source To view a signal from another device connected to your LCD TV such as a VCR player press INPUT SELECT then press or corresponding Number button...

Page 18: ...s rotation as follows SPACE If the character which you desire appears press ENTER Repeat this step to enter the rest of the characters If you would like a blank space in the label name you must choose the empty space from the list of characters 6 When you finish inputting the label name press EXIT CANCEL to return to the normal screen 7 Repeat steps 4 5 for other channel You can assign a label to ...

Page 19: ...years old and above Genre ALL All D Dialogue L Language S Sex V Violence FV Fantasy Violence Movie Rating G PG PG 13 R NC 17 X ENTER Set Movie Rating Select G All ages PG Parental guidance PG 13 Parental guidance less than 13 years old R Under 17 years old parental guidance suggested NC 17 17 years old and above X Adult only 7 Press to select the desired rating then press ENTER 8 Press EXIT CANCEL...

Page 20: ...pability to decode and display Closed Captioned television programs Closed Captioning will display text on the screen for hearing impaired viewers or it will translate and display text in another language Captions This Closed Caption Mode will display text on the screen in English or another language Generally Closed Captions in English are transmitted on C1 and Closed Captions in other languages ...

Page 21: ... Auto None Raised Depressed Uniform Left Shadow Right Shadow Text Color Auto Black White Red Green Blue Yellow Magenta Cyan Text Opacity Auto Solid Transparent Translucent Flashing Background Color Auto Black White Red Green Blue Yellow Magenta Cyan Background Opacity Auto Solid Transparent Translucent Flashing 7 Press EXIT CANCEL to return to the normal screen NOTE You cannot set both Text Color ...

Page 22: ...iety of picture sizes Natural Cinema Wide1 Cinema Wide2 Cinema Wide 3 Full and Native Selecting the picture size 1 Press SETUP TV MENU in the TV mode The TV menu screen will appear 2 Press or to select Picture then press or ENTER 3 Press or to select Picture Size then press or ENTER to display Picture Size menu Press or corresponding Number buttons 0 4 to select the desired picture size as describ...

Page 23: ...the PC mode 2 Press SETUP TV MENU The TV menu screen will appear 3 Press or to select Picture then press or ENTER 4 Press or to select PC Setting then press or ENTER The PC Setting menu will appear Ver Position Clock Phase Adjust 25 0 25 PC Setting Hor Position 25 Select ENTER Set Auto Adjust 5 Press or to select the desired item you want to adjust 6 Press or to adjust the setting Hor Position To ...

Page 24: ...lect Audio then press or ENTER 3 Press or to select MTS then press or to select Stereo Treble Balance Audio 15 0 Adjust 15 Bass Select MTS Stereo Surround Off Audio Language No Info HDMI Audio HDMI 4 Press EXIT CANCEL to return to the normal screen NOTE Generally you can leave your TV in stereo mode because the TV automatically outputs the type of sound being broadcast stereo or mono If the stereo...

Page 25: ... 25 0 Adjust Select Color Temperature Cool 16 Backlight 5 Press or to adjust the setting 6 Press EXIT CANCEL to return to the normal screen Checking the digital signal strength This TV will allow you to view the digital signal meter for digital channels 1 Press SETUP TV MENU in the TV mode The TV menu screen will appear 2 Press or to select Channel then press or ENTER 3 Press or to select DTV Sign...

Page 26: ...gged in for the first time wait for about 5 seconds before pressing POWER NOTE When connecting to other equipment unplug the unit from the AC outlet 2 Press POWER on the unit or on the remote control to turn on the unit The POWER indicator will change to green Each time you turn the unit ON the TV DVD starts from the TV mode When using an amplifier switch on the amplifier 3 Press TV DVD to select ...

Page 27: ...increase the speed of the search x 2 x 4 x 8 x 15 CD x 2 x 4 x 8 x 20 To resume normal playback press PLAY Still Playback Press PAUSE STILL during normal playback to pause playback To resume normal playback press PLAY Frame Advance Press PAUSE STILL during still playback One frame is advanced each time you press PAUSE STILL To resume normal playback press PLAY Slow motion Playback Press SLOW Rever...

Page 28: ...ntaining a mixture of MP3 WMA and JPEG files the files are played back by selecting them from the file browser 1 2 3 4 Press or to select the desired file When PLAY is pressed after displaying file browser displayed playback begins automatically starting from the first file In this case if the first file is an MP3 WMA file only MP3 WMA files are played back in order If the first file is a JPEG fil...

Page 29: ...er 1 Folder 2 MP3 1 MP3 2 MP3 3 WMA 1 WMA 2 WMA 3 JPEG Preview Repeat Off Mode Off Edit Mode 2 Press to select the file you want to add into the program list Press ENTER Selected file was marked Repeat this procedure to select the other files Folder 1 Folder 2 MP3 1 MP3 2 MP3 3 WMA 1 WMA 2 WMA 3 JPEG Preview Repeat Off Mode Off Edit Mode MP3 1 MP3 3 Press to select Add To Program Then press ENTER ...

Page 30: ... Press to view a different part of the frame You may move the frame from the center position UP DOWN LEFT or RIGHT 3 In the zoom mode press ZOOM repeatedly to return to a 1 1 view Off NOTE You can select the Pause Slow or Search playback in the zoom mode Some discs may not respond to zoom feature Locating desired scene Use the title chapter and time recorded on the disc to locate the desired point...

Page 31: ...cted Repeat this procedure to set the other 2 scenes 3 Press MARKER to remove this display Returning to the scenes 1 Press MARKER during playback or stop mode 2 Press or to select the Marker 1 3 Marker 2 Marker 1 Marker 3 00 27 54 01 16 25 02 08 31 3 Press ENTER Playback starts from the marked scene To cancel the mark 1 Press MARKER during playback or stop mode 2 Press or to select the Marker 1 3 ...

Page 32: ...rded on some discs If the title menu is recorded on the disc you can select the desired title 1 Press TOP MENU during playback Title menu appears on the screen 2 Press or to select the desired title 3 Press ENTER or PLAY The playback of the selected title will start NOTE Depending on the DVD you may not be able to select the title Depending on the DVD a title menu may simply be called a menu or ti...

Page 33: ...ur preferred picture setting for example if you select 4 3 Panscan the disc may not offer this option In this case the picture would display the format the disc is capable of playing back Setting on screen display On screen display can be switched on or off when you press the any button 1 Press SETUP TV MENU in the stop mode or No Disc Press or to select option then press or ENTER 2 Press or to se...

Page 34: ... select Off PCM or Bitstream then press ENTER Off Night Mode Digital Out Off PCM Bitstream Off There is no sound output from DIGITAL AUDIO COAXIAL jack PCM Change Dolby Digital to PCM for the output Select when connected to a 2 channel digital stereo amplifier Bitstream Disc audio bitstream data will be output 4 Press SETUP TV MENU to remove the menu screen NOTE This function works only during pla...

Page 35: ...Press Number buttons 0 9 to input the new password Parental Off Password Change Enter New Password 5 Press ENTER Now your new password has been set Be sure to remember this number NOTE If you forget your password it can be reset With no disc in the player and in DVD mode press STOP on the unit Continue holding the button and press 7 on the remote control at the same time Password Clear appears on ...

Page 36: ...pali 2415 Telugu 3015 Bhutani 1436 Hindi 1819 Norwegian 2425 Thai 3018 Bihari 1218 Hungarian 1831 Oriya 2528 Tibetan 1225 Breton 1228 Icelandic 1929 Panjabi 2611 Tigrinya 3019 Bulgarian 1217 Indonesian 1924 Pashto Pushto 2629 Tonga 3025 Burmese 2335 Interlingua 1911 Persian 1611 Turkish 3028 Byelorussian 1215 Irish 1711 Polish 2622 Turkmen 3021 Cambodian 2123 Italian 1930 Portuguese 2630 Twi 3033 ...

Page 37: ...dio inputs and outputs To connect the LCD TV DVD to a VCR Connections to other equipment To connect to a DVD player with Component Video Input You can enjoy a high quality picture by connecting the unit s COMPONENT VIDEO OUT jacks of your DVD player with the COMPONENT video cables not supplied Rear of the unit To Video Audio OUT Video Audio cord not supplied To VIDEO AUDIO IN To S Video OUT To Aud...

Page 38: ...d Speaker Left Surround Speaker Right TV DVD NOTE When you are viewing digital broadcast this unit will not work in conjunction with DTS audio or MPEG audio There will be no sound output if connected to an AV amplifier with a built in DTS decoder or MPEG decoder HDMI to DVI adapter cable HDMI type A connector not supplied Audio cord not supplied HDMI cable type A connector not supplied To DVI Audi...

Page 39: ...th the screws on the plug In case of a Multimedia computer connect the audio cord to the audio output of your Multimedia computer and to the AUDIO connector of the PC HDMI AUDIO IN jack of the TV DVD You can also connect the PC with HDMI cable If you use HDMI cable you don t have to connect the audio cord If you use DVI to HDMI cable please connect audio cord as same way as VGA cable Press INPUT S...

Page 40: ...s normal when you adjust the CONTRAST or BRIGHTNESS settings Most types of television interference can be remedied by adjusting the height and position of the VHF UHF antenna Outdoor antennas are recommended for best results The most common types of television interference are shown below If one of these symptoms appear when the TV is connected to a Cable TV system the disturbance may be caused by...

Page 41: ... Cable TV connections reorient antenna Check for sources of possible interference 17 15 21 22 13 14 40 Picture wobbles or drifts Station or Cable TV experiencing problems tune to another station Make sure channels are set into memory Cable TV company is scrambling signal Check antenna orientation 17 15 13 No Cable TV reception Check all Cable TV connections Set Signal Type option to the Cable mode...

Page 42: ...t functioning Turn off the unit and unplug the AC power cord for several minutes then replug it 12 Playback does not start when the title is selected Check the Parental setup 34 35 Audio soundtrack and or subtitle language is not changed when you play back a DVD Multilingual language is not recorded on the DVD disc 31 32 No subtitle Some discs have no subtitles Subtitles are cleared Press SUBTITLE...

Page 43: ... V p p 75 ohms Audio RCA 8 dBm 50K ohms Component video Y 1 V p p 75 ohms PB PR 0 7 V p p 75 ohms HDMI HDMI compliant type A connector HDCP compliant E EDID compliant Suggested scan rates 1080i 480p 480i 720p HDMI Audio 2 channel PCM 32 44 1 48 kHz sampling frequency 16 20 24 bits per sample PC Monitor Mini Dsub 15pin x 1 Antenna VHF UHF In 75 ohms coaxial Outputs Digital audio out 0 5 Vp p 75 ohm...

Page 44: ...at the sole discretion of TTE based upon the TTE Limited Warranty statement At the sole discretion of TTE television screen sizes 32 and smaller is either consumer carry in to an Authorized RCA Service Center or directly exchanged for a new or refurbished remanufactured unit At the sole discretion of TTE television screen sizes 33 through 47 is either consumer carry in to an Authorized RCA Service...

Page 45: ...RCA CRT DV televisions are either consumer carry in to an Authorized RCA Service Centre or directly exchanged for a new or refurbished remanufactured unit At the sole discretion of TTE RCA LCD televisions are either consumer carry in to an Authorized RCA Service Centre directly exchanged for a new or refurbished remanufacture unit or provided in home service At the sole discretion of TTE RCA Sceni...

Page 46: ... Memo 52D0201A_EN indd 46 52D0201A_EN indd 46 6 12 09 1 44 47 PM 6 12 09 1 44 47 PM ...

Page 47: ... Memo 52D0201A_EN indd 47 52D0201A_EN indd 47 6 12 09 1 44 47 PM 6 12 09 1 44 47 PM ...

Page 48: ...er license to TTE Corporation Printed in Thailand Please do not send any products to the Indianapolis address listed in this manual or on the carton This will only add delays in service for your product Visit the RCA website at www rca com television J52D0201A SH 09 06 N 52D0201A_EN indd 48 52D0201A_EN indd 48 6 12 09 1 44 47 PM 6 12 09 1 44 47 PM ...

Reviews: