24
Lyra • jukebox
Side View
13. / VOLUME -
- Increases and decreases the volume level.
14. ON / OFF / Stop
- When the power is off, press and hold to turn on the unit.
When the unit is in stop mode, press to turn power off. When music is playing, press
to stop playback.
15. RESET -
Resets the unit.
Under some rare circumstances, the device might stop responding to key presses.
When this happens, you can recover the unit by inserting a sharp object (e.g. paper
clip) into the Reset hole, located on the left-hand-side of the unit.
Playback Controls
7.
Play / Pause
- When the unit is on, press to play and pause music.
8.
LIKE -
Puts the currently playing song into the
Like
playlist (active only during
playback).
9.
DISLIKE -
Puts the currently playing song into the
Dislike
playlist (active only during
playback).
10. NEXT -
When you’re playing music, press and release to skip forward to the next
song. To scan forward in the current song, press and hold.
11. PREVIOUS -
When you’re playing music, press and release to skip back to the
beginning of the song or the previous song. To scan backwards in the song that’s
playing, press and hold).
12. LCD (Liquid Crystal Display) -
This is where the Lyra’s user interface appears (go
to page 25 for an explanation of the items that appear on the LCD during playback).
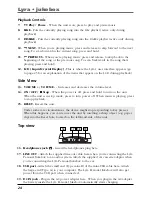
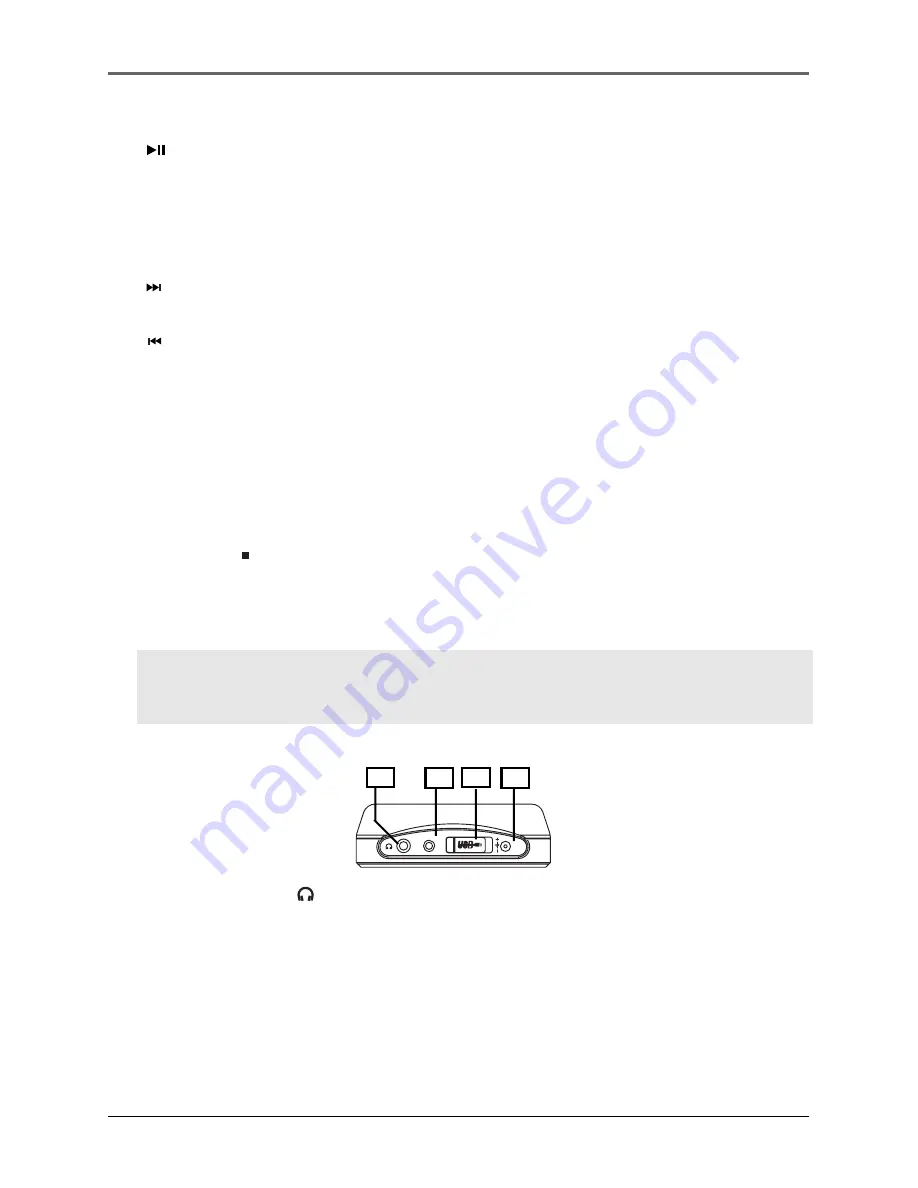
Top view
16. Headphones jack -
Insert the headphones plug here.
17. LINE OUT -
Attach the supplied line out cable here when you’re connecting the Lyra
Personal Jukebox to an audio system. Attach the supplied car cassette adaptor when
you’re connecting the Lyra Personal Jukebox to the car.
18. USB port -
Attach the small end (Type mini-B) of the mini-USB cable here. Attach
the large end (Type A) to your computer. The Lyra Personal Jukebox will also get
power from the USB port when connected.
19. DC IN jack -
Plug in the AC power adapter here. When you plug in the AC adapter,
the battery inside the Lyra Personal Jukebox automatically starts charging.
DC IN
5V
LINE OUT
16
17
18
19


