background image

Summary of Contents for P52753

Page 1: ...USER S r GUIDE qoq j _ C 0 ...

Page 2: ...al Code Part 1 which provides guidelines for proper grounding and in particular specifies that the cable ground shall be connected to the grounding system of the building as close to the point of cable entry as practical Mail Your Registration Card Today Record Vital Information Here A Product Registration Card is packedwith your set Please fill out the caid and return it immediately Your prompt s...

Page 3: ...em SRS 17 SETUP Menu General Instructions 18 Setting Closed Captioning 19 Setting the Sleep Timer 20 Setting the Alarm 21 Labeling Channels 22 Parental Control 23 Channel Memory Autoprogramming Channels 24 Channel Memory Erasing Adding Channels 24 Changing Antenna Input 25 Setting up VCR Channels 26 Setting up Cable Box Channel _ _ 27 Detailed Connections Tips to Read Before Connecting Components ...

Page 4: ...Details for connecting a cable TV system to your TV are on pages 31 Details for connecting a VCR to your TV are on pages 35 36 5 Attach power cord First attach the flat end of the power cord completely into the connector on the back of your TV and then plug the other end into a wall outlet 6 Turn on TV adjust the volume and select a channel Press the TV button on the remote to turn on the TV When ...

Page 5: ...epeatedly to select highlight the it Details begin on page 16 CHAN MEM function Select the desired channel number by _ _ pressing the CHAN up or downbutton or by pressing the two ll I corresponding number buttons I M Y Then press to add a channel or press to erase a channel Details are on page 24 8 Set the clock 1 Repeatedly press the MENU PROG button to select the SETUP MENU and then press Press ...

Page 6: ...til it snaps back together The operation of the remote will probably not be affected Installing Replacing Batteries 1 Turn the remote control face down 2 Press down on the ridged area of the battery cover and slide it off 3 Install four AAA batteries in the battery compartment as shown Make sure you insert the negative end of each battery first 4 Replace the cover and turn remote over face up Note...

Page 7: ...mponent first press its component button VCR1 VCR2oLD DSSoCABLE AUDIO or TV and then press the desired function button Note Not all components have functions that can be controlled by these buttons but you can experiment with your particular models to discover exactly which buttons will control it The TV button automatically controls your TV no additional programming is required_ Details for progr...

Page 8: ...control the TV again POWER Button PressPOWERto turnoff TV CHAN Buttons Press CHAN up to select the next higher channel in channel memory Press CHAN down to select the next lower channel in channel memory You can add or erase channels in memory as desired Details are on page 24 VOL Buttons Press VOL up to increase volume Press VOL down to decrease volume DISPLAY Button Displays time if clock hasbee...

Page 9: ...nna or signal source Press the ANTENNA button to switch from one input to the other The color of the channel numbers on the screen indicates which antenna input you are watching The channel numbers are blue for ANTA and yellow forANTB If the channel numbers are blue you are watching whatever is connected to the ANTA input on the back of your TV If the channel numbers are yellow you are watching wh...

Page 10: ...e volume The volume display wiU automatically appear on the screen when you press the VOL buttons _ 3 CH Channel Buttons Press CH up to see the next higher channel in memory Press CH down to see the next lower channel in memory You can add or erase channels in memory as desired Details are on page 24 _ MENU Button Press repeatedly until the menu you want to display is selected then press or Next p...

Page 11: ...V s channel number whenever you change channels or press the remote s TV or DISPLAY button When the channel numbers are blue you are watching the signals from the ANTA antenna input If you change the ANTENNA A B function to B the color of the channel numbers will change to yellow to let you know you are watching the signals from the ANTB input The word STEREO appears next to the channel number if ...

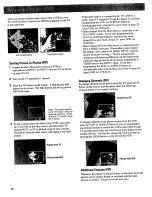
Page 12: ...VE x7 J How to make it work Press FREEZE once to freeze the TV picture The sound of the program will not be affected Press and hold ZM IN until desired zoom amount is reached Press and hold ZM OUT to reduce the zoom amount and return to normal size After you have zoomed in you can press the arrow buttons to move around the screen pan Note Sometimes you may want to freeze the picture first and then...

Page 13: ... little screen will display a stop action picture that will be continuously updated While the 12 channels are on the screen you can use the ZMOUT button to enlarge the picture and then use the arrow buttons to move around the screen To return to normal size press ZM OUT Note When using the zoom feature you will see a mosaic pattern as the picture is made larger To select one of the channels being ...

Page 14: ...ing differences in tint between the small and large picture by electronically coupling the S VIDEO input to the INPUT 1 inpuL If you have programmed the VCR1 or VCR2oLD button to automatically select channel 90 as described on page 24 press VCR1 or VCR2oLD Changing Channels PIP To change channels on the picture fromthe TV press the T_ button on the remote and then press either the CHAN up or down ...

Page 15: ... remove the little picture from the screen Press and hold one of the four arrow buttons to move the small picture in that direction You can move the small picture anywhere on the screen by pressing and holding the arrow buttons one at a time SWAP FREEZE A Repeatedly press ZM IN to enlarge the small picture Five sizes are available Repeatedly press ZM OUT to reduce the size of the small picture to ...

Page 16: ... button to display the pattern and VOL up or down to align the colors See next page for details Adjusting for a Color Picture that Pleases You 1 Decrease color to minimum This will leave a black and white image on the screen 2 Adjust contrast until the picture pleases you 3 Adjust brightness until the black partsof the picture appear black You may need to wait until the picture shows something you...

Page 17: ...een lines to produce single white lines 1 Turn on the TV and select a channel that is active in your area Allow the TV to operate at least ten minutes before converging 2 Repeatedly press the VIDEO button until the CONVERGENCE function is selected _ Olel ltrl 3 Then press the button to display the pattern lil B USE VOL TV TO EXIT 4 When properly converged all three colors in the pattern red blue a...

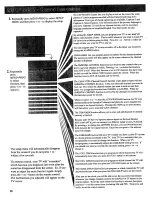
Page 18: ... offer the program in another language Your TV lets you know when SAPaudio is available by displaying an asterisk on the screen after the stereo indicator like this STEREO If you want to listen to the SAP channel when the asterisk appears change the STEREO SAP function to its SAP setting The SAP setting will only appear in the function when SAP is available Your TV will then reproduce the SAP audi...

Page 19: ...h quality external speakers optimizes the sound performance of your TV SRS Sound Retrieval Systcrn_ and the SRS logo o are iggistered trademarks of SRS Labs Inc Turning On SRS 0 1 Repeatedly press the MENU PROG button to select AUDIO MENU press and then repeatedly press MENUopROG again to select SRS ON OFF function Note You can also change the SRS ON OFF function between ON and OFF without going t...

Page 20: ...trol function works hand in hand with the PARENTAL CONTROL function It lets you select the channels you want to lock out First select the channel number you Want to lock out and then press to change this function from NORMAL to LOCKED When the PARENTAL CONTROL function is set to ON the channels you locked with this function cannot be viewed When you press or to start the AUTOPROGRAM function the T...

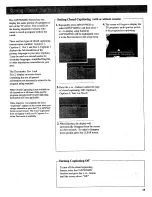
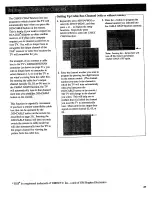
Page 21: ...ormation CC are applicable When Captions I is available the word Captioned appears on the screen when you ch mge channels or press the TV or DISPLAY button on the remote The word Captioned does not appear to tell you if Captions 2 or either Text mode is available Setting Closed Captioning with or without remote 1 Repeatedly press MENU PROG to select SETUP MENU and then press or to display setup fu...

Page 22: ...he TV to stay on Each time you press the or button the time will increase 30 minutes up to 4 hours Then the time display will start over The amount of time remaining before the TV shuts itself off will appear in the sleep timer menu whenever you display He SLEEP TIMER function I hour and 23 minutes remaining 3 When finished the display will automatically disappear from the screen in a few seconds ...

Page 23: ...ng until the word Press MENUopROG to select SET DISABLED appears ALARM function and then press or Note Remember to check the AM PM to display the alarm settings setting Midnight is 12 00AM and noon is 12 00PM 4 Press MENUopROG to select the next function called OFF TIME If you want the TV to turn off by itself enter the desired time by f LrSt pressing to select the hour including AM and PM and the...

Page 24: ...and function Four blank letter frames repeating steps 4 and 5 characters from which you ll be able will appear under the channel number to choose when programming the 7 When finished the display will channel labels automatically disappear from the A B C D E F G H I d K L M i screen in a few seconds_ Your N 0 P Q R S T U V W X Y Z labels will remain in memory until blank space you erasethem They ar...

Page 25: ...e instructions below will first tell you how to turn parental control on or off with the PARENTAL CTRL function and then how to lock desired channels with the CHAN CTRL function 1 Repeatedly press MENUopROG to select SETUP MENU and then press or to display setup functions Repeatedly press MENU PROG to select the PARENTAL CTRL function 2 To lock channels press the MENUopROG button to select the CHA...

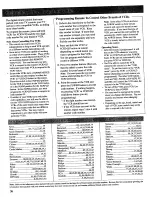
Page 26: ...te 1 Connecthome antenna s or cable TV to your set 2 After you have turned on the TV and adjusted the volume repeatedly press MENU PROG to select SETUP MENU and then press or to display the setup functions Repeatedly press MENU PROG to select the A UTOPROGRAM function 3 Press either or to begin autoprogramming The TV will fast program all channels for ANTA input and then programall channels for AN...

Page 27: ...TA input and one for ANT B input This allows you to add or delete channels into each channel memory as desired When you use the AUTOPROGRAM fimction the TV automatically c hecks both inputs and sets up a separate channel memory for each Changing Antenna Input with remote 1 Press the ANTENNA button on the remote control to switch from the ANTA input to the ANTB input The color of the channel number...

Page 28: ...Channels with or without remote 1 Repeatedly press MENU PROG to select SETUP MENU and then press or to display the setup functions Repeatedly press MENUopROG to select the VCR 1 CHAN function 4 If you have anotherVCR connected to the TV press MENUopROG to select the VCR 2 CHAN function 2 Enter the channel number you want to program by pressing two digit buttons on the remote control The channel nu...

Page 29: ...n on the remote as described on page 33 Pressing the DSS CABLE btttton Will then not only switch the remoteto cablelmode but will a s6 automatically tune the TV to the proper channel for viewing the picture from the cable box Setting Up Cable Box Channel with or without remote 1 Repeatedly press MENUopROG to select the SETUP MENU and then press or to display the setup functions Repeatedly Press ME...

Page 30: ...n the component s power button is switched off If the outlet is labeled unswitched that means power will always be available at that outlet even when the component is turned off Depending on the size of your system you may prefer to use an extension cord or a multiple adapter to get enough outlets for all your components The power cords on your RCA components are polarized one blade is wider than ...

Page 31: ...een during recording Videosignals from the S VIDEO connector can not be recorded from the SELECT OUT VIDEOjack To record from an S VHS component connected to the S VIDEO connector you must also connect the video cable to the VIDEOINPUT1 jack andthen select channel 91 on the TV screen On screen displays such as menus and status displays can not be recorded from thisjack Special features such as pic...

Page 32: ...VHF or UHF Only or VHF UHF Combination Antenna Adap_ such as RCA 193983 _ _ I _ Push on F ANTA BACK ANTB _ OFTV CONVERTER OR If the antenna cables coming from your home antenna s are a 75 ohm round coaxial cable that carries VHF channels 2 13 and a 300 ohm flat twin lead cable for UHF channels 14 69 connect them to your set like this Incoming UHF Cables From I_ and Home Antenna s VHF Ant no M xor ...

Page 33: ...m if your cable company requires a converter decoder box that cannot be controlled by remote control Scrambled Cable TV Channels Some cable TV decoders require that you manually switch from regular to scrambled channels on the decoder whenever you wish to view the premium pay channels By connecting the decoder to the ANTA input and CONVERTER output on the TV as shown here you can switch between th...

Page 34: ...led can then be seen whenever the TV is receiving the ANTA signals The cable TV channels that are scrambled can then be seen thru the converter box and l_aenthru the VCR whenever the TV is receiving the ANT B signals Most VCRs will feed the signal thru their antenna jacks even when the VCR is turned off This allows you to watch scraJnbled channels from the converter box without having to turn on t...

Page 35: ...the right number was entered the cable box should turn on Pressing the CHAN buttons should then also change channels on the cable box If the cable box does not react to the remote or if the remote turns on the cable box but does not change channels repeat steps 1 thru 4 with another code number Operating Notes After the remote is programmed it will turn on the cable box whenever you press DSSoCABL...

Page 36: ...f a descrambler device cable box which is generally provided by the cable company How you connect the cable box to your TV depends upon whether or not the cable box can be controlled by remote control The TV s remote can also control most brands of cable boxes so if your cable box is remote controllable you may want to connect it as shown in Diagram B on page 31 Instructions for programming the TV...

Page 37: ...ing a 2 way signal splitter is shown above Note The audio video connections from the VCR to the TV are optional however these additional connections usually produce a better quality picture during VCR playback These connections are required however for stereo playback from stereo VCRs and for picture in picture operation Optional accessories are available from most RCA dealers and electronics supp...

Page 38: ...connector do not come thru the SELECT OUTjacks Torecord from an S Videocomponent remember to also connect the regular videocable to the VIDEO INPUT I jack and then tune to channel 91 You willnot be able to record the picture in picture inset picture or any of the menus or status displays S VHS Super VHS VCR This connection allows you to record TV programs and play back tapes Incoming Cable Back of...

Page 39: ... the remote is in the TV Mode The ANTENNA MENUopROG CLEAR and D1SPLAYbuttons are for RCA VCRs only VCR1 and VCR2 LD Buttons Press to turn on VCR and put remote in VCR Mode Press the TV button to put remote back into TV Mode POWER Button Press to turn off VCR REW Rewind Button Press while VCR is stopped to rewind tape Press while VCR is playing to search backward PLAY Button Press to start tape pla...

Page 40: ...and off remotely If you have this type of VCR you can test the code number by pressing the CHAN button instead of the POWER button Make sure the VCR is already turned on when you test the code number Operating Notes_ After the remote is programmed it will turnon the VCR whenever you press VCR1 or VCR2 LD and then POWER Some VCRs turn on automatically when you press VCR1 or VCR2 LD You ll be able t...

Page 41: ...UT 1 audio jack select channel 90 on the TV to view whatever the camcorder is playing S VHS or Standard VHS Camcorder This connection allows you to record onto the camcorder whatever is currently being displayed on the TV screen AV IN Jack Audio Video In Audio Audio Video Input Cable usually supplied with camcorder Back of TV Video This connection will let you record onto the camcorder whatever is...

Page 42: ...jacks on the TV as shown here If the computer or other device has monaural audio output only one A UDIO OUT jack instead of L and R connect it to the TV s R MONO jack This will enable the TV to reproduce the sound through both the left and right speakers To View Signals From Computer If you connected the computer to the TV s INPUT 1 jacks select channel 91 on the TV so you can see whatever signal ...

Page 43: ...escribed on page 16 Adjust the amplifier for normal listening Then control sound with the VOL and MUTE buttons on the TV s remote AudioNideo Cables CASSETTE RECORDER such as RCA AH069G OR AMPLIFIER STEREO m m If your stereo amplifier is part of a system that has its own remote control connect it to the SELECT OUT jacks as shown here The fixed level audio signal present at these jacks is also ideal...

Page 44: ...ment Depending on the age brand model and type of audio equipment some models may not be able to respond to all the function buttons listed below YOUwill want to experiment with each button to determine the exact function for your component POWER Press to turn on component Press again to turn off Some components will turn on automatically when you press this button VOL Press to change volume level...

Page 45: ...es broadcast or tape give the best surround effect but regular stereo and mono programs will also benefit Connecting Speakers to Back of Amplifier or Receiver If you connect an Amplifier or Receiver to your TV connect the speakers to the Amplifier Receiver instead of the TV Sound from the TV will then come through the Amplifier Receiver and the TV s internal speakers You can turn off the TV s inte...

Page 46: ... components farther apart or need additional cables Antenna Cables Screw on Antenna Cable Attaches to the round antenna connectors called 75 ohm F type on the back of your VCR or TV The ends screw onto the connectors for a secure connection Push on Antenna Cable Attaches to the round antenna connectors called 75 ohm F type on the back of your VCR or TV Ends push on for a quick connection Gold Tipp...

Page 47: ...AH075G 10 99 Gold Tipped Dubbing Cable 6 ft AH077G 14 99 VCR Connection Kit AVH500 32 95 S Video Cable 8 ft VAA020 29 95 Replacement Power Cor d 5 1 2 ft 187802 10 15 Antenna Adapter 193983 6 95 Antenna Mixer 193984 10 73 Antenna Mixer 197551 10 95 Replacement Remote Control CRKTOG1 225841 41 00 Simple Touch TM Remote 206800 38 15 Prices are subject to change without notice Total Merchandise 10 Mi...

Page 48: ...order for accessory items listed on this order form 1 800 338 0376 Most times your order will be shipped UPS within 72 hours of receipt If ever it is not possible to ship within 30 days we will notify you with an update on your order and an option to cancel To place your order by mail detach and mail the completed order form with credit card information money order or check in U S currency mlide p...

Page 49: ...first pressing the TV button Try unplugging set for two minutes and then turning it on again Make sure power cord is fully inserted into back of TV Maybe something is between the remote and the remote sensor Maybe the remote is not aimed directly at the component TV or VCR you are trying to control Maybe remote is not in TV Mode Press the TV button so remote will control TV Maybe batteries in remo...

Page 50: ... channels in Pix in Pix I Try another channel Try adjusting VOLUME BASS and TREBLE controls If station is sending stereo try changing STEREO SAP function to MONO setting for clearer sound Try adjusting SRS O controls to turn SRS O offor on Make sure STEREO SAP function is in STEREO mode If using the VCR1 or VCR2oLD button make sure it is programmed to select the proper video input channel as descr...

Page 51: ...Noclosed captioning Blackbarsappear onthescreen Turn on the CAPTIONING function TV program does not have closed captioning Turn off the CAPTIONING function 49 ...

Page 52: ...ous using furniture polishwill martheirappearance They canbeeasily cleaned withadamp softcloth Toclean thescreen youcanwipeit withadamp soft cloth A verydiluted mildsoap canbeused onthe screen if it isextremely dirty Youcanalsouseanon abrasive glass cleaner likeWindex orGlass Plus witha softcloth Besuretoapplycleaner to acloth Donotput cleaner directlyonthescreen Donotusestrong cleaners polishes o...

Page 53: ...wner s Manual clearly describes how to insl all adjust and operate your television Any additional information should be obtained from your Dealer Installation and related adjustments Signal reception problems not caused by your television Damage from misuse or neglect Remote control batteries A television that has been modified or incorporated into other products or is used for institutional or ot...

Page 54: ... Labels 22 EXTERNAL SPEAKERS Terminals 43 FF Fast Forward Button 37 7 10 13 FREEZE Button _ 52 Front Panel Controls 8 5 Function Buttons HI FI OUT Jacks _ 29 41 Home Antenna i_ INPUT Button 7 4 Installing Batteries 9_t Interference Labeling Channels 22 Last Function Memory i 14 16 18 Locking Out Channels 23 Memory Channel 18 24 26 MENU PROG Button 2 3 7 8 Mode TV _ 6 12 1 29 Monitor Pane MONO Posi...

Page 55: ...y Remote Control 6 Time DisPlay 9 TINT Adjustment I4 TREBLE Function 16 Trouble Checks 47 49 TV Button 2 5 6 12 TV Mode 6 12 VCR 1 CHAN Function 18 26 VCR 2 CHAN Function 18 26 VCR Channel Setup 26 VCR Connections 35 36 VCR Mode_ 37 VCRlt Button 5 26 37 VCR2oLD Button 5 26 37 VIDEO MENU 3 14 Video Game Caution 1 Video Input Channels 24 29 34 35 36 38 VOL Volume Buttons 2 6 8 Warranty 51 Warr mty R...

Page 56: ...manufacturing operations The key benefit of these new paints is to significantly reduce air pollution _Pnomson Consumer Electronics remains committed to improving our manufacturing process through changes like these to help our environment At Thomson on going efforts to maintain our valuable _tural resources will continue to be a priority If your TV needs service please contact your dealer or the ...

Reviews: