4
Copyright © 2020 RCA Communications Systems
www.RCACommunicationsSystems.com
Communications Systems
RDR43x0-IS Series Professional
Digital Two-Way Radios
INSTRUCTION MANUAL
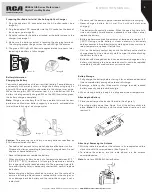
Attaching / Removing the Belt Clip
Using a small screwdriver, align the belt clip’s screw holes to the
radio’s chassis. Attach by turning the screws clockwise into the belt
clip’s screw holes. Remove by doing the reverse. (See Figure 4)
Programmable Buttons
Your RCA Communications Systems Dealer can program the
programmable buttons as shortcuts to radio functions or preset
channels/groups depending on the duration of a button press:
Short Press
- Press and release quickly.
Long Press
- Press and hold for the programmed duration (between 1
seconds and 3.75 seconds).
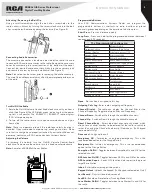
Connecting Audio Accessories
The accessory connector is located on the side of the radio. It is used
to connect RCA audio accessories to the radio. Remove the accessory
cover by unscrewing the screw location at the bottom of the cover.
Connect the desired audio accessory firmly into the accessory jack
and secure the screw by turning it clockwise. (See Figure 5)
Note:
Please loosen the screw prior to removing the audio accessory.
The use of the audio accessory may affect the waterproof performance
of the radio.
None
- No function is assigned to this key.
Outgoing Calls Log
- Enter radio’s outgoing call log menu.
Channel Display
- The radio can display the Channel Alias or the
Channel Frequency. Toggles between Alias and Frequency.
Channel Down
- Switches Up through the available channels.
Channel Up
- Switches Down through the available channels.
Direct Channel Entry
- Enters the direct channel entry mode, which
allows for a channel number to be entered for the radio to switch to
rather than using the Channel Knob or Up / Down keys. (Full Keypad
radio models Only!)
Disconnect
- hangs up the call.
Emergency Off
- Terminates an outgoing emergency. This is the
recommended option for the Orange Button.
Emergency On
- Initiates an emergency. This is the recommended
option for the Orange Button.
Encryption On/Off
- Toggles between Encryption On and Off for the
selected channel.
GPS Location On/Off
- Toggles between GPS On and Off for the radio.
GPS Location Report
- Sends GPS location data report to the preset
target Base Station.
Inbox
- Enter radio’s messages inbox menu.
Keypad Unlock
- Unlocks the keypad. (Full Keypad radio models Only!)
Last Record
- Plays last recorded voice call.
Lock BS
- Enable cell reselection (Trunking Mode Only)
Lone Worker On/Off
- Toggles between Lone Worker On and Off for
the radio.
4
5
Turn On/Off the Radio
1. Rotate the On/Off/Volume Control Knob clockwise until you hear a
click. (See Figure 6) The LED blinks green, indicating that the power
up test is successful. The RDR4360™ / RDR4390™ radio displays
“RCA” after powering on.
2. To turn off the radio, rotate this knob counterclockwise until you
hear a click.
Note:
There is no power up tone if the radio tones/alerts function is
disabled. If your radio does not power up, check your battery. Make
sure that it is charged and properly attached. If your radio still does not
power up, contact your RCA Communications Systems dealer.
Adjusting the Volume
To increase the volume, turn the On/Off/ Volume Control Knob
clockwise. To decrease the volume, turn this knob counterclockwise.
Note:
Same for all RDR43x0 Series Radios.
6
The Programmable Functions are:
None
Monitor On/Off
Outgoing Call Log
Nuisance Temp Delete
Channel Display
One Touch Access 1~15
Channel Down
Power Low/High
Channel Up
Alerts/Tones Profiles
Direct Channel Entry
Public Address On/Off
Disconnect
Radio Mode Toggle Switch
Emergency Off
Record Playback
Emergency On
Scan On/Off
Encryption On/Off
Speaker Setting
GPS Location On/Off
Status Message
GPS Location Report
TalkAround
Inbox
Text Message
Keypad Unlock
Unblock BS
Last Record
Voice Broadcast
Lock BS
Zone Down
Lone Worker On/Off
Zone Toggle Switch
Man Down On/Off
Zone Up


