


13
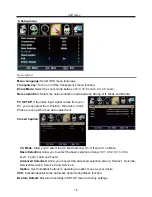
Description
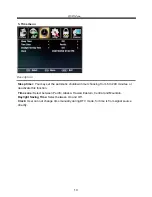
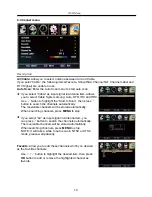
3. Time menu
Sleep timer:
You may set the automatic shutdown timer choosing from 5 to 240 minutes, or
deactivate this function.
Time zone:
Select between Pacific, Alaska, Hawaii, Eastern, Central and Mountain.
Daylight Saving Time:
Select between On and Off.
Clock:
User can not change time manually during DTV mode, for time is from signal source
directly.
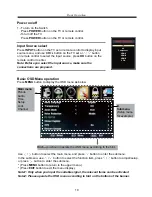
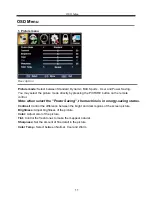
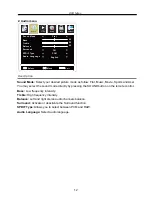
OSD Menu


