background image

EN

7

CD Player

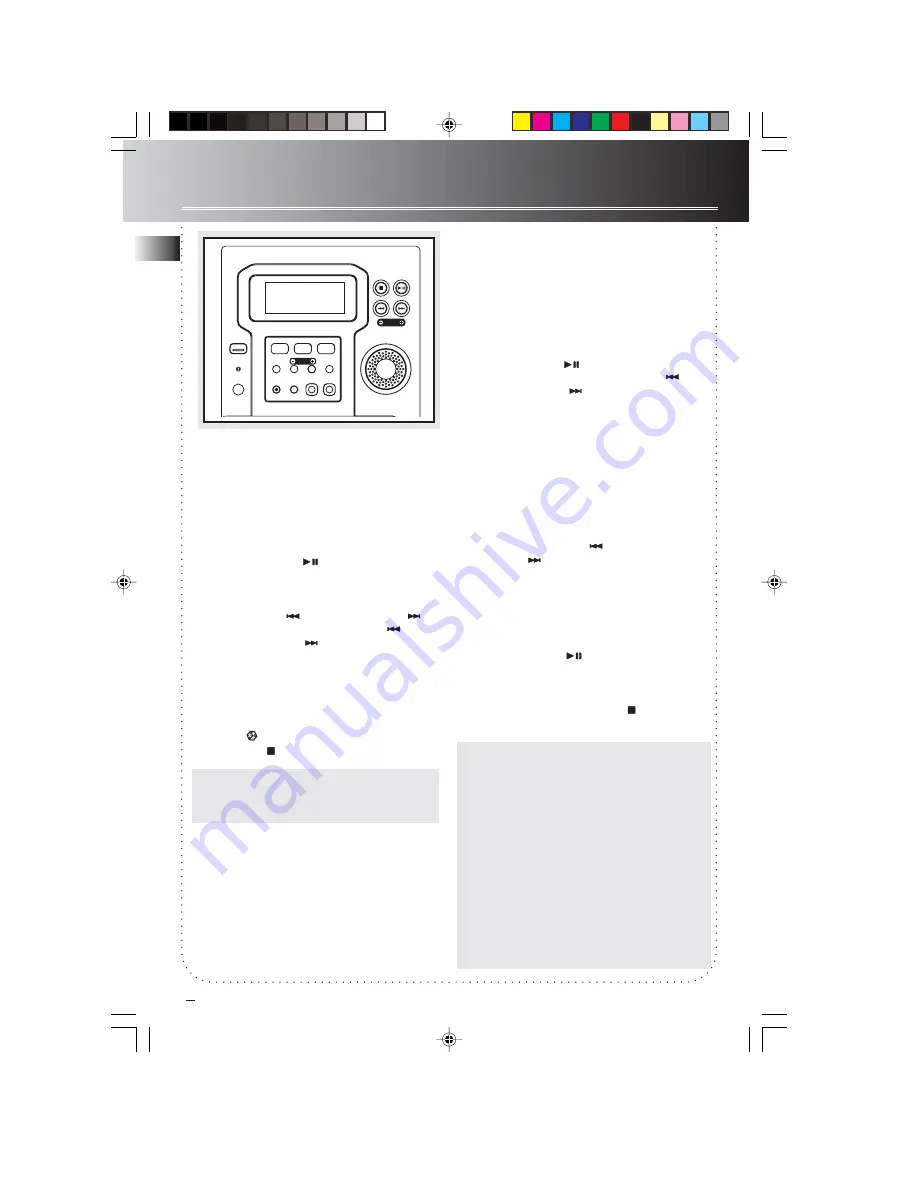
Loading and Playing CDs

1. Push lightly to open the CD door.  Load a CD

(with labeled side facing up) into the CD
compartment.  Then, close the door by pushing
it down lightly.

2. Press 

CD 

to select CD mode and the power will

be turned on automatically.

3. Press 

PLAY/PAUSE

 to play and pause CD

playback.

   You may:

• skip to other tracks by pressing 

SKIP

BACKWARD       

or 

SKIP FORWARD     .

Press and hold

 SKIP BACKWARD      

or

SKIP FORWARD      

to search.

• press 

REPEAT1•ALL

 on the remote control

once to repeat all tracks.  

REPEAT

 is shown

in the display simultaneously.  Press again to
play a particular track repeatedly, at the
same time, 

REPEAT 1

 is displayed.  Press a

third time to de-select the function.

• Press     to listen to the tracks randomly.

4. Press 

STOP   

 to stop playback.

Tip: 

Tip: 

Tip: 

Tip: 

Tip: 

If the CD compartment is not loaded with

 a CD or the CD is unreadable, the message
 “

NO DISC

NO DISC

NO DISC

NO DISC

NO DISC

” will be shown.

Setting Intro Play

Intro Play lets you enjoy the CD tracks for 10
seconds.  When the last track has played for 10
seconds, the Intro Play stops.
1. Follow step 2 and 3 of “Loading and Playing

CDs” above.

2. Press 

INTRO

 on the remote control and the

INTRO


icon will be shown.

3. Press 

PLAY/PAUSE

       to start playback from

the first track.  Press 

SKIP BACKWARD

or 

SKIP FORWARD      

to select a particular

track.

4. Press 

INTRO

 again to exit intro play.

Programming

1. Select CD mode by pressing 

CD

.

2. Press 

PROG./SET/CLEAR 

after the CD has been

loaded into the system. The message 

“0 PR 1”

will be shown on the display and PROG.
flashes.

3. Press 

SKIP BACKWARD     

 or 

SKIP

FORWARD     

 to select a track to be stored

into memory location 1.

4. Press 

PROG./SET/CLEAR 

to confirm your

selection and store that track into memory.
Repeat step 3 and this step to store additional
tracks.  A maximum of 20 tracks can be stored
into memory.

5. Press 

PLAY/PAUSE

         to run the preset

program.  When the unit is playing the
program, 

“PROG”

 icon will be displayed.

6. Press 

PROG./SET/CLEAR 

in CD programming

mode and press and hold 

STOP     

to clear the

stored program.

Notes to CD-R/RW

This unit is compatible with CD-RW/ CD-R discs
for playback.
•  Do not affix any type of labels to either side

(recordable or labeled side) of a CD-R/RW disc
as this may result in the unit malfunctioning.

•  To avoid damages to the CD-R/RW disc, do not

open the disc compartment door while the
disc is being read.

•  Do not load an unrecorded CD-R/RW disc into

the unit. This may take a longer time to read
the disc.

•  

Playback capability for CD-RW discs may

vary due to variations in the quality of
the CD-RW disc and the recorder used to
create the disc.

POWER/

STAND-BY

DIGITAL PLL  SYNTHESIZED  TUNER

MULTI FUNCTION LCD DISPLAY

TUNING

CLOCK/

TIMER

BAND•APP

ST•MONO

REC•

II

IR SENSOR

PROG/

SET/CLEAR

EQ

X-BASS

PRESET

V O

L U ME

C O

N T R OL

TUNER

T APE

CD

TIMER

RS2001 EN

7/23/02, 3:48 PM

12

Summary of Contents for RS2001

Page 1: ...EN RS2001 EN 7 23 02 3 48 PM 1 ...

Page 2: ... s Registrada s Marque s Deposée s 55305520 EN F E www rca com www rca com LatinAmerica Printed In China Impreso en China IMPORTADOR Comercializadora Thomson de México S A de C V Miguel de Cervantes Saavedra 57 Col Ampliación Granada C P 11529 Mexico D F Telefono 55 25 81 53 20 RFC CTM 980723 KS5 0151 RS2001 EN 7 23 02 3 48 PM 2 ...

Page 3: ...eer este manual antes de usar por vez primera su euipo DIGIT AL LOGIC DECK POWER STAND BY DIGITAL PLL SYNTHESIZED TUNER MULTI FUNCTION LCD DISPLA Y TUNING CLOCK TIMER BAND APP ST MONO REC II IR SENSOR PROG SET CLEAR EQ X BASS PRESET VOL U ME CON T R OL TUNER TAPE CD TIMER PLAYBACK RECORD OPEN CLOSE RS2001 RS2001 EN 7 23 02 3 48 PM 3 ...

Page 4: ...Government Printing Office Washington DC 20402 Please specify stock number 004 000 00345 4 when ordering copies This product complies with DHHS Rules 21 CFR Subchapter J Applicable at the date of manufacture For Your Safety The AC power plug is polarized one blade is wider than the other and only fits into AC power outlets one way If the plug won t go into the outlet completely turn the plug over ...

Page 5: ...ithout prior notice The English version serves as the final reference on all product and operational details should any discrepancies arise in other languages For Your Records In the event that service should be required you may need both the model number and the serial number In the space below record the date and place of purchase and the serial number Model No Date of Purchase Place of Purchase...

Page 6: ... unit Connecting the Speakers When connecting the speakers match the red wires to the red jacks and the black wires to the black jacks Each speaker has a black and a red jack one for positive and one for negative The top two jacks are for the left speaker while the bottom two jacks are for the right speaker Release tab to lock wire in the terminal NOTE Make sure the insulation is completely remove...

Page 7: ... classic rock pop jazz X BASS Enables disables X Bass PLAY PAUSE In CD mode Plays and pauses CD playback In Tape mode Plays and pauses tape playback STOP In CD mode Stops CD playback In Tape mode Stops tape playback TUNING SKIP BACKWARD SKIP FORWARD In CD mode skips backward or forward to the other tracks In Tape mode Rewinds or fast forwards tape In tuner mode searches down or up radio frequency ...

Page 8: ...tereo and mono mode in FM tuner STOP Stops CD and tape playback TIMER ON OFF Enables and disables timer DISPLAY In CD mode toggles among displaying track elapse time track remain time and disc remain time SHUFFLE Selects random playback in CD mode REC PAUSE Starts recording or pause recording INTRO Selects Intro play in CD mode Installing Batteries The remote control must be inserted with 2 AAA or...

Page 9: ... and minute 11 Press PROG SET CLEAR to confirm settings Timer will be activated automatically after settings are finished Activating the Timer Press TIMER ON OFF on the remote control or press and hold CLOCK TIMER on the main unit for 2 seconds to activate and deactivate the timer function If clock time is not set SET CLK will flash on the display when you try to activate the timer Follow instruct...

Page 10: ...ontrol to select band 2 Press TUNING or on the main unit or TUNE CD or on the remote control to select station to be stored 3 Press PROG SET CLEAR to enter program mode 4 Press PRESET or to select memory location up to 30 memory locations When you are selecting the preset location the preset station number is flashing 5 Press PROG SET CLEAR to confirm the setting Auto Preset Programming Press and ...

Page 11: ...C II again to start recording 4 Press STOP to stop recording Press REC II to pause during recording To resume recording press again Recording a CD 1 Press CD to select CD mode 2 Press SKIP BACKWARD or SKIP FORWARD to select the track that you want to record 3 Press REC II on the main unit or on the remote control to record The REC icon will flash on the display Press REC II or again to start recor...

Page 12: ... track 4 Press INTRO again to exit intro play Programming 1 Select CD mode by pressing CD 2 Press PROG SET CLEAR after the CD has been loaded into the system The message 0 PR 1 will be shown on the display and PROG flashes 3 Press SKIP BACKWARD or SKIP FORWARD to select a track to be stored into memory location 1 4 Press PROG SET CLEAR to confirm your selection and store that track into memory Rep...

Page 13: ...not on Check that CD function is selected Use CD lens cleaner Clean the disc Clean the disc Check disc for warping scratches or other damage Check if something is causing the system to vibrate If so move the system Make sure the speakers are at least 3 feet away or on a different surface from the main unit Problem CD button will not respond or does not change discs when you press DISC SKIP Distort...

Page 14: ...p before you insert it Handling CDs Do not touch the signal surfaces Hold CDs by the edges or by one edge and the hole Do not affix labels or adhesive tapes to the label surfaces Do not scratch or damage the label CDs rotate at high speeds inside the player Do not use damaged cracked or warped CDs Cleaning CDs Dirty CDs can cause poor sound quality Always keep CDs clean by wiping them gently with ...

Page 15: ...designed to let you to hear outside sounds do not turn up the volume so high that you are unable to hear what is around you Important Battery Information Remove the batteries to avoid leakage if you do not use your remote control for more than one month Discard leaky batteries immediately as leaking batteries may cause skin burns or other personal injuries Dispose of batteries in the proper manner...

Page 16: ... completed Proof of purchase in the form of a bill of sale or receipted invoice which is evidence that the product is within the warranty period must be presented to obtain warranty service For rental firms proof of first rental is also required What your warranty does not cover Customer instruction Your Owner s Manual describes how to install adjust and operate your unit Any additional informatio...

Page 17: ... AND LIMITED WARRANTY ARE GOVERNED BY THE LAWS OF THE STATE OF INDIANA EXCEPT TO THE EXTENT PROHIBITED BY APPLICABLE LAW ANY IMPLIED WARRANTY OF MERCHANTABILITY OR FITNESS FOR A PARTICULAR PURPOSE ON THIS PRODUCT IS LIMITED TO THE APPLICABLE WARRANTY PERIOD SET FORTH ABOVE How State Law relates to warranty Some states do not allow the exclusion nor limitation of incidental or consequential damages...

Page 18: ...s are completed Proof of purchase in the form of a bill of sale or receipted invoice which is evidence that the product is within the warranty period must be presented to obtain warranty service For rental firms proof of first rental is also required What your warranty does not cover Customer instruction Your Owner s Manual describes how to install adjust and operate your unit Any additional infor...

Page 19: ... EXCEPT TO THE EXTENT PROHIBITED BY APPLICABLE PROVINCIAL LAW ANY IMPLIED WARRANTY OF MERCHANTABILITY OR FITNESS FOR A PARTICULAR PURPOSE ON THIS PRODUCT IS LIMITED TO THE APPLICABLE WARRANTY PERIOD SET FORTH ABOVE How Provincial Laws relates to warranty This warranty gives you specific legal rights which are in addition to statutory warranties that may vary from Province to Province If you purcha...

Reviews: