Radio
This unit has a built-in digital-tuning FM radio.
Manual tuning
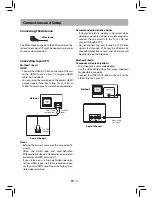
1. Connect the FM antenna at the back of the unit.
2. Press
TUNER
button.
3. Tune a station by pressing
TUNE
/
buttons
repeatedly until the desired station is found.
Alternatively, you can press and hold the same
button down for about two seconds to activate
the automatic search function. In this mode the
unit will automatically tune frequencies until it
fi nds a station.
4. Repeat step 3 to tune to another radio station.
Automatic preset programming
1. Press
TUNER
button to enter Tuner mode.
2. Press and hold
MEM/ANGLE
button for two
seconds to start automatic preset programming.
3. Radio frequencies will be scanned and stored
automatically. When all the available radio
stations are stored or all 30 FM memory locations
are full, the auto preset programming function
will stop.
Manual preset
1. Tune to a radio station (see
Manual tuning
for
details).
2. Press
MEM/ANGLE
button, and input your
desired preset number using the numeric
buttons, then press
MEM/ANGLE
button to store
it.
Retrieving preset stations
1. Press
TUNER
button to enter the Tuner mode.
2. Press
/
buttons to search up or down for
the preset stations or directly press the numeric
buttons.
Tips:
• When a strong FM signal is tuned,
ST
is
displayed.
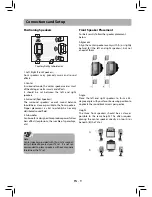
• If there is any interference, change the
antenna’s position until ideal sound
reception is obtained. TV and other
electronic devices could be the cause
of interference, so try to position the
antenna away from them.
• A weak signal can aff ect the
Automatic
preset programming
function’s
effi
ciency. Adjust the antenna for better
reception and a more effi
cient search.
AUX/OPTICAL
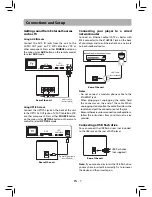
You can connect Audio or Audio-Video devices
such as a TV, Game System, VCR, Satellite or Cable
Box to this unit using the AUX IN jack or OPTICAL
jack at the back of the unit. The AUX input provides
an analog audio connection especially suitable for
older devices. This unit will take the audio from the
connected device and play the audio through the
speakers.
The OPTICAL input provides a digital connection
suitable for components that can output dolby
digital surround sound audio.
Connecting auxiliary components
Refer to
Connecting sound from External Sources
such as TV
for details on connecting the auxiliary
components to the unit.
Selecting AUX/OPTICAL mode
Press either
SOURCE
button on the main unit or
AUX button or OPTICAL button on the remote
control to select AUX or OPTICAL mode.
Sound output in AUX/OPTICAL mode
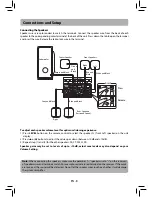
• You may change the Surround Sound setting
to STEREO mode if you like (see instructions
under
Overview of Controls
).
However, we
recommend you leave the system in full
surround mode (5.1 CH)
.
EN - 16

