4
Chapter 1
Chapter 1: Connections and Setup
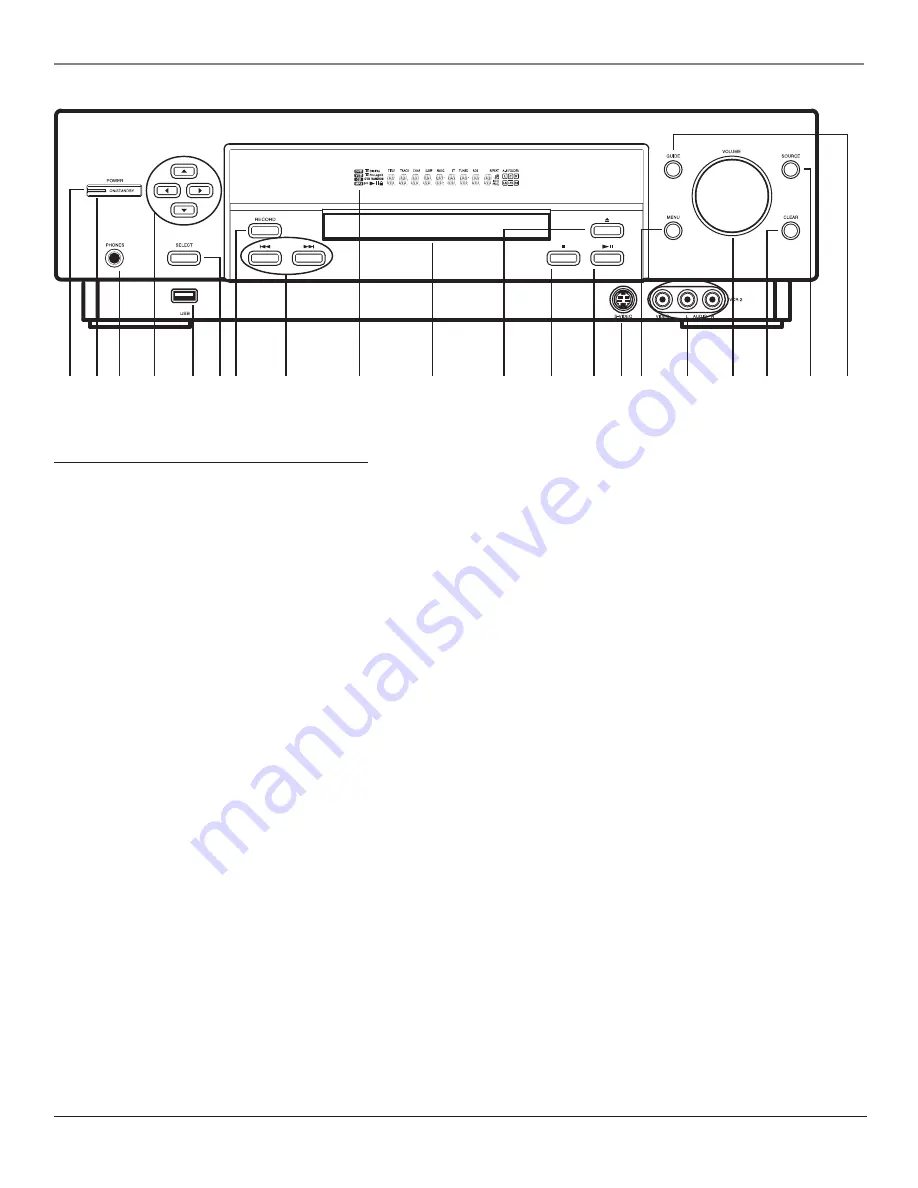
Front of the Home Theater Music Jukebox
1.
POWER indicator
— Indicates when the unit is on or in standby.
2.
POWER
— Toggles the unit between on and standby.
3.
PHONES jack
— Allows you to connect headphones for private listening.
4.
Arrow buttons
— Move the on-screen highlight.
5.
USB jack
— Allows you to connect a keyboard or Lyra portable mp3 player or some USB keyboards.
6.
SELECT
— Selects menu choices when they are highlighted.
7.
RECORD
— Starts recording MP3s.
8.
Reverse and Forward buttons
— Search forward or backward during playback. Press and hold to skip audio tracks and movie chapters.
9.
Display
10.
Disc tray
11.
Open/Close
— Opens and closes the disc tray.
12.
Stop
— Stops the current function (record, play, etc.).
13.
Play / Pause
— Plays or pauses playback.
14.
VCR2 S-Video input jack
— Allows you to connect an S-video component.
15.
MENU
— Displays the on-screen menu system.
16.
VCR2 audio/video input jacks
— Allows you to connect an external audio or video component, such as a camcorder or video game system.
17.
VOLUME
— Raises and lowers the volume of the speakers.
18.
CLEAR
— Removes any menu or display from the screen and returns you to normal viewing. Also clears on-screen menu item entries.
19.
SOURCE
— Toggles between the available input sources (VCR, satellite, aux, etc.).
20.
GUIDE
— Toggles between the guide and player screens in Music, Movie, or Radio Modes.
1 2 3 4
5 6 7
8
11 12 13 14 15
17 18 19
16
20
9
10


