53
appendix a: reference
Troubleshooting Tips
No power
•
Check to make sure it is plugged into an operating outlet.
•
Check to make sure your connections are correct.
VCR does not respond to remote
•
Press VCR to set remote to control the VCR.
•
Check to make sure there are no objects between the VCR and remote.
•
The batteries may need changing.
•
Make sure the Remote VCR1/VCR2 setting is set to VCR1 so the remote that came packed with your VCR
can operate it.
•
Remove batteries and hold number button 1 for at least 60 seconds to drain the microprocessor inside
the remote. Release number 1 and replace the batteries.
•
Remove all batteries for approximately 12 hours. Then replace batteries.
Remote no longer controls an RCA, ProScan, or GE TV
•
Press TV to set remote to control a compatible TV.
•
Check to make sure the remote is programmed to control an RCA, ProScan, or GE TV.
Remote no longer controls a compatible TV
•
Press TV to set remote to control the compatible TV.
•
Check to make sure there are no objects between the component and remote.
•
The batteries may need changing.
•
Reprogram remote after batteries have been changed.
•
Remove batteries and hold number button 1 for at least 60 seconds to drain the microprocessor inside
the remote. Release number 1, replace the batteries, and (if necessary) reprogram the remote.
•
Remove all batteries for approximately 12 hours. Then replace batteries and (if necessary) reprogram the
remote.
Poor or no picture for normal TV viewing
•
Check to make sure the VCR indicator is off.
•
Check to make sure the TV is switched to an active channel.
•
Check to make sure the antenna connections are secure and correct.
Snowy or no picture during playback
•
Press TV•VCR to turn VCR indicator on.
•
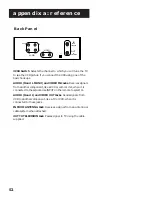
Check TV channel selected (3 or 4) to make sure it matches the channel selected with 3CH4 switch on
back of VCR.
•
Check to make sure the TV’s fine tuning is correct for the channel you have selected.
•
Check video cable connections between VCR and TV monitor.
•
Check to make sure the TV monitor is set to video input.
Summary of Contents for VR615HF
Page 1: ...video cassette recorder user s guide VR615HF ...
Page 24: ......
Page 36: ......
Page 44: ......

