Chapter 2
23
Using On-Screen Menus
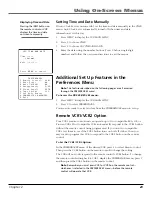
Setting Time and Date Manually
If Auto Clock Set was unsuccessful, set the time and date manually in the
TIME
menu. Auto Clock Set is automatically turned off when time and date
information is set this way.
1.
Press MENU to display the
VCR MAIN MENU
.
2.
Press 3 to choose
TIME
.
3.
Press 1 to choose
SET TIME AND DATE
.
4.
Enter the data using the number buttons. Press 0 before single-digit
numbers and follow the on-screen directions to exit the menus.
Additional Set Up Features in the
Preferences Menu
Note
: The features described on the following pages are all accessed
through the PREFERENCES menu.
To Access the
PREFERENCES
menu:
1.
Press MENU to display the
VCR MAIN MENU
.
2.
Press 6 to select
PREFERENCES
.
You are now ready to select an item from the
PREFERENCES
menu to set up.
Remote VCR1/VCR2 Option
Your VCR’s remote control unit can operate up to two compatible RCA, GE, or
Proscan VCRs. Most compatible VCRs automatically respond to the VCR1 button
without the remote control being programmed. If you own two compatible
VCRs, test them to see if the VCR1 button turns on both. If it does, then you
may want to program this VCR to respond to the VCR2 button on the remote
control.
To Set the VCR1/VCR2 Option:
In the
PREFERENCES
menu of the desired VCR, press 1 to select
Remote Control
.
Then press the VCR2 button on the remote control to change the setting.
The VCR will now only respond to the remote control’s VCR2 button. To change
the remote control setting back to VCR1, display the
PREFERENCES
menu, press 1,
and then press the VCR1 button on the remote control.
Note
: Remember you must press VCR1 or VCR2 on the remote control—
whichever is selected in the
PREFERENCES
menu— before the remote
control will operate that VCR.
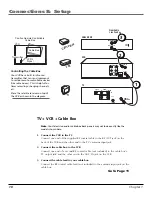
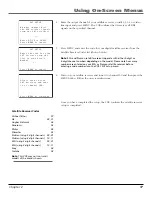
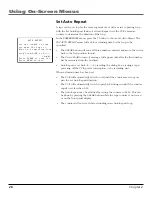
SET TIME AND DATE
Time --:--
(hh:mm)
Date --/--/--
Press MENU to cancel
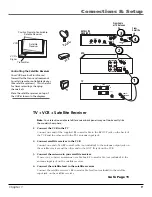
Displaying Time and Date
Pressing the INFO button on
the remote control or VCR
displays the time and date
on screen temporarily.
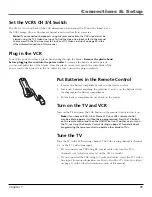
PREFERENCES
1 Remote Control: VCR1
2 Auto Play:
ON
3 Auto TV/VCR:
ON
4 EnergySaver:
2:00
5 Front Panel:
AUTO
6 Tape Speed:
SLP
7 Set Auto Repeat
8 COMMERCIAL ADVANCEE
0 Exit

