Porch Posts page 9
Instructions for kit #B 1895
□
3
C
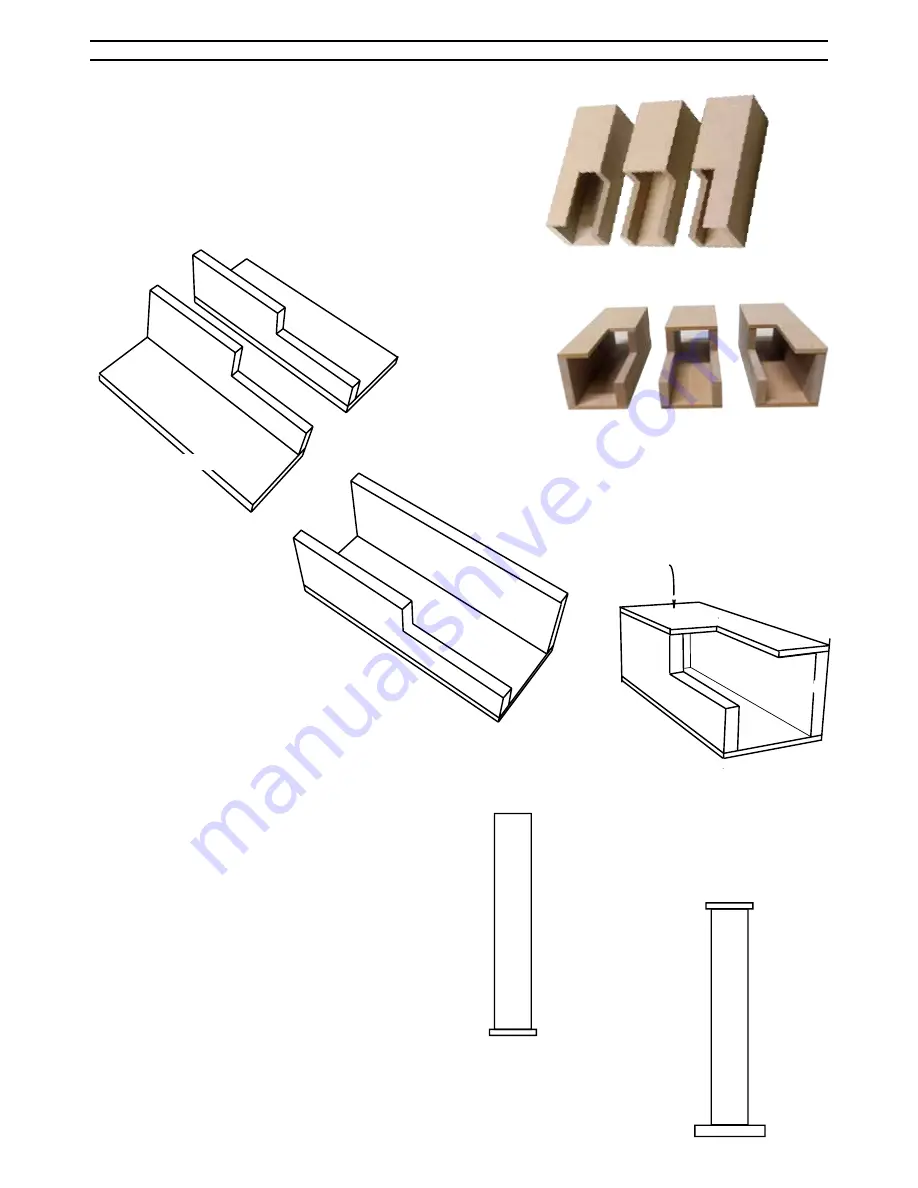
End Postbases:
(1)
Lay two Postbase Fronts flat, glue and tape one Post
-
base Side to each, lined up on opposite edges to make
one left set and one right set.
(2) Glue and tape a Postbase SideEnd to each assembly.
Postbase Side
3C (1)
Left and Right Sets
are mirrors of each other
Postbase Front
3C (2)
Left set
Postbase SideEnd
□
4.
Glue the Porch Posts to Post Caps, centered.
Pro tip: I usually paint the Porch Post and Post Caps the
same color, so I paint them (one coat) first, sand them,
glue them together, and paint them again (second-coat).
Note: the notch is for an arch (see page 20).
Texture Paint: Real Good Toys’ “Stucco Grit” mixed with
paint is tough and good looking on Foundations, Postbases,
and the Front Step Block. Paint (one coat) the base color and
sand now, and apply the paint + grit during final assembly.
□
5.
Glue the Porch Posts to PostBase Caps, centered.
Look from every angle to make sure the Posts are straight.
Step 4:
Porch Post
Post Cap
Step 5
PostBase Cap
a
Front
3C (3) Left Set viewed from the bottom
Right set is the mirror
Side
BackEnd
SideEnd
(3) Glue and tape the Postbase BackEnd to
the back edges of the Postbase Sides 3C (3).
(4) Line up the edges and ends with extra
attention to the edges in the cutout.
Let the glue dry, then paint the Postbases.


