Can I do it differently?
Yes you can - it’s your house!
The information on these pages is offered as “best practices” advice, and it is what we do when we build this house.
If you are customizing or have something else in mind, test-ahead to make sure your planning includes
everything
!
Painting:
www.realgoodtoys.help has painting and sanding videos
Paint (fi rst-coat) everything.
Don’t try to sand , fi ll, primp, or do much of anything to the wood before the fi rst coat.
The fi rst coat fi lls and reinforces the wood so sanding clips off the fi bers rather than pushing them around. The fi rst-
coat is all about what penetrates and fi lls the wood. There is no expectation that more than a hint of paint will be on the
surface. Don’t ‘double paint’ or try to give it an extra thick fi rst coat as you watch the paint soak in... that is expected and
preferred.
The fi rst benefi t of painting before assembly (one-coat) is that it is the easiest time to do a really thorough job of sand-
ing after painting. The difference between a heirloom-grade fi nish on a dollhouse and a “I-was-in-a-hurry” fi nish is most
often the quality of the sanding, and it’s hard to sand into the little hidden corners of an assembled dollhouse, but it’s easy
to sand the fl at panels layed out on a workbench.
So
sand everything now
- sand until the paint is smooth and transparent with no scratchiness to it, and with lots of wood
showing through the paint. For the clapboard walls, sand “one clapboard course at-a-time”: fold the sandpaper and hold
it on your fi nger-tips, then sand back-and-forth across one clapboard’s suface 2 or 3 times, then move up to the next clap-
board. “One at a time” is what makes it smooth and “Heirloom-Great”.
Second coat
everything after building the housebody up to the top of the Walls (before attaching the Top Floor). The
second coat goes on smooth and creamy, and except for touchup, it may be enough.
First-coat
Sanding one course at a time
Instructions for the Special Edition #SE-JM907 The Alison, Jr.
Painting Page 7
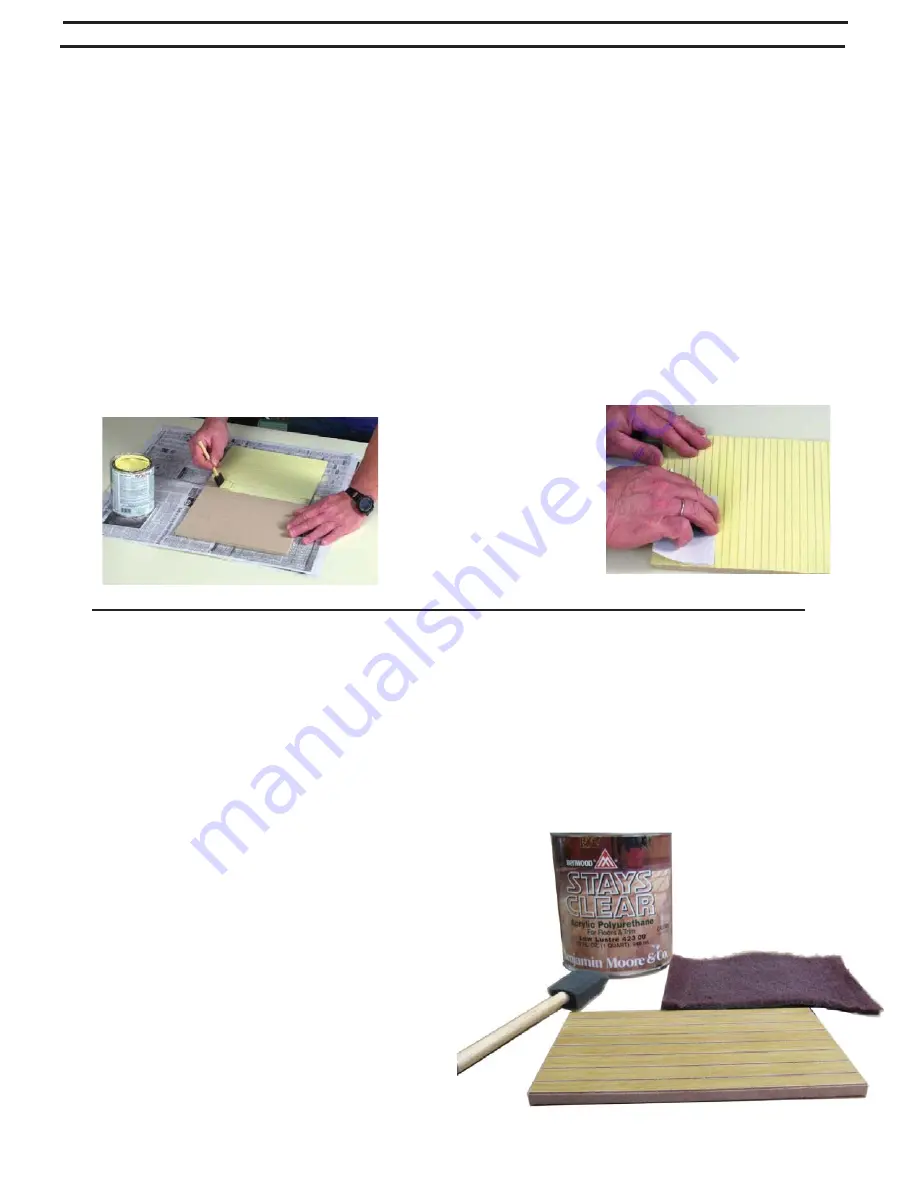
Finish the Floors:
The fl oors need fi nishing to protect
them from damage by tape being removed, by paint or
glue, or by normal wear-and-tear during assembly. Wipe
off the fi rst coat and, when it is dry, de-shine the surface
with a non-woven pad (also called “synthetic steel wool”)
or a crumple of brown paper bag; then apply more coats.
Q: How can I prevent glue from seeping onto the fl oor after I clamp (tape) the Sides together?
A: Do not skimp on the glue... a little squeezing out tells you that there’s enough glue in the joint. Clean up the
squeezings with a damp rag followed by a dry rag, and the little bit that remains down in the grooves will shrink back
as it dries, and will not be visible.
This issue is one of the reasons it is important to pre-fi nish the fl oors before assembly. I know, the fi nish tries to bead
up when you fi rst put it on and it is ‘paint-can-runny’, but just keep rubbing it out as it loses it’s excess moisture and
starts to get tacky, and that fi rst coat will eventually behave itself and lay down properly. I like to do the fi rst-coat-
rub-out with a crumple of brown paper bag so I can rub vigorously and ‘de-shine’ the print fl ooring, but other builders
report success with just brushing and brushing until the moisture level gets right. After the fi nish is dry, do a very light
de-shine with a non-woven abrasive pad (like ‘Scotch Brite”, the green pad you use in the kitchen for stainless steel
pots... a used one is just right), and then apply a second coat of fi nish.
of fi nish.


