background image

TonerRefillKits.com


RechargX™ RX006 v2

Mon - Fri  8am - 5pm ET                     

© 1995-2011 ReChargX™, EmptyX, TonerRefillKits and TonerRefillKits.com, the TonerRefillKits logo, the  

2011.11.10

800.527.3712 or 352.343.7533                 ReChargX™ and EmptyX logos are trademarks owned by TonerRefillkits, LLC. All rights reserved. 

Page 1 of 8

ReChargX™ RX006 Instructions

For use in the Lexmark 1382620, 1382625, 1382920 and 

1382925 toner cartridges

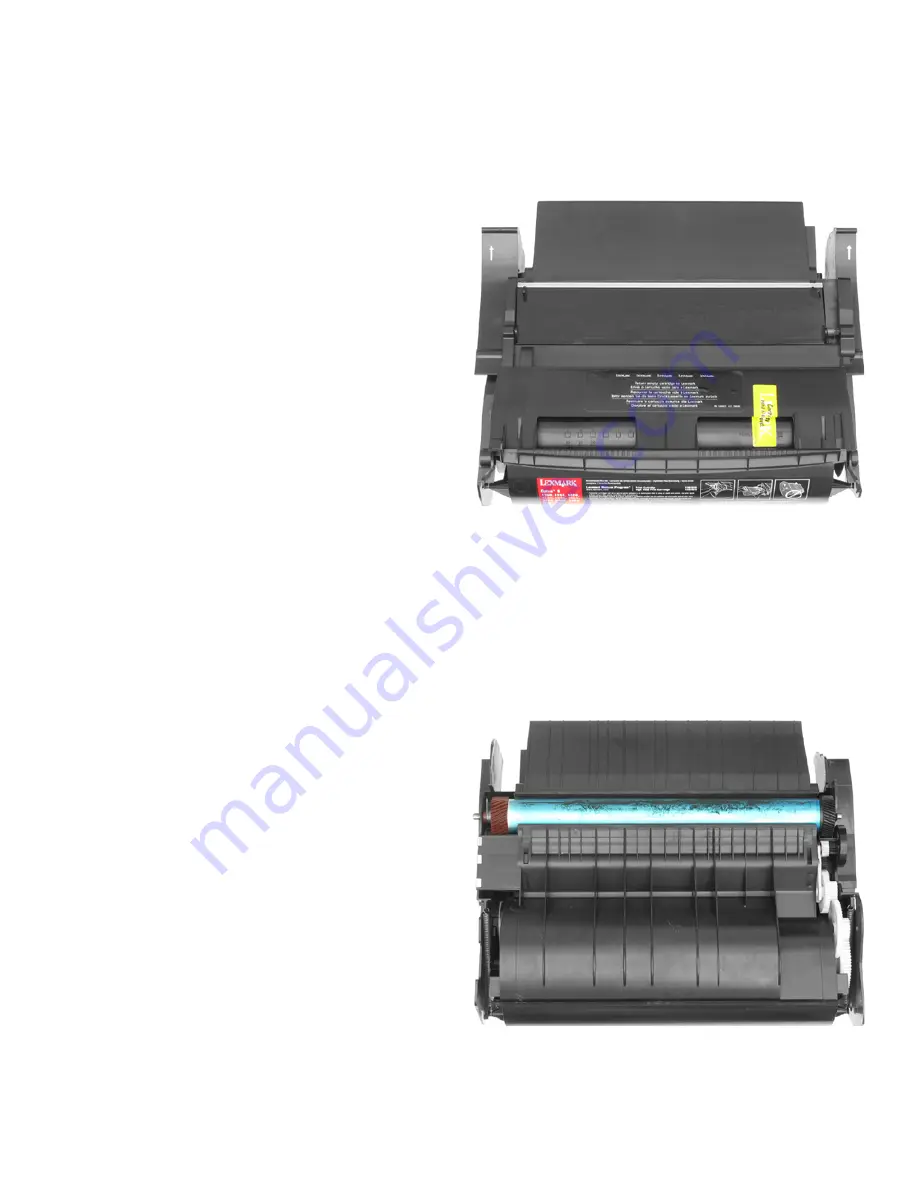
The Lexmark 1382620, 1382925, 1382920 

and 1382925 are the toner cartridges most 

frequently  found  in  the  Lexmark  Optra  S 

Series,  and  all  other  machines  using  the 

same underlying “engine” (figure 1).

This toner cartridge is quite easy to refill using 

our  ReChargX™  RX006  Premium  Print  Toner 

Refill Kit.

Within  these  ReChargX™  RX006  Premium 

Print  Toner  Refill  Kit  instructions,  we  will  be 

adding  new  toner  and  removing  the  waste 

toner.

Step 1: Orient the Toner Cartridge

Orient  the  toner  cartridge  as  you  would  if 

installing it into the printer with the handle 

toward you (figure 1). 

Flip the toner cartridge over from right to left 

so that the blue/green imaging drum on the 

underside of the toner cartridge is facing up 

(figure 2).


Step 2: Locate the Imaging Drum

Before we start working with the cartridge we will 

protect the imaging drum of the toner cartridge. 

The imaging drum is the blue/green roller on the 

underside of the toner cartridge, shown by the 

white arrows in figure 2.

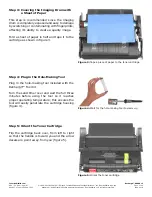
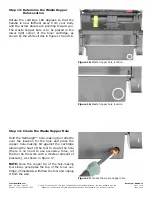
Figure 1: The Lexmark 1382625 toner cartridge

ê

ê

Figure 2: Orient the toner cartridge

Summary of Contents for RX006

Page 1: ...y to refill using our ReChargX RX006 Premium Print Toner Refill Kit Within these ReChargX RX006 Premium Print Toner Refill Kit instructions we will be adding new toner and removing the waste toner Step 1 Orient the Toner Cartridge Orient the toner cartridge as you would if installing it into the printer with the handle toward you figure 1 Flip the toner cartridge over from right to left so that th...

Page 2: ...to create a quality image Fold a sheet of paper in half and tape it to the cartridge as shown in figure 3 Step 4 Plug in the Hole Making Tool Plug in the hole making tool included with the ReChargX Tool Kit Turn the sand timer over and wait the full three minutes before using the tool so it reaches proper operating temperature this ensures the tool will easily penetrate the cartridge housing figur...

Page 3: ... of the cartridge label as shown by the white circles in figures 6 and 7 Step 7 Creating the Toner Hopper Hole Hold the ReChargX hole making tool directly over the location for the hole and press the copper hole making bit against the cartridge allowing the heat of the tool to create the hole there is no need to use excessive force let the tool do the work with a minimal amount of pressure figure ...

Page 4: ...the bottle to free up the toner that may have settled during shipping Next remove the original cap from the bottle and replace it with the plastic dispenser spout from the ReChargX RX006 Toner Refill Kit NOTE We recommend only using 1 3 1 2 of the load of toner from the bottle into your cartridge during the refill session for this series of cartridges The cartridges in this series are equipped wit...

Page 5: ...artridge as shown in figure 11 NOTE Only use the toner grabber cloth on the exterior of the toner cartridge around the toner hopper hole area Do not use the cloth to clean any of the internal components or the cartridge imaging drum Step 11 Seal the Toner Hopper Hole with the ReChargX Leak Proof Seal Remove the protective backing from the ReChargX leak proof seal figure 12 and lower the seal aroun...

Page 6: ...ed in the lower right corner of the toner cartridge as shown by the white circles in figures 15 and 16 Step 14 Create the Waste Hopper Hole Hold the ReChargX hole making tool directly over the location for the hole and press the copper hole making bit against the cartridge allowing the heat of the tool to create the hole there is no need to use excessive force let the tool do the work with a minim...

Page 7: ...hole over the paper gently tapping along the side of the toner cartridge helps to keep the toner flowing as well NOTE There is no need to attempt to remove every last bit of waste toner from the hopper just that which comes out easily Step 16 Clean the Area Around the Waste Hopper Hole After the waste toner has been removed from the waste hopper use the yellow orange toner grabber cloth to clean a...

Page 8: ...efilled your Lexmark 1382620 1382925 1382920 or 1382925 toner cartridge and emptied the waste hopper Enjoy your savings You ve just saved 186 50 by refilling your toner cartridge End of ReChargX RX006 Instructions Customer Service Technical Support To further help your ReChargX RX006 Toner Refill procedure we are always ready willing and happy to answer any of your questions or comments via techni...

Reviews: