TonerRefillKits.com
RechargX™ RX211
Mon - Fri 8am - 5pm ET © 1995-2011 ReChargX™, EmptyX, TonerRefillKits and TonerRefillKits.com, the TonerRefillKits logo, the
2011.06.14
800.527.3712 or 352.343.7533 ReChargX™ and EmptyX logos are trademarks owned by TonerRefillkits, LLC. All rights reserved.
Page 4 of 12
Step 9: Remove the Excess Plastic From
the Hole-Making Tool
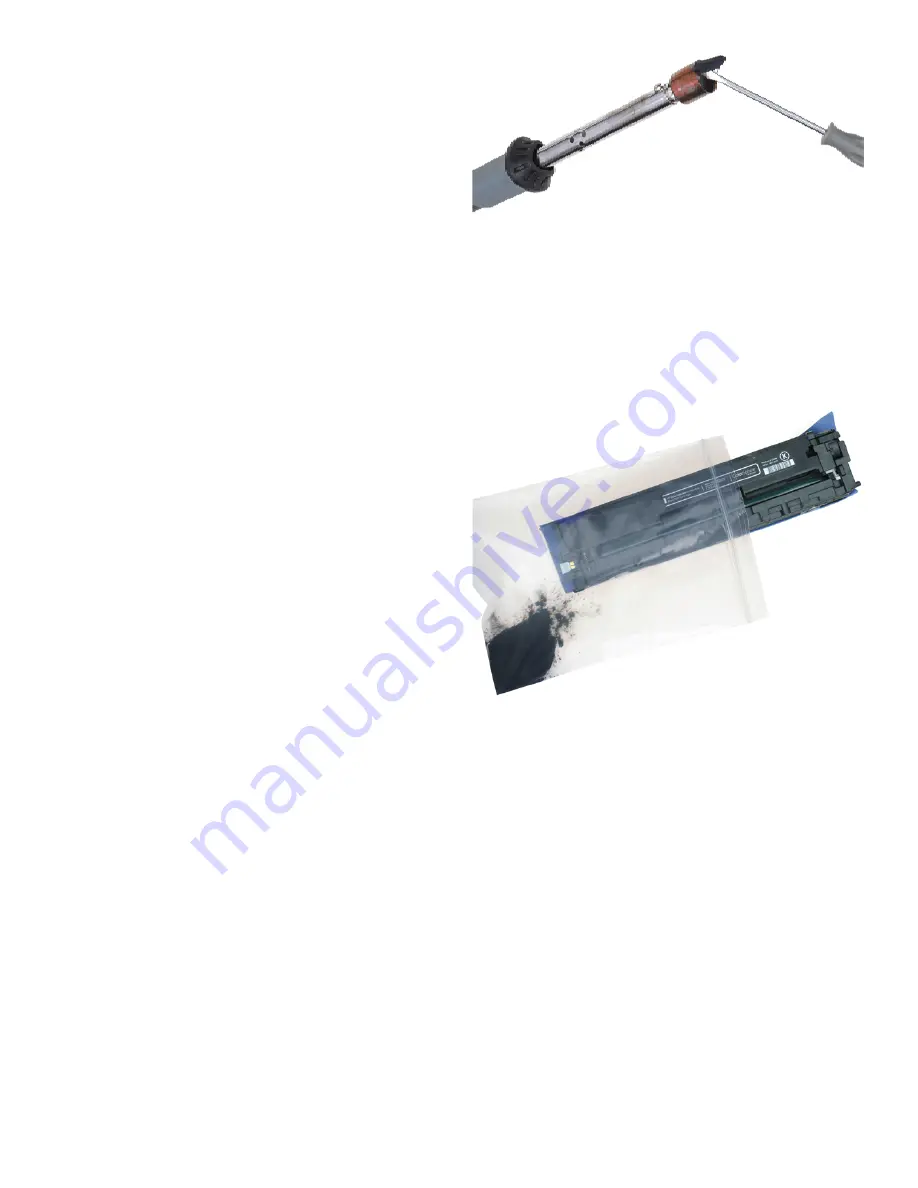
Use the metal tip of the small flat-blade
screwdriver (included in the ReChargX™ Tool
Kit) to remove the small, circular piece of
plastic that will normally remain inside the
copper hole-making bit (figure 9).
Note
: This step needs to be completed before
the hole-making tool cools off. If the plastic
does harden inside the copper bit, plug in the
tool and remove the plastic debris as soon as it
starts to loosen from the bit.
Step 10: Empty the Toner Hopper
Now, we will remove the residual toner from the
toner cartridge.
Critical:
Your print quality will suffer significantly
if the remaining toner is not first removed. This
step is only necessary on the first refill of each
cartridge.
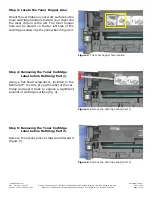
Holding the cartridge inside the plastic zip-top
bag, included in your ReChargX™ RX211 Refill
Kit, carefully pour out all remaining toner. If the
toner stops flowing, give the cartridge a light tap
to start the flow again (figure 10).
Shaking the toner cartridge up-and-down
is not recommend as it normally creates an
unnecessary toner mess.
If the toner stops flowing, lift the end of the
cartridge up and then re-lower the hole within
the bag. Gently tapping along the side of the
cartridge helps to keep the toner flowing.
With the majority of the toner removed from
the cartridge, carefully zip the bag closed to
prevent accidental spills while discarding the
bag and toner.
Figure 9
: Remove the excess plastic piece
Figure 10
: Empty the Toner Hopper


