background image

©2016 ReconRobotics 

13  


Troubleshooting (cont.)

Troubleshooting (cont.)


When I drop the robot, it does not drive straight when it lands. 
What could be wrong? 

The robot


has electronic circuitry that needs to self-calibrate after deployment. When 

the robot


lands, let it sit still for a few seconds before driving. It will automatically 

recalibrate itself during this time and should resume driving as expected. 

 
Why isn’t the robot’s IR light turning on? 

The IR LED will not turn on if the light sensor detects sufficient light, in order to 
conserve battery life. If your robot's IR light does not turn on when the robot is in a 
state of complete darkness, there may be an issue with the light sensor.  


What would cause the IR light to stay on constantly, even in 
daylight? 

If there is dust or debris present on the IR blister, the light sensor may determine the 
environment has less ambient light than it really does. Ensure that the IR blister is free 
of dust or debris by wiping it with a soft towel. 

 
The robot or OCU II doesn’t seem to be holding a full battery 
charge. What can be done? 

If you feel that your Recon Scout XL robot or OCU II is not running for its complete 
battery life on a full charge, there is a simple test you can run to check the 
performance: 
 



Fully charge your robot and OCU II (refer to page 7 for instructions). Start test 
by pulling pin from robot and turning on the OCU II. Record the time that the 
units are turned on. Run both units continuously until:  


a. Robot stops sending video 


b. OCU II screen goes blank  



Record the time. Contact ReconRobotics for service if: 


a. Robot runs for under 50 minutes 


b. OCU II runs for under 120 minutes 


©2016 ReconRobotics 

2  


Recon Scout XL Robot

Recon Scout XL Robot


Components

Components


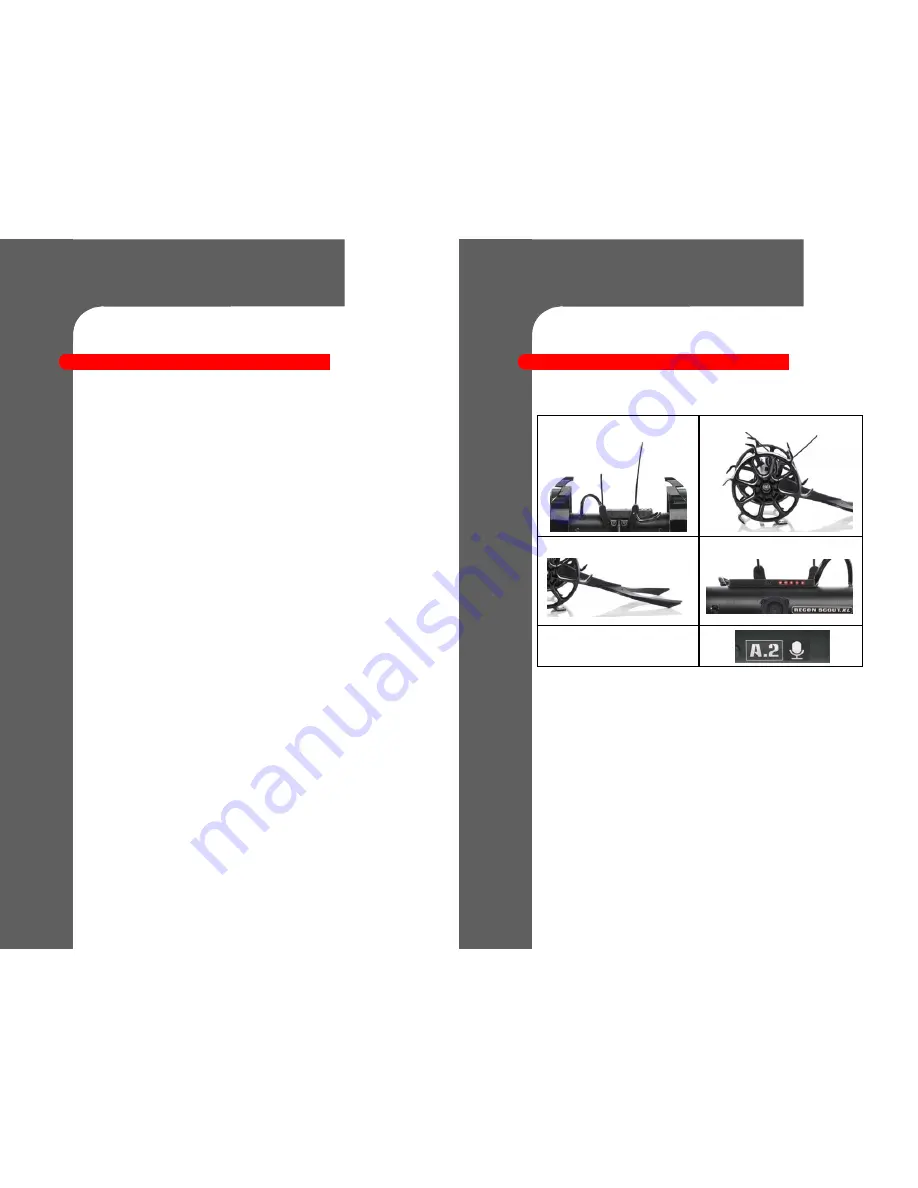
A robot should have the following components: 

 
If any of these items are missing or damaged, please notify 
ReconRobotics immediately. 

(See Warranty and Repair, pg. 17)


Two Antennas  

Two Wheels 

Stabilizer Tail 

IR Blister 

Microphone: 

(indicated by a sticker) 


Summary of Contents for Scout XL

Page 1: ...u are experiencing and request a Return Material Authorization RMA tracking number In addition to your original sales receipt you will need to provide the unit s serial number your return shipping address email address and a daytime telephone number ReconRobotics Inc 5251 W 73rd Streeet Ste A Edina MN 55439 Phone 1 866 697 6267 or 952 935 5515 Fax 952 935 5508 Website www reconrobotics com For cus...

Page 2: ...he buyer assumes all risks associated with lithium polymer batteries If you do not agree with these conditions please return the robot kit to ReconRobotics Do not attempt to disassemble or modify the robot or OCU II This may cause an electric shock fire or system failure Do not insert any foreign objects inside the robot or OCU II This may cause electric shock fire or system failure Do not immerse...

Page 3: ... warranty and or Annual Maintenance Plans Keep loose clothing and hair away from the robot Considerations for charging Always charge the robot with the activation pin inserted Always keep the OCU II turned off while charging Always charge in a cool ventilated fire safe area Do not leave system unattended while charging Always use a proper country specific AC socket 120 240 VAC with the battery cha...

Page 4: ...ne or email 5 Serial number of the product that is experiencing difficulties Our technical staff will attempt to troubleshoot and resolve the problem If repair service is needed we will set up an RMA Return Material Authorization and ar range for shipment of your equipment to our US repair facility Standard turnaround time for repair is under one week after receipt If your issue cannot be resolved...

Page 5: ... it really does Ensure that the IR blister is free of dust or debris by wiping it with a soft towel The robot or OCU II doesn t seem to be holding a full battery charge What can be done If you feel that your Recon Scout XL robot or OCU II is not running for its complete battery life on a full charge there is a simple test you can run to check the performance Fully charge your robot and OCU II refe...

Page 6: ...n have several possible causes The robot may be out of range The robot may be low on power or deactivated The robot or OCU II may be experiencing interference caused by environmental factors e g other radio devices in the area or proximity to metal The charge indicator lights do not light up when the robot or OCU II is connected to the battery charger Refer to page 7 for instructions on how to rea...

Page 7: ...deo Out Capabilities OCU II Audio Video Out Capabilities Audio Output The OCU II is capable of receiving audio transmitted from the Recon Scout XL robot To listen plug the provided volume control adaptor into the appropriate jack on the left hand side of the OCU II Then plug headphones into the volume control adaptor Headphones approved for Apple or Android devices will not work with the provided ...

Page 8: ... 2 and one on channel A will interfere with each other and not work well in the same environment Basic Deployment Instructions 1 Charge robot or OCU II if needed 2 Rotate OCU II antennas to an upright position 3 Switch OCU II on 4 Pull pin from robot Confirm that robot is broadcasting video and accepting command from the OCU II before deploying 5 If using headphones with a Recon Scout XL robot plu...

Page 9: ...t off the IR Blister to ensure the sensor is clear Parts Replacement The parts and tools supplied in a Field Maintenance Kit FMK allow you to replace the following parts on your Recon Scout XL robot Antennas Wheels Tail Activation Pin 2016 ReconRobotics 6 Setting up the OCU II Rotate antennas to an upright position as shown The operator may rotate the antennas up or down as needed to receive the m...

Page 10: ...fic AC wall socket 120 240 VAC 4 Plug the appropriate charger cords into the OCU II and robot Ensure connecting plugs are not bent during insertion or removal Ensure that the red dot on the connecting plug is aligned with the red line on the robot when inserting see image at right 5 Remove robot and OCU II from charger when charging is complete BA5590 BB2590 Field Charger 1 Turn off OCU II and ins...

Reviews: