background image

8

2-INSTALLATION

The instructions in this chapter refer explicitly to the Italian installation regulation UNI 10683. In any case, 

always observe the regulations in force in the country of installation.

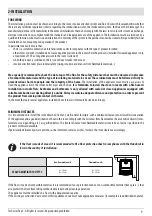
PELLETS

Wood pellets are manufactured by hot-extruding compressed sawdust which is produced during the working of natural dried wood. The 

compactness of the material is guaranteed by the lignin contained in the wood itself and allows pellets to be produced without glue or 

binders.

The market offers different types of pellets with characteristics that vary according to the wood mixtures used. The most common diameter 

on the market is 6 mm (although 8 mm diameter is available too) with a length, on average, of between 3 and 40 mm. A good quality 

pellet has a density of between 600 and 750 or more kg/metres cubed and a moisture content that accounts for 5 to 8% of its weight.

Pellets have technical advantages besides being an ecological fuel, as the wood residue is used completely, thereby achieving cleaner 

combustion than that of fossil fuels.

While good-quality wood has a calorific value of 4.4 kW/kg (15% moisture, after about 18 months of seasoning), whereas that of pellets 

is around 4.9 kW/kg. To ensure good combustion, the pellets must be stored in a dry place and protected from dirt. Pellets are usually 

supplied in 15 kg bags, therefore, storing them is very convenient.

Good quality pellets guarantee good combustion, thereby decreasing harmful emissions into the atmosphere.

The poorer the quality of the fuel, the more often the internal parts of the brazier and combustion chamber must 

be cleaned.

The main quality certifications for pellets currently available on the European market guarantee that the fuel complies with class A1/A2 

according to ISO 17225-2 (ex EN 14961). These certifications include, for example, 

ENPlus

DINplus

Ö-Norm M7135, 

and in particular, 

guarantee the following characteristics:

• 

calorific value: 4.6 ÷ 5.3 kWh/kg.

• 

Water content: ≤ 10% of the weight.

• 

Percentage of ash: max 1.2% of the weight (A1 less than 0.7%).

• 

Diameter: 6±1/8±1 mm.

• 

Length: 3÷40 mm.

• 

Content: 100% untreated wood without the addition of binding agents (max 5% bark).

• 

Packaging: in sacks made from ecologically compatible or biologically decomposing material.

The company strongly recommends using certified fuel for its products (ENplus, DINplus, Ö-Norm M7135).

Poor quality pellets or others that do not comply with the characteristics specified previously may compromise the 

operation of your product and can therefore make the guarantee and product liability invalid.

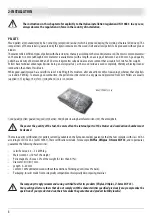
BAG OF PELLETS 15 kg

Summary of Contents for MALVA MULTIAIR 10 UP! S1

Page 1: ...INSTALLATION GUIDE EN PELLET STOVE MALVA MULTIAIR 10 UP S1 PART 1 REGULATIONS AND ASSEMBLY Instructions in English...

Page 2: ...S 17 4 UNPACKING 19 5 FITTING THE METAL HOUSING 22 6 RIGHT CONTROL PANEL OPENING 27 7 CONTROL PANEL ASSEMBLY FOR LEFT OPENING 28 8 OPENING THE DOOR OF THE FIREBOX 38 9 CONNECTIONS TO ADDITIONAL DEVICE...

Page 3: ...By system we intend Stove Flue Air vent REVISIONSTOTHE PUBLICATION The content of this manual is strictly technical and the property of RED No part of this manual may be translated into other languag...

Page 4: ...hopper The instructions provided in this manual must always be complied with to ensure the product and any electronic appliances connected to it are used correctly and accidents are prevented This ap...

Page 5: ...n The doors covers on the appliance must remain closed when it is not used The product must be powered by an electrical system that is equipped with an effective earthing device Switch the product off...

Page 6: ...f the product willrestandprovidesuitableinsulationifitismadeofflammablematerial e g wood fitted carpet or plastic Live electrical parts only power the product once it has been fully assembled Disconne...

Page 7: ...ll calorific value within tight margins compared to the test pellets used However size considerably influences performance so on average it must not be less than 24 mm long and with a 6mm diameter in...

Page 8: ...himneys flues or parts of the system affecting the appliance damagecausedbytamperingwiththeappliance atmosphericagents naturaldisasters vandalism electricaldischarges fires faults in the electric and...

Page 9: ...uired to separate this equipment and or thebatteriesoraccumulatorsincluded fromothertypesofwasteandtakethemtothelocalcollectioncentre Thedistributorcanbeasked to collect the waste electrical and elect...

Page 10: ...lets is around 4 9 kW kg To ensure good combustion the pellets must be stored in a dry place and protected from dirt Pellets are usually supplied in 15 kg bags therefore storing them is very convenien...

Page 11: ...tallation of the appliance must ensure easy access to clean the appliance itself the smoke outlet pipes and the flue It is forbidden to install the stove in rooms with a fire hazard Installation in st...

Page 12: ...as modern heating appliances have high efficiency with cooler flue gasses and consequently less draught it is therefore essential that the flue is built up to standard and always kept in perfect worki...

Page 13: ...educe smokecooling Itshouldbeseparatedfromcombustibleorflammablematerialswithanairgaporinsulatingmaterials checkthedistance specified by the manufacturer of the fireplace according to EN1443 The chimn...

Page 14: ...zed in accordance with the general method of calculation of UNI EN13384 1 or other proven efficiency methods Below is a list of some flues available on the market AISI 316 steel chimney with doublecha...

Page 15: ...s critical to the safety of the system CHIMNEYPOT Thechimneypotisacrucialelementfortheheatingappliancetoworkproperly werecommendawindproofchimneypot A seeFigure7 The area of the opening for smoke extr...

Page 16: ...stoves etc which could cause a depression in the room Make sure that with all appliances on the pressure drop between the room and the outside does not exceed the value of 4 Pa also for Oyster applia...

Page 17: ...h with 1 accessible 90 bend 6 5 metres Maximum length with 3 accessible 90 bends 4 5 metres Maximum number of accessible 90 bends 3 Horizontal sections minimum slope 3 4 metres Use smoke ducts with a...

Page 18: ...um safety distances from combustible materials The previous rules also apply for holes made in walls 2 Oldflue minimumpipe 100mmwiththeinclusionof an external access door for chimney cleaning 3 Extern...

Page 19: ...54 525 80 253 96 157 172 313 60 60 80 1045 49 17 3 DRAWINGS ANDTECHNICAL FEATURES Technical Dept All rights reserved Reproduction prohibited DRAWINGS AND CHARACTERISTICS STOVE DIMENSIONS MALVA MULTIA...

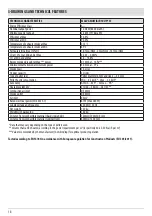
Page 20: ...iameter 6 mm and size 3 40 mm Pellet hourly consumption Min 0 5 kg h Max 2 3 kg h Autonomy At min 43 h At max 9 h Heatable volume m3 215 40 246 35 287 30 Combustion air inlet 50 mm Smoke outlet 80 mm...

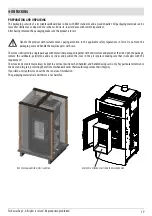
Page 21: ...d handle the majolica parts with care Thestoveisdeliveredinasinglepackagewithmetalsidespackagedtogetherwiththestructureandplacedattheside Openthepackage remove the cardboard polystyrene and any straps...

Page 22: ...u s 20 4 UNPACKING To remove the stove from the pallet you must remove the two screws u and plate s from the stove s foot There are four brackets s REMOVING THE FASTENING BRACKETS...

Page 23: ...ecting pipe If the stove needs to be connected to an outlet pipe which goes through the rear wall to connect to the flue take utmost care to make sure that the joint is not forced If the stove smoke o...

Page 24: ...et with the stove structure Taketheboxwiththecladdingsandpreparethemforinstallation Themetalpartsaretobeassembledtothestructureinaccordancewith the indications on the following pages Live electrical p...

Page 25: ...t All rights reserved Reproduction prohibited Take metal side B and insert rubber pad D and bumpers C 2 D 2 C on each upper part of panel B in the upper part Insert the two bumpers C in the lower part...

Page 26: ...4 5 FITTINGTHE METAL HOUSING Now take panel B and insert the z holes in the v hooks on the stove frame At the top fasten panel B to structure with the two screws E Proceed in the same way also for the...

Page 27: ...HOUSING Technical Dept All rights reserved Reproduction prohibited Then assemble the A top on the frame by placing it over the stove in its adjustable dampers To strengthen tightness the A top is also...

Page 28: ...cleaning of the stove it is necessary to remove the F decorative panel With the stove without top A remove the two k screws in the top part from the j hole in the frame in the bottom part raise the C...

Page 29: ...shownbelow Takethe s handlewith your hand and pull to the right until panel T is completely extracted There is a limit switch in the panel guide so there is no danger of it falling Ifitisnotpossibleto...

Page 30: ...tion Theelectricalconnection changeandfunctioningoperationsmustonlybecarriedoutbyauthorisedand qualifiedpersonnel With stove off and disconnected from current proceed as follows remove the T panel by...

Page 31: ...Technical Dept All rights reserved Reproduction prohibited disconnect piston pin c the T panel is now completely detached from the stove put it in a safe place until next use remove screw d and bushin...

Page 32: ...v 30 7 CONTROL PANEL ASSEMBLY FOR LEFT OPENING remove the two v screws that secure the panel support to the stove...

Page 33: ...production prohibited now cable C will be connected in board to the stove but disconnected from the panel panel T will be completely disconnected the panel support Z will be independent from the stove...

Page 34: ...ROL PANEL ASSEMBLY FOR LEFT OPENING from block H remove cap W from the left by removing the two k screws remove handle s from the right now insert cap W on the right and tighten it with screws k also...

Page 35: ...s reserved Reproduction prohibited from the cart with guide G closed remove screw o on the right while with guide G open remove the two screws p for right opening the guide block G can be detached fro...

Page 36: ...e it from the hole on the back panel the cable C then remains secured to the plate M see the image below remove the knockout hole s in the left part of the stove back panel pass the free end of the ca...

Page 37: ...ENING Technical Dept All rights reserved Reproduction prohibited secure the plate M once again using the two screws x on the left rotate the guide position to be able to extract the panel on the left...

Page 38: ...o p G p G H G 36 7 CONTROL PANEL ASSEMBLY FOR LEFT OPENING fix guide G again using screw o with guide closed and the two screws p with guide open block H is pre assembled as is guide block G...

Page 39: ...CONTROL PANEL ASSEMBLY FOR LEFT OPENING Technical Dept All rights reserved Reproduction prohibited take screws y and block guide G to block H take the whole block and secure it to the stove with the...

Page 40: ...T c s d b 38 7 CONTROL PANEL ASSEMBLY FOR LEFT OPENING take panel T and connect the two piston pins c and s insert panel T in its seat position bushing b and screw d for the panel limit switch...

Page 41: ...reserved Reproduction prohibited DOOR OPENING To open the stove door fit the cold handle f into the hole in the handle and pull it towards you Attention Thefireboxdoormustbeclosedproperlyforthestoveto...

Page 42: ...WIFI INTERFACE OPTIONAL Install theWeb Wi Fi using the holes on the back of the product and follow the instructions on the product itself Attention the APP REDWIFI Easy is available in the Play Store...

Page 43: ...s reserved Reproduction prohibited ASH PAN ACCESSORY It is possible to purchase an ash pan K optional to be inserted in the lower compartment to help ash cleaning and collection Open the stove firebox...

Page 44: ...dcomeincontactwithflammablesurfacesorpartsthat are affected by heat e g change in shades wiring ducts plasterboard etc Moreover persons and animals must beprotectedfromaccidentalorintentionalcontact I...

Page 45: ...put for safety purposes and to prevent the rear wall from being hit directly by the hot air flow generating halos blackeningorevendangerousheatinginthecaseofflammablewalls Whenpositioningthestoveneara...

Page 46: ...ove mitten that comes with the stoveitself Whenloading donotletthepelletbagcomeintocontactwithhotsurfaces Neverremovetheprotectiongridinsidethehopper No other type of fuel other than pellets is to be...

Page 47: ...r connecting the power cable to the back of the stove turn the switch at the back to position I The luminous switch button will light up The switch on the back of the stove is used to power the system...

Page 48: ...07 03 2019 REV 1 8901874800 Via La Croce n 8 33074Vigonovo di Fontanafredda PN ITALY Telephone 39 0434 997200 Internet www red365 it e mail info red365 it...

Reviews: