


Revised 2017-08-31
Network Tab
Drawing No. LP0997-C
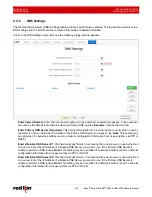
DMNR/NEMO Settings
Sixnet
®
Series SN/RAM
®
6000 & RAM 9000 Software Manual
- 109 -
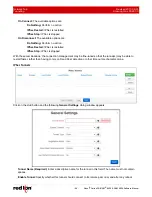
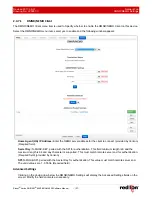
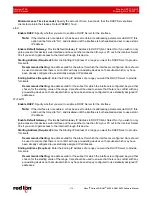
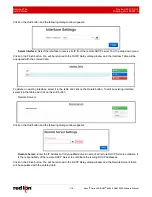
Select the desired interface by clicking the name of the available interface (or select all available interfaces
using the
Select All
option) from the Available list on the left side of the screen. Verify your selection(s) move to
the Selected side of the screen and click
Done
when finished or click
Clear
to revert your selection.
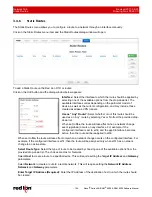
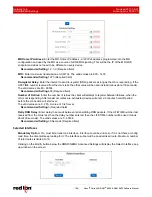
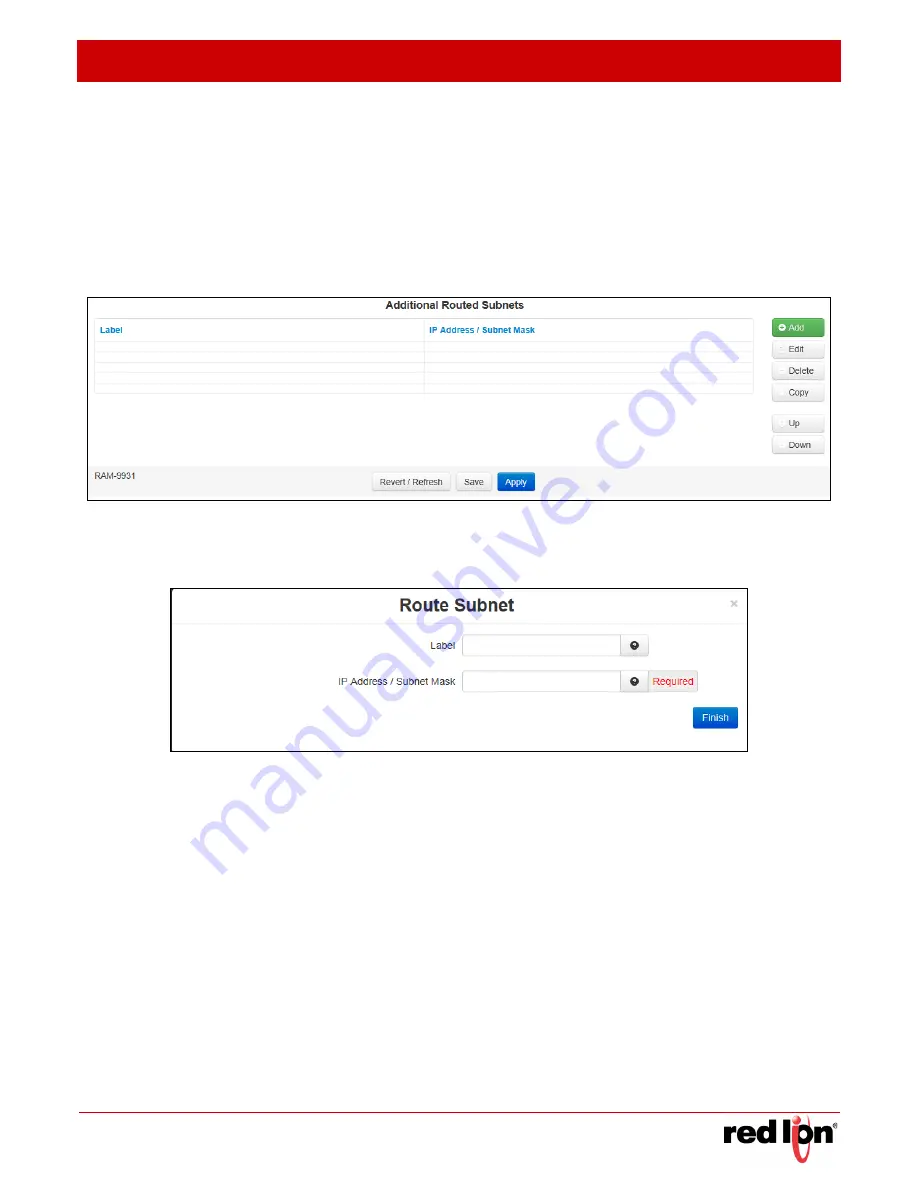
Additional
Routed
Subnets
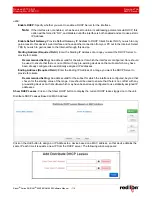
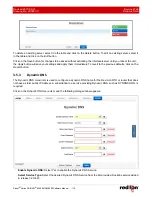
This function is used to Add, Edit, Delete, Copy or Move routed subnets. Current and added routed subnets
are visible and selectable in the primary display area. Each is displayed by Label and IP Address / Subnet
Mask.
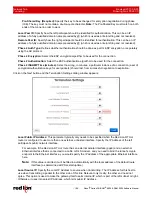
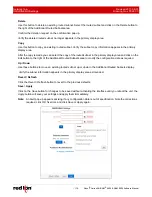
Add
This button is used to add a routed subnet. Clicking on the
Add
button to the right of the Additional Routed
Subnets area displays the Route Subnet pop up window on the screen.
Enter a name (label) into the Label field for the Subnet you are adding. This is not required but can be helpful
in identifying the purpose of the subnet within the network.
Enter the IP address and subnet mask using IP/CIDR notation into the IP Address / Subnet Mask field. The
allowed CIDR values are 8 - 32. This subnet will be an advertised route. The maximum number of total
interface/subnet routes is limited to 16.
Click
Finish
.
Verify the added subnet appears in the primary display area.
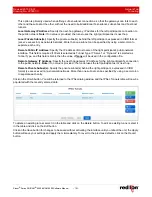
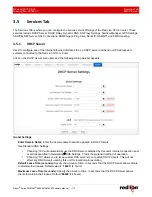
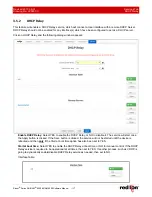
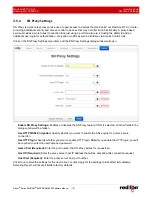
Edit
Use this button to edit an existing routed subnet. Select the routed subnet and click on the Edit button to the
right of the Additional Routed Subnets area to display the Route Subnet pop up window on the screen.
Modify the name (label) as required in the Label field for the Subnet you want to edit.
Modify the IP address and Subnet mask as required for the Subnet into the IP Address / Subnet Mask field you
are editing and click Finish.
Verify the edited subnet information appears in the primary display area.


