EN
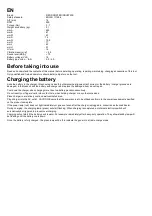
Brand
: RED ROOSTER INDUSTRIE
Safety standard
: EN ISO 11148-6
A/F (mm)
: 14
RPM
: 950
Torque (Nm)
: 3 - 7
Weight w/o battery (kg)
: 2,1
mm A
: 480
mm B
: 87
mm W
: 40
mm D
: 14
mm O
: 10,2
mm R
: 17
mm L
: 40
mm H
: 21
H1 mm
: 16
Vibration level (m/s²)
: < 2,5
Sound level (dB(A))
: < 75
Battery voltage (Volt)
: 18
Battery type Li-ion….(Ah)
: 2,0 / 4,0
Before taking into use
Read and understand the contents of this manual before installing, operating, repairing, maintaining, changing accessories of this tool.
Only qualified and trained operators should install, adjust or use the tool.
Charging the battery
Slide the battery in the charger, this should go smoothly otherwise the alignment isn't correct or the battery / charger grooves are
damaged. In that case check the battery and charger and replace the damaged item, do not repair.
Cool down the charger when charging more than two battery packs consecutively.
Do not insert your fingers/ nails into contact hole, when holding charger or any other occasions.
Place charger in a relatively cool and well-ventilated area.
Plug charger into the AC outlet. CAUTION: Ensure that the power source to be utilized conforms to the power requirement specified
on the product nameplate.
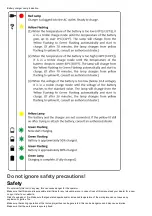
If the power lamp (red) does not light immediately or goes out soon after the charger is plugged in, consult an authorized dealer.
During charging, the charging lamp (green) will start flashing. When charging is completed, an internal electronic switch will
automatically be triggered to prevent overcharging.
Charging will not start if the battery pack is warm. For example, immediately after heavy-duty operation. The yellow standby lamp will
be flashing until the battery cools down.
Once the battery is fully charged, the green lamp will be lit to indicate the gone into a trickle charge mode.


