ENGLISH
22
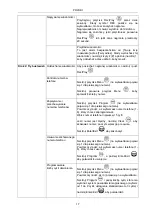
C. Interruption
of all calls after the conversation
When the conversation via the speaker telephone is finished, the receiver must cancel the call by
pressing hash (#) instead of just replacing the receiver. This breaks the connection for the present call
and all remaining calls.
Interruption of dialler
If the dialler has been activated by mistake it can only be interrupted by:
-
the receiver following the instructions in
Quick start guide (Step 2)
-
disconnecting the mains voltage to the dialler and removing the backup battery.
Setting the house code
If the factory settings for the wire-free home alarm Smart Panel have not been changed, there is NO
NEED TO CHANGE the house code.
However, if the settings on the Smart Panel have been changed, or need to be changed to resolve a
problem (whereby the Smart Panel and sensors only work occasionally or not at all, or are disrupting
other systems), then the house code must also be changed on all the system modules (sensors and
sirens).
The settings for the house codes can be changed as instructed below.
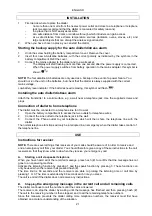
There are four jumpers or DIP switches on each unit.
Remove the battery cover and then reset the DIP switches to change the house code.
When a DIP switch is in the upper position it is switched on (ON) and when in the lower position switched
off (OFF). The factory-set code on the dialler means that all the DIP switches are switched on (ON).
In order for the system to function correctly, the jumpers on Smart Panel and all the other system
modules (sensors and sirens) must correspond exactly.
Jumpers for house
code
HOUSE CODE
Smart Panel
All sensors
Default house code:
1: ON, 2: ON, 3: ON, 4: ON
*Jumper: ON = inserted, OFF = removed
DIP switch for house
code
Remote
control
Default house code: 1: ON, 2: ON, 3: ON,
4: ON
TROUBLESHOOTING
If the message FAIL is displayed, this means that the telephone line is not working or is not properly
connected. Check the connection.
If the recording quality is low: Record the message again in a quiet room with your mouth close to the
microphone (5–15 cm).
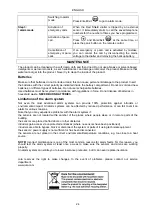
Quick start guide
Step 1:
Switch to setup mode
before programming is
started
Switching to setup
mode
Press Menu
to activate the keypad. Key in the 4-
digit PIN code (the default PIN code is 1234). Press
Enter/Exit
to return to setup mode.
Recording a
message
Hold the Rec/Play
button down for two seconds.
You can start recording when REC is shown on the
display.
Record your message by speaking clearly into the
microphone.
The recording is finished when you press Rec/Play
again, or when the recording has lasted 20 seconds.
Summary of Contents for 41-087
Page 25: ......


