16
2
INSTALLATION GUIDE
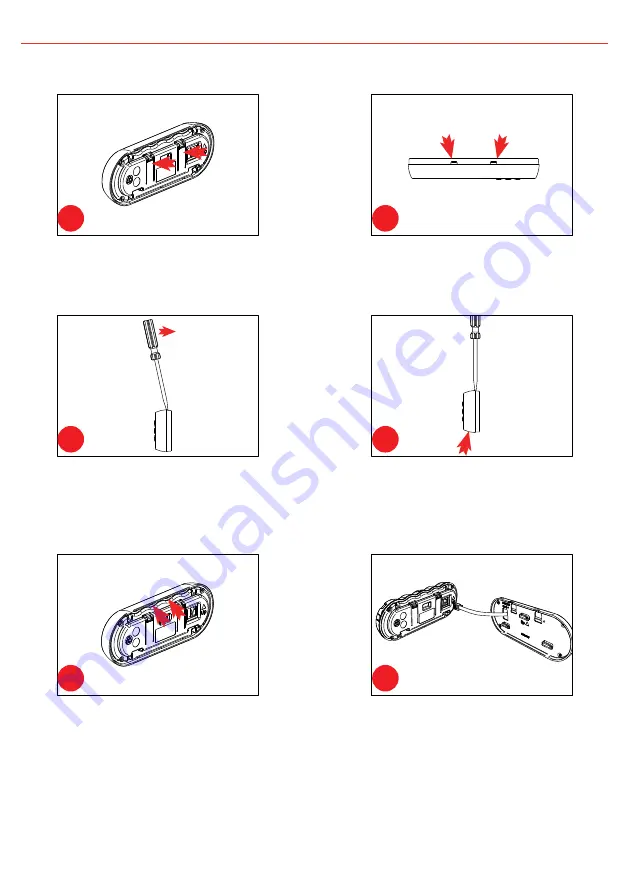
Removing the Remote Monitor
1
2
The locking tabs on the back of the Inner
Assembly need to be unclipped from the Back
Plate.
The locking tabs can be accessed through
holes on the top of the backing plate when
installed.
3
4
Insert a flat-head screwdriver at a slight angle
towards the front of the Remote Monitor and
push back to depress the locking tabs.
When the screwdriver is in a vertical position,
gently push upwards on the bottom of the
Remote Assembly to unlock tab. Repeat steps
3 and 4 for the second tab.
5
6
Slide fingers between the Front Face and the
Inner Assembly in positions marked above and
carefully pull back towards the front of the
Remote Monitor.
Remove the Remote Monitor cable and the
Inner Assembly is removed.
FIGURE 2.2.2.3:
How to remove the Remote Monitor.


