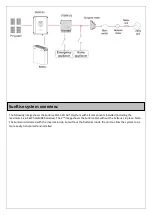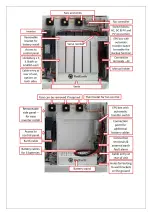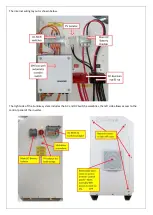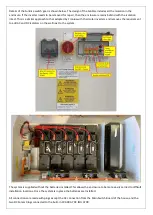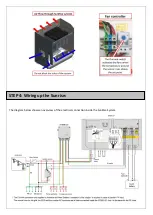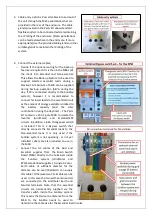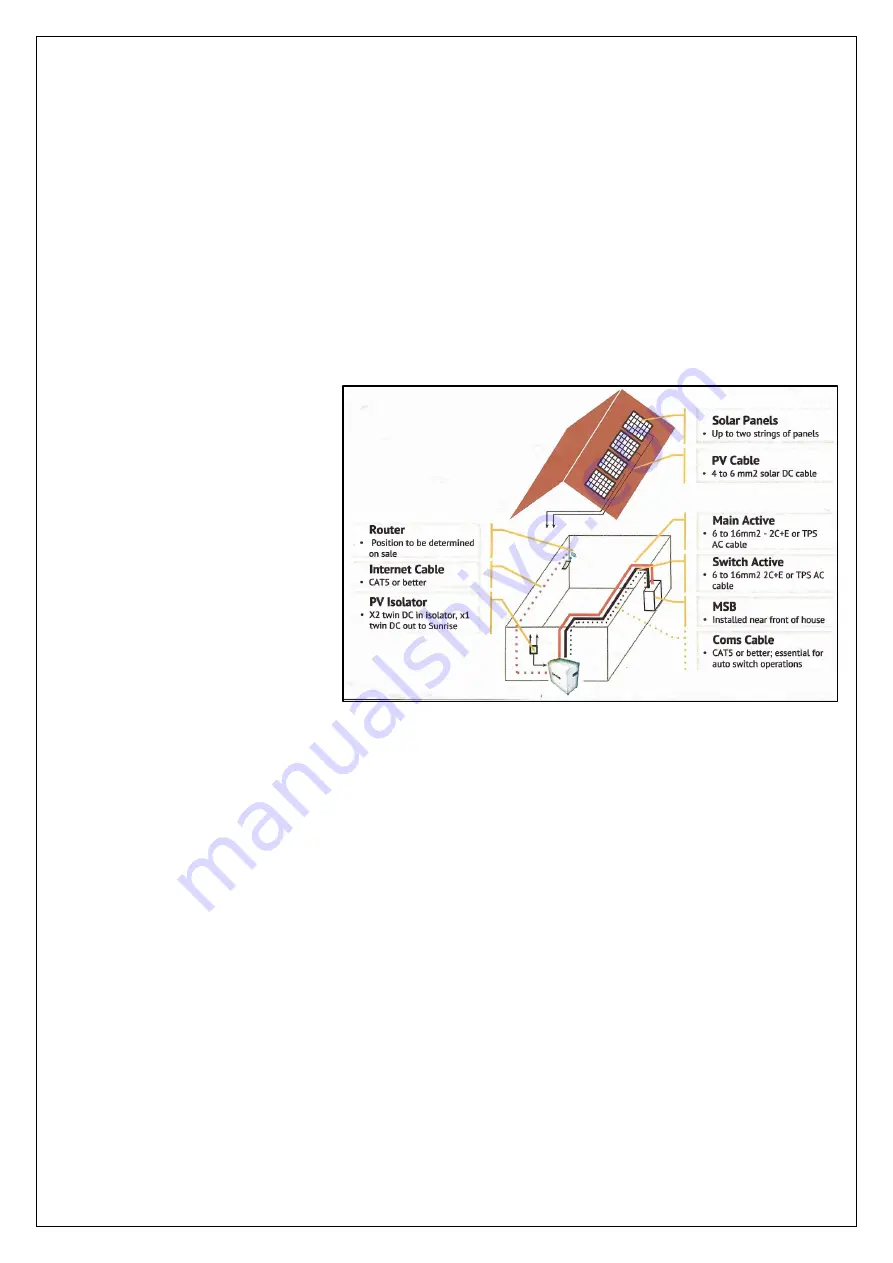
A typical complete installation of the SunRise Home Battery will require the electrical connection of the following
cables;
1.
Install AC cables from the Main Switch Board (MSB) directly to the terminals inside the SunRise system (Grid
and EPS/Essential load supplies). Either a single 3Core + Earth cable or two 2C+E cables of sufficient diamter
for the distance can be used.
2.
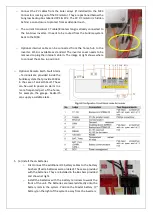
Install the supplied current monitor wire (from SunRise system to MSB) to monitor the grid feed-in level. A
standard Cat5/6 cable can be used.
3.
Connection of up to 2 arrays of PV solar panels to the DC Isolator in the SunRise system. It is important to
connect the +ve and -ve cables of each string to the correct terminals in the DC Isolator (maximum of
6.65kW of panels and maximum PV string voltage of 600VDC)
4.
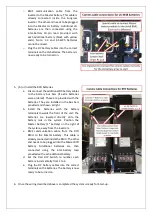
Optional – Cat5E internet cable (to provide more reliable comms for remote monitoring) WiFi is included in
the system as default.
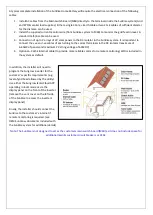
In addition, the installer will need to
program the Sungrow inverter for the
customer’s specific requirements (e.g.
level of grid-feed allowed by the utility)
Use either the Sungrow iSolarCloud APP
operating in local mode or via the
display panel on the front of the inverter
(remove the vent cover on the left side
of the SunRise to access the inverter’s
display panel)
Finally, the installer should connect the
SunRise to the customer’s internet if
remote monitoring is required. (see
OEM SunGrow documents included with
the SunRise system for additional details)
Note: The SunRise is not designed to act as the customers main switch board (MSB) as it does not include space for
additional main & customer circuit breakers or RCDs.
Summary of Contents for SunRise 1-PH
Page 1: ...SunRise Home Battery System Model SGS 1 PH AUTO with LG BYD battery Installation Manual...
Page 6: ......
Page 19: ......
Page 22: ......


