background image


AN-50 User Manual 


14/52  


Red

line Communications


…..solving the first mile challenge


Transceiver


Deployments


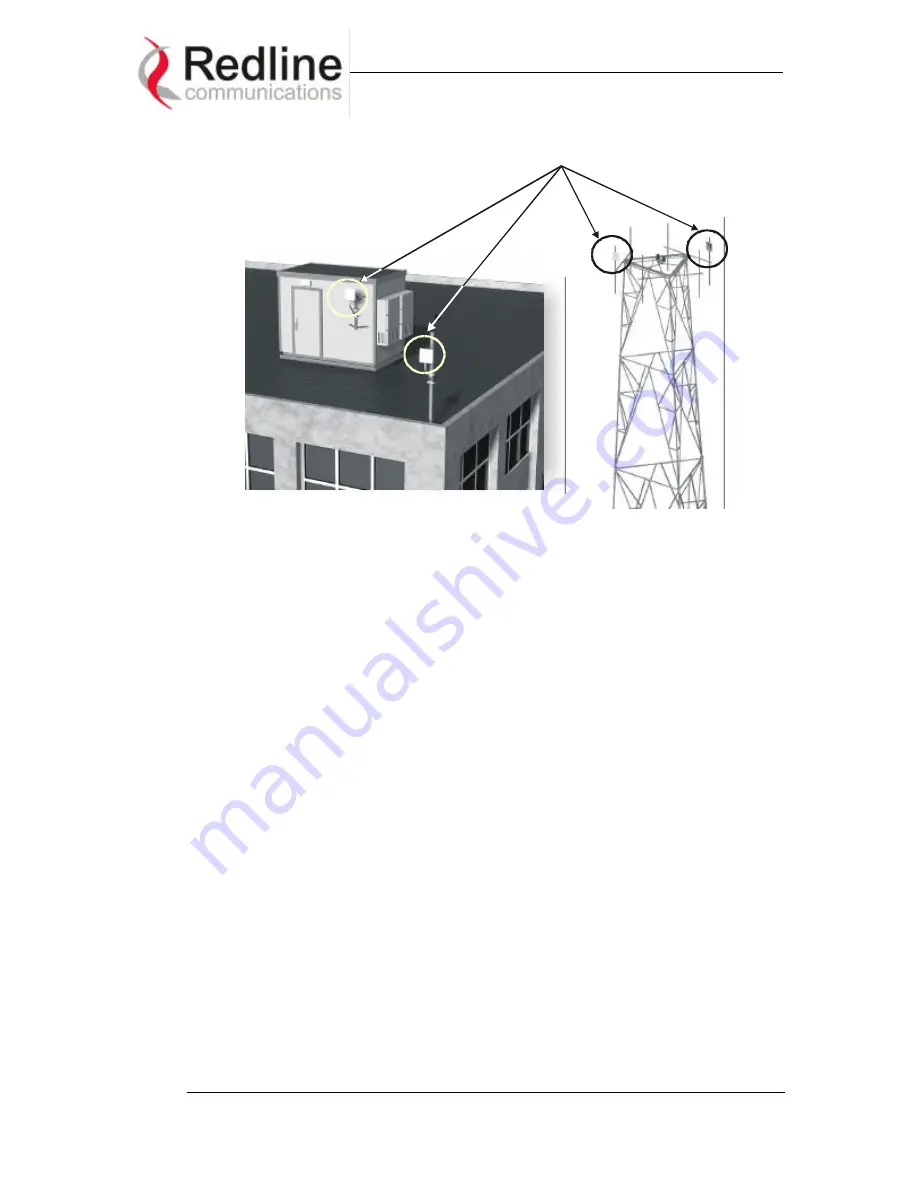
Figure 4 Antenna deployment options. 


Identify potential sources of RF interference.

 Measure for any possible RF 

interference on the roof-top or tower by utilizing a RF power meter or spectrum 
analyzer. RF interference arises from any other wireless system operating within 
the same frequency band of the AN-50.  Note that the AN-50 can operate in any 
one of the four channels designated for UNII band, therefore, there is some 
flexibility in addressing or avoiding the interference should other transmitters, in 
relatively close proximity, pose a problem.     

 
Verify the location of access points.

 With the remote terminal transmitting, use a 

spectrum analyzer to ensure there is adequate signal strength arriving at the 
candidate location for the antenna. 
 

5.2. 

Installing the Antenna  

 
Once the site survey has been completed, and the exact location of the antenna 
identified, the next step is to mount the AN-50 transceiver/antenna onto either a 
building structure or pole. The antenna and mounting brackets have been designed 
to withstand strong winds (see specifications at the end of this user guide).  It is 
imperative that all bolts and nuts are securely fastened to avoid any movement 
that could introduce misalignment. Note that there is an arrow on the back of the 
antenna, which must be pointing upwards to indicate proper orientation when the 
antenna is deployed.  
   

Summary of Contents for AN-50

Page 1: ...erminal located indoors to the transceiver located outdoors and the CAT 5 which connects the terminal to a switch or router for interface to the core network Terminal CAT 5 Cable AC Power Chord IF Cable Transceiver Antenna Pole and Mount Flat Plate Antenna Figure 3 AN 50 installation The terminal is for indoor installation only while the transceiver and antenna are mounted externally The principal...

Page 2: ...to help with the cell planning Obtain a copy of the facility blueprints and verify their accuracy The installation process will require penetrating the building to run the IF cable between the outdoor and indoor units In this regard it is imperative that the blueprints of the building are up to date and accurate Identify a Clear Line of Sight Path For maximum performance it is recommended to mount...

Page 3: ... proximity pose a problem Verify the location of access points With the remote terminal transmitting use a spectrum analyzer to ensure there is adequate signal strength arriving at the candidate location for the antenna 5 2 Installing the Antenna Once the site survey has been completed and the exact location of the antenna identified the next step is to mount the AN 50 transceiver antenna onto eit...

Page 4: ...t is attaching is structurally sound and can withstand the specified wind loading Lag Screw and Washer Figure 5 Mounting the antenna on a building structure Once the antenna is mounted it has to be aligned in both the azimuth and elevation planes The elevation alignment is accomplished by loosening the two bolts attached to the mounting bracket as shown in Figure 6 and slanting the pole until the ...

Page 5: ... drip loop as shown to prevent water from accumulating onto the connector The IF cable is equipped with 75 ohm F type connectors at both ends however it is important to note that one end of the cable is designated for outdoors as it is a specialized weather proof design while the other end is to be connected to the indoor terminal unit A label is attached to one end of the cable to clearly indicat...

Page 6: ...is connected the terminal is ready to be installed and configured The first step is to connect a CAT 5 cable from the Ethernet port to the host IP appliance Note a CAT 3 cable can be used if the terminal operates in 10BT mode 10 Mb s data rate However even with 10BT connections today it is recommended to use CAT 5 cabling initially in anticipation for the increased speed in the future As noted pre...

Page 7: ... 10 provides an illustration of the pin out designation for the AN 50 LAN interface to help you establish other implementations that are not addressed in this manual Figure 10 AN 50 LAN Ethernet Port pin out Now connect the AC cord to the 120 VAC outlet and turn the terminal on using the toggle switch at the rear of the unit The system Pwr LED should illuminate green to indicate proper power to th...

Page 8: ...ractors 2 For Compliance with FCC RF Exposure Requirements the transmitting antenna is required to be mounted outdoor on the building roof or antenna tower and located at a safety distance of more than 1 5 meters 5 feet from the transmitting antenna to any person s body 3 The Model AN 50 is a fixed point to point device that is certified by FCC and Industry Canada with the 5 8 GHz Directional Ante...

Reviews: