background image

29

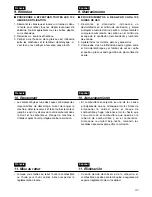
8. Fonctionnement

8. Uso

Français

Español

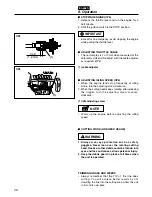
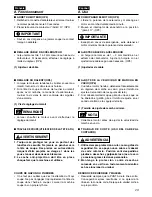
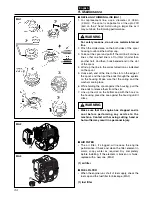
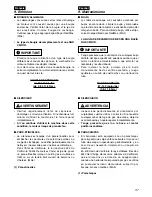
ARRET DU MOTEUR (OP3)

1. Relâcher la manette d’accélérateur et laisser tourner

le moteur pendant encore 30 secondes.

2. Placer le bouton de contact sur “(Arrêt) O”. (OP3)

• Sauf en cas d’urgence, ne jamais couper le contact

lorsqu’on accélére.

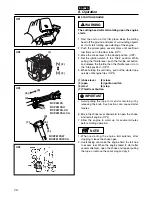
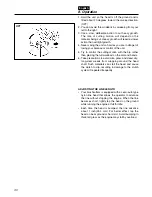
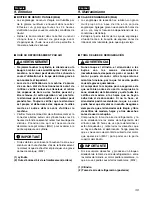
REGLAGE CÂBLE D’ACCÉLÉRATEUR

• le jeu normal est de 1 à 2 mm mesuré au niveau du

carburateur. Si nécessaire, effectuer ce réglage à
l’aide du régleur. (OP5)

(1) Ajusteur de câble

REGLAGE DU RALENTI (OP6)

1. Lorsque le moteur a tendance à s’arrêter souvent au

ralenti, tourner la vis dans le sens horaire.

2. Si la tête de coupe continue de tourner au ralenti

après avoir relâché la manette d’accélérateur,
tourner la vis dans le sens contraire des aiguilles
d’une montre.

(1) Vis de réglage du ralenti

• Laisser chauffer le moteur avant d’effectuer le

réglage du ralenti.

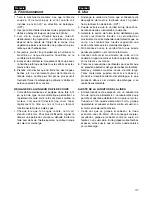
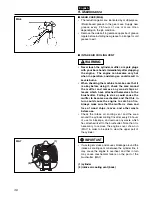
TRAVAIL DE COUPE (UTILISATION DE LA TETE A FIL)

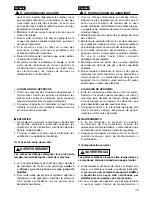
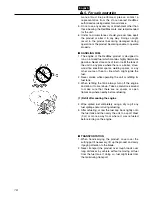
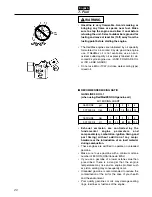
1. Toujours se protéger les yeux en portant des

lunettes de sécurité. Ne jamais se pencher vers
la tête de coupe. Des pierres ou autres débris
risquent d’être projetés au visage et  dans les
yeux et causer de sérieuses blessures.

2. Le cache anti-projection doit être en place

chaque fois que la machine est utilisée.

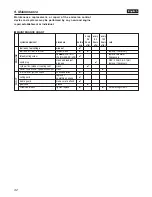
COUPE DE GAZON OU D’HERBES 

• Il ne faut pas oublier que c’est l’extrémité du fil qui

coupe. Ne pas l’engager trop rapidement la tête de
coupe dans l’herbe à couper. Laisser la machine
couper à son propre rythme. 

AVERTISSEMENT

REMARQUE

IMPORTANT

CÓMO PARAR EL MOTOR (OP3)

1. Libere la palanca del acelerador y mantenga el

motor en marcha durante medio minuto.

2. Mueva el interruptor de encendido a la posición

“(parar) O”. (OP3)

• Excepto en casos de emergencia, evite detener el

motor mientras tira de la palanca del acelerador.

AJUSTE CABLE DEL ACELERADOR

• La holgura normal es de 1 – 2 mm medida en el

extremo del carburador. Ajuste la holgura con el
ajustador de cable según sea necesario. (OP5)

(1) Ajustador de cable

AJUSTE DE LA VELOCIDAD DE MARCHA EN
VACÍO (OP6)

1. Cuando el motor tienda a detenerse frecuentemente

en régimen de marcha en vacío, gire el tornillo de
ajuste en el sentido de las agujas del reloj.

2. Si el cabezal cortador sigue girando una vez que se

ha liberado el gatillo, gire el tornillo de ajuste en el
sentido contrario a las agujas del reloj.

(1) Tornillo de ajuste de marcha mínima

• Caliente el motor antes de ajustar la velocidad de

marcha en vacío.

TRABAJO DE CORTE (USO DEL CABEZAL
CORTADOR)

1. Utilice siempre protección ocular, como gafas de

seguridad. No se apoye nunca sobre el cabezal
de corte rotatorio. Podrían salir despedidos
piedras o desechos y golpearle los ojos o la cara
y ocasionar graves lesiones personales.

2. Mantenga la protección contra desechos

colocada en su sitio en todo momento mientras
se hace funcionar la unidad.

DESBROCE DE HIERBAS Y MALEZA

• Recuerde siempre que la PUNTA de la línea corta.

Conseguirá mejores resultados si no apremia la
línea en la zona de corte. Deje que la unidad corte a
su propio ritmo.

ADVERTENCIA

NOTA

IMPORTANTE

Summary of Contents for BCZ2610S

Page 1: ...idas por el Estado de California como causantes de c ncer malformaciones en reci n nacidos y otros problemas de reproducci n Les chappements du moteur de ce produit contiennent des produits chimiques...

Page 2: ...in order to prevent accidents which could lead to serious bodily injury or death This mark indicates instructions which must be followed or it leads to mechanical failure breakdown or damage This mark...

Page 3: ...trucciones y que las siga estrictamente ADVERTENCIAS CONTENIDAS EN EL MANUAL Bajo este s mbolo aparecen instrucciones que se deben seguir a fin de evitar accidentes que pueden causar serias lesiones f...

Page 4: ...H Fuel tank capacity 22 0 fl oz 0 65 Transmission Centrifugal clutch Rigid driveshaft Reduction ratio 1 462 Cutting head rotating direction Counter clockwise Operator view Durability period 300hrs Sta...

Page 5: ...encieux 12 Poign e de d marrage 13 R servoir de carburant 14 Pompe d amor age 15 Levier de starter 16 Capot du filtre air 17 Poign e 18 Protecteur 1 Mango 2 Colgador de correa para hombro 3 Interrupto...

Page 6: ...his machine 2 Wear head eye and ear protection 3 Warning Danger of kickback 4 Beware of thrown objects 5 Warning Attention 6 Keep all children bystanders and helpers 15 meters away from the brushcutte...

Page 7: ...ILTRE A AIR c Position ouverte du starter Emplacement CAPOT DU FILTRE A AIR 1 Lea el manual de instrucciones antes de usar esta m quina 2 Use protecci n para la cabeza ojos y o dos 3 Advertencia Adver...

Page 8: ...oots 2 And you should carry with you 1 Attached tools and files 2 Properly reserved fuel 3 Spare blade or nylon string 4 Things to notify your working area rope warning signs 5 Whistle for collaborati...

Page 9: ...cil lograr una adecuada visi n del rea de trabajo c Durante tormentas de lluvia tormentas el ctricas tormentas de viento o en cualquier 1 Lire ce manuel attentivement jusqu une compr hension totale et...

Page 10: ...s Injury RSI could occur If you feel discomfort redness and swelling of your fingers or any other part of your body see a doctor before getting worse 2 To avoid noise complaints in general operate pro...

Page 11: ...rre REMARQUE AVERTISSEMENT otra circunstancia en que las condiciones clim ticas puedan hacer inseguro el uso del producto PLAN DE TRABAJO 1 Nunca utilice el producto cuando se encuentre bajo la influe...

Page 12: ...te as soon as the engine is started When starting the engine place the product onto the ground in a flat clear area and hold it firmly in place so as to ensure that neither the cutting part nor the th...

Page 13: ...antes de iniciar el trabajo 3 Inspeccione la unidad completa para determinar si tiene sujetadores sueltos o fugas de combustible Aseg rese de que el accesorio de corte est debidamente instalado y aseg...

Page 14: ...t in serious burns or electrical shock IF SOMEONE COMES 1 Guard against hazardous situations at all times Warn adults to keep pets and children away from the area Be careful if you are approached Inju...

Page 15: ...Separe los pies ligeramente un poco m s que el ancho de sus hombros de manera que su peso quede distribuido uniformemente en ambas piernas y aseg rese de mantener siempre una postura firme mientras t...

Page 16: ...which might ignite the fuel 2 Never smoke while operating the unit or refilling its fuel tank 3 When refilling the tank always turn off the engine and allow it to cool down Take a careful look around...

Page 17: ...rvicio RedMax autorizado m s cercano 5 Utilice solamente piezas y accesorios marcados RedMax y recomendados para la unidad 6 No se debe bajo ninguna circunstancia desarmar el producto ni modificarlo d...

Page 18: ...e locking the gear shaft by inserting the supplied tool into the upper holder on the gear box loosen and remove the hexagon nut left handed 2 Fit the line head assembly to the gear shaft over the hold...

Page 19: ...s le haut jusqu ce que la t te de l appareil soit droite au niveau du sol SE4 IMPORTANT INSTALACI N DEL MANGO Instale el mango en el tubo del eje y aseg relo en la posici n que le sea m s c moda SE1 1...

Page 20: ...emission are controlled by the fundamental engine parameters and components eq carburation ignition timing and port timing without addition of any major hardware or the introduction of an inert mater...

Page 21: ...urce d tincelles proximit de l endroit o est entrepos e l essence Arr ter le moteur puis le laisser refroidir un peu avant de remplir le r servoir Remplir le r servoir l ext rieur sur une surface nue...

Page 22: ...eizing due to abnormal lean mixture 5 Put a clear indication on the outside of the container to avoid mixing up with other containers FUELING THE UNIT 1 Untwist and remove the fuel cap Keep the cap an...

Page 23: ...DE VIE DU MOTEUR AVERTISSEMENT IMPORTANT Gasolinas o aceites de mala calidad puede da ar los anillos de sellado las l neas o el tanque de combustible del motor COMO MEZCLAR EL COMBUSTIBLE Agite cuidad...

Page 24: ...toring the product for a long period of time clean the fuel tank after rendering it empty Next activate the engine and empty the carburetor of the composite fuel 6 In the case of scrapping the used mi...

Page 25: ...i risque d entra ner un refus de couverture par la garantie REMARQUE 1 COMBUSTIBLE SIN ACEITE GASOLINA CRUDA Esto ocasionar r pidamente da os graves a las partes internas del motor 2 GASOHOL Este pued...

Page 26: ...irmly pull out the starter rope quickly until engine fires OP4 1 choke lever 2 close 3 open 4 ignition switch 5 start 6 stop 7 Throttle set button Avoid pulling the rope to its end or returning it by...

Page 27: ...au plusieurs fois la corde de d marrage ou enlever et s cher la bougie REMARQUE IMPORTANT AVERTISSEMENT ARRANQUE DEL MOTOR Tenga presente que el cabezal cortador comenzar a girar cuando el motor sea a...

Page 28: ...2 When the cutting head keeps rotating after releasing the trigger turn the adjusting screw counter clockwise 1 idle adjusting screw Warm up the engine before adjusting the idling speed CUTTING WORK...

Page 29: ...propre rythme AVERTISSEMENT REMARQUE IMPORTANT C MO PARAR EL MOTOR OP3 1 Libere la palanca del acelerador y mantenga el motor en marcha durante medio minuto 2 Mueva el interruptor de encendido a la p...

Page 30: ...ng the full workload on the arm and hands 6 Take precautions to avoid wire grass and dead dry long stem weeds from wrapping around the head shaft Such materials can stall the head and cause the clutch...

Page 31: ...s golpee el cabezal contra un suelo sin hierbas o un suelo duro Evite golpear sobre hierbas espesas altas puesto que el motor puede calarse por sobrecarga 1 Tenir la machine de mani re ce que la t te...

Page 32: ...spark plug plug gap replace if necessary cylinder fins intake air cooling vent clean muffler spark arrester cylinder exhaust port clean throttle lever ignition switch check operation replace if cutti...

Page 33: ...r d acc l rateur bouton de contact v rifier le fonctionnement remplacer en cas de parties coupantes d faut cache anti projection v rifier la fixation carter du renvoi d angle graisser vis crous boulon...

Page 34: ...put the ends through the eyelets on the housing Make sure that the spring and the washers are in place 6 While holding the spool against the housing pull the line ends to release them from the slot 7...

Page 35: ...ch s MA3 1 Filtre carburant AVERTISSEMENT AVERTISSEMENT RELLENADO DE LA L NEA DE DESBROCE MA1 1 Para la l nea de reemplazo utilice un di metro de 0 095pulgadas 2 4mm La bobina es apta para una l nea d...

Page 36: ...GHTENING TORQUE 87 104 in lbs 9 8 11 8 N m MUFFLER Inspect periodically the muffler for loose fasteners any damage or corrosion If any sign of exhaust leakage is found stop using the machine and have...

Page 37: ...buissons ou d herbes MA5 1 Pare etincelles AVERTISSEMENT IMPORTANT BUJ A Los fallos de arranque son causados a menudo por buj as en mal estado Limpie la buj a y compruebe que la distancia de la misma...

Page 38: ...or leaves which have attached themselves to the brushcutter Failing to do so could cause the muffler to become overheated and that this in turn could cause the engine to catch on fire Always make sure...

Page 39: ...cylindre 2 Ou e d entr e d air de refroidissement arri re IMPORTANT AVERTISSEMENT CAJA DE ENGRANAJES MA6 Los engranajes de reducci n se lubrican con grasa multi prop sito a base de litio en la caja d...

Page 40: ...oil or grease has worked its way in between the clutch lining and drum and if it has wipe it away using oil free lead free gasoline MA8 Aged fuel is one of major causes of engine starting failure Bef...

Page 41: ...y el tambor de ser as quite el aceite o grasa usando gasolina sin plomo libre de aceite Le carburant g est une des causes principales des impossibilit s de d marrage Avant de ranger la machine vider l...

Page 42: ...to the debris guard which is suitable for the metal blade OPT1 TIGHTENING TORQUE 26 43 5 in lbs 2 94 4 9 N m 1 Guard T3246 24110 Change the loop handle to the J handle for safe operation OPT2 1 Bracke...

Page 43: ...Changer la poign e pour utiliser celle en J pour un fonctionnement en toute s curit OPT2 1 Moyeu 3583 14101 2 Poign e en J 6367 14200 IMPORTANT IMPORTANT Elija el protector contra desechos adecuado pa...

Page 44: ...Grass WARNING SET UP THE BLADE 1 Detach the line head assembly OPT4 2 Put on the blade making the marked side face the shaft side put the holder and the cover on and fasten the blade with the nut OPT...

Page 45: ...PT4 2 Mettre la lame en place en posant le c t marqu face au c t de l arbre installer le moyeu et le couvercle et serrer la lame avec l crou OPT4 COUPLE DE SERRAGE 130 174 pouces livres 14 7 19 6 N m...

Page 46: ...g depth according to the condition of object If the grass or other object gets caught in the blade or if the unit starts to shake or vibrate turn off the engine and check the whole unit Change the bla...

Page 47: ...te le moindre d faut la rebuter et la remplacer par une lame d origine RedMax AVERTISSEMENT AVERTISSEMENT corte comienza a girar inmediatamente cuando se arranca el motor poniendo el acelerador en pos...

Page 48: ...that was hit The operator can lose control of the unit and the blade can cause serious personal injury to the operator or any person nearby if the blade contacts any part of the body 2 How you can red...

Page 49: ...s endroits d pourvus AVERTISSEMENT AVERTISSEMENT Utilizando el arn s para el hombro cuelgue la unidad en el lado derecho de su cuerpo Ajuste la longitud de la correa de manera que el cabezal cortador...

Page 50: ...lat file A 22 24 tooth blade B 8 tooth blade C 4 tooth blade Point OPT10 1 Keep the end corner sharp 2 Round the root of the edge using round file 3 Do not use water when using a grinder It is recomme...

Page 51: ...el rea de trabajo despejada de material cortado y de otros desechos 3 Cu l es la mejor forma de mantener el control a Sostenga firmemente la unidad con ambas manos Esto puede ayudar a neutralizar even...

Page 52: ...VERIFICATION CAUSES PROBABLES ACTION r servoir de carburant carburant incorrect vidanger et remplacer le carburant vis de r glage de carburateur d r gl refaire le r glage silencieux cylindre d p t de...

Page 53: ...n 5 Les pi ces de la machine seront disponibles pendant sept 7 ans apr s l arr t de fabrication de cette machine Il est possible que certaines pi ces particuli res soient soumises des changements en c...

Page 54: ...54 14 Parts list Fig 1 DRIVE UNIT BCZ2610S BCZ2610S CA S N 70060101 and up...

Page 55: ...ER COMP 848 8RA 0340 1 28 LEVER T3002 12202 03 1 29 SCREW 6110 14410 04 2 30 NUT 6110 14410 05 2 31 SHAFT 6110 14410 06 1 32 SPRING 6110 14410 07 1 33 SPRING 6110 14410 08 1 34 BUTTON T3032 14410 09 1...

Page 56: ...56 14 Parts list Fig 2 ENGINE UNIT BCZ2610S BCZ2610S CA S N 70050101 and up...

Page 57: ...10 2 77 MUFFLER ASSY 848 F40 1510 1 79 ARRESTER 4810 15140 1 Key Description Part Number Q ty 80 BOLT M5x50 4820 15310 2 81 GASKET 848 F3R 15C0 1 82 PLATE muffler 848 F3R 15D0 1 83 COVER ASSY 848 F30...

Page 58: ...es As the small off road engine owner you are responsible for the performance of the required maintenance listed in your owner s manual ZENOAH AMERICA INC recommends that you retain all receipts cover...

Page 59: ...du propri taire li es la garantie En tant que propri taire du petit moteur hors route vous tes responsable de la r alisation de l entretien indiqu dans votre mode d emploi ZENOAH AMERICA INC vous reco...

Page 60: ...NC Responsabilidades del propietario Como propietario del motor todo terreno usted es responsable por la realizaci n del mantenimiento requerido que se indica en el manual del propietario ZENOAH AMERI...

Page 61: ...ART THAT IS EQUIVALENT IN PERFORMANCE AND DURABILITY MAY BE USED IN NON WARRANTY MAINTENANCE OR REPAIRS AND SHALL NOT REDUCE THE WARRANTY OBLIGATION OF THE COMPANY THE COMPANY IS LIABLE FOR DAMAGES TO...

Page 62: ...ilit peut tre utilis e pour l entretien hors garantie ou les r parations hors garantie et ce sans r duire l obligation de garantie incombant la soci t La soci t sera tenue responsable des dommages aux...

Page 63: ...MPLAZO PROGRAMADO DE LA MISMA SEA REALIZADO PARA EL MANTENIMIENTO O REPARACIONES NO CUBIERTOS POR LA GARANT A SE PODR USAR CUALQUIER PIEZA DE RECAMBIO QUE SEA EQUIVALENTE EN PRESTACI N Y DURABILIDAD S...

Page 64: ...nforme aux reglements sur les emissions de gaz 2008 1 U S EPA et 2008 1 californie EXH et EVP pour SI SORE s P riode de l acquiescement CATEGORY A Type de moteur 8HQZS 0254BN 2 Cylindree 25cc Syst me...

Reviews: