background image

US-5

BCZ400SW

U
S

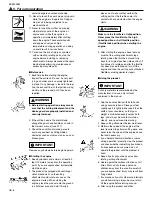
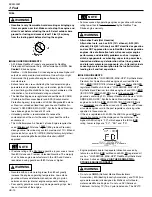
• A brushcutter or trimmer can be

dangerous if used incorrectly or
carelessly, and can cause serious or
fatal injury to the operater or others. It
is extremely important that you read
and understand the contents of this
Owner's manual. 

• Under no circumstances may the

design of the machine be modified
without the permission of the
manufacturer. Always use genuine
accessories and parts. Non-authorized
modifications and/or accessories or
parts can result in serious personal
injury or the death of the operator or
others.

• When planning your work schedule,

allow plenty of time to rest. Limit the
amount of time over which the product
is to be used continuously to
somewhere around 30 ~ 40 minutes per
session. Also try to keep the total
amount of work performed in a single
day under 2 hours or less. 

• If you don’t observe the working time,

or working manner (See p5), Repetitive
Stress Injury(RSI) could occur. 
If you feel discomfort, redness and
swelling of your fingers or any other
part of your body, see a doctor before
getting worse.

Basic safety rules

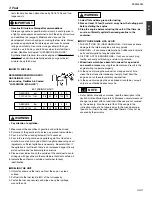
1. Never operate the product when you are

fatigued, ill, or upset, or under the
influence of madication that may make you
drowsy, or if you are under  the influence
of alcohol or drugs.

2. Never use the product;

a: When the ground is slippery or when

you can't maintain a steady posture.

b: At night, at times of heavy fog, or at any

other times when your field of vision
might be limited and it would be difficult
to gain a clear view of the working area.

c: During rain storms, during lightning

storms, at times of strong or gale-force
winds, or at any other times when
weather conditions might make it
unsafe to use the product.

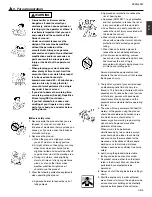
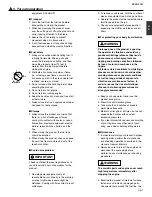
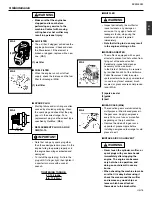
3. Wear the following protective equipments

when operating the product.

a: Approved helmet to reduce the risk of

falling objects.

WARNING

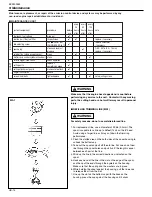
5. For safe operation

b: Approved ear protection to reduce the

risk of hearing loss.

c: Approved (ANSI Z87.1.) eye protection

and foot protection to reduce the risk of
injury associated with thrown objects.

d: Face filter mask in dusty conditions to

reduce the risk of injury associated with
the inhalation of dust.

e: Wear sturdy rubber-soled shoes or

shoes with some other form of anti-slip
protection to help protect you against
falling.

f: Wear thick anti-vibration gloves to

reduce the risk of whitefinger disease.

g: Do not wear loose clothing, scarves,

neck chains, unconfineed long hair, and
like to reduce the risk of injury
associated with objects being drawn into
air intake and rotating parts. 

Personal protective equipment cannot
eliminate the risk of injury but it will reduce
the degree of injury.

4. The ignition system of your unit produces

an electromagnetic field of a very low
intensity. This field may interfere with some
pacemakers. To reduce the risk of serious
or fatal injury, persons with pacemaker
should consult their physician and the
pacemaker munufacturer before operating
this tool.

5. The area within a perimeter of 50 feet (15

meters) of the person using the product
should be considered a hazardous area
into which no one should enter. If
necessary yellow warning rope, warning
signs should be placed around the
perimeter of the area. 
When work is to be performed
simultaneously by two or more persons,
care should also be taken to constantly
look around or otherwise check for the
presence and locations of other people
working so as to maintain a distance
between each person sufficient to ensure
safety.

6. Avoid using the product where stable

footing and balance are not assured. 

7. All product service, other than the items

listed in the Owner's Manual, should be
performed by competent service
personnel. 

8. Always shut off the engine before setting it

down.

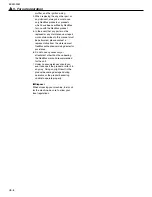
9. Start the engine only in well ventilated

areas. Never start or run the engine inside
a closed room or building and potentially
explosive atmosphere. Exhaust fumes

Summary of Contents for BCZ400SW

Page 1: ...formaciones en reci n nacidos y otros problemas de reproducci n Les chappements du moteur de ce produit contiennent des produits chimiques connus par l Etat de Californie comme tant responsables de ca...

Page 2: ......

Page 3: ...s product contains chemicals known to the State of California to cause cancer birth defects or other reproductive harm WARNING Before using our products please read this manual carefully to understand...

Page 4: ...e machine 4 5 For safe operation 5 6 Set up 9 7 Fuel 10 8 Operation 12 9 Maintenance 14 10 Storage 16 11 Disposal 16 12 Optional blade usage 17 13 Troubleshooting guide 20 Contents 1 Read this brushcu...

Page 5: ...park plug NGK CMR7H 10 Fuel tank capacity 24 7 fl oz 0 73 Transmission Centrifugal clutch Rigid driveshaft Reduction ratio 1 400 Cutting head rotating direction Counter clockwise Operator view Durabil...

Page 6: ...should contact the dealer from which you purchased the product to order new labels and affix them in the required location s Never modify your brushcutter We won t warrant the machine if you use the r...

Page 7: ...operation b Approved ear protection to reduce the risk of hearing loss c Approved ANSI Z87 1 eye protection and foot protection to reduce the risk of injury associated with thrown objects d Face filte...

Page 8: ...ground in a flat clear area and hold it firmly in IMPORTANT WARNING 5 For safe operation place so as to ensure that neither the cutting part nor the throttle come into contact with any obstacle when...

Page 9: ...late at night when people might be disturbed Comply with times listed in local ordinances IMPORTANT 2 To reduce sound levels limit the number of pieces of equipment used at any one time 3 Operate the...

Page 10: ...l must be performed please contact a representative from the store nearest RedMax authorized servicing dealer for assistance 6 Do not use any accessory or attachment other than those bearing the RedMa...

Page 11: ...d attach the guard skirt SE2 1 Debris guard 2 Bolts 3 Guard skirt INSTALLING LINE HEAD SE3 1 While locking the gear shaft by inserting the supplied tool into the upper holder on the gear box loosen an...

Page 12: ...merican Petroleum Institute TC Two Cycle labeled oils The API TC WARNING WARNING NOTE 7 Fuel FUEL Gasoline is very flammable Avoid smoking or bringing any flame or sparks near fuel Make sure to stop t...

Page 13: ...UELING THE UNIT 1 Untwist and remove the fuel cap Rest the cap on a clean surface 2 Put fuel into the fuel tank to 80 of the full capacity 3 Fasten the fuel cap securely and wipe up any fuel spillage...

Page 14: ...start engine OP2 7 Allow the engine to warm up for several minutes before starting operation IMPORTANT WARNING 1 OP1 1 2 3 OP2 1 2 a b 3 OP3 OP4 04 in 1 2mm 1 OP5 1 When restarting the engine immediat...

Page 15: ...aterial being cut Heavy growth will require slower action than will light growth 4 Never swing the unit so hard as you are in danger of losing your balance or control of the unit 5 Try to control the...

Page 16: ...the spring and the washers are in place 6 While holding the spool against the housing pull the line ends to release them from the slot 7 Line up the slot on the bottom cap with the hook on the housin...

Page 17: ...ose fasteners any damage or corrosion If any sign of exhaust leakage is found stop using the machine and have it repaired immediately Note that failing to do so may result in the engine catching on fi...

Page 18: ...use for blockage and remove any waste which has attached itself to the brushcutter Note that it is necessary to remove the engine cover shown in MA7 in order to be able to view the upper part of the...

Page 19: ...eeds D Grass WARNING SET UP THE BLADE 1 Detach the line head assembly OPT3 2 Put on the blade making the marked side face the shaft side put the holder and the cover on and fasten the blade with the n...

Page 20: ...astened incorrectly may cause serious accident to the operator WARNING WARNING WARNING Make sure that the blade is not bent warped cracked broken or damaged If you find any error to the blade discard...

Page 21: ...et to place the protective cover over the blades When transporting the unit over long distances detach the blade fix the unit by ropes IMPORTANT OPT9 12 Optional blade usage d Keep the blade sharp A d...

Page 22: ...ct correct GAP 0 9 1 0 mm spark plug disconnected retighten Case 2 Engine starts but does not keep running Hard re starting CHECK PROBABLE CAUSES ACTION fuel tank incorrect fuel or staled fuel drain i...

Page 23: ...ion center or service center as soon as the problem exists The warranty repairs should be completed in a reasonable amount of time not to exceed 30 days If you have any questions regarding your warran...

Page 24: ...enance are not covered ADD ON OR MODIFIED PARTS Add on or modified parts that are not exempted by CARB or EPA may not be used The use of any non exempted add on or modified parts will be grounds for d...

Page 25: ...connus par l Etat de Californie comme tant responsables de cancers d anomalies cong nitales et d autres atteintes l appareil reproducteur Avant d utiliser cette ce produit veuillez lire attentivement...

Page 26: ...des composants 3 2 Caracteristiques 3 3 Etiquettes d avertissement plac es sur la machine 4 4 Symboles utilises sur la machine 4 5 Consignes de securite 5 6 Assemblage 9 7 Carburant 10 8 Fonctionnemen...

Page 27: ...e fil Moteur Type 2 temps essence refroidi par air Mod le GZ40N Cylindr e 40 1 cm3 Puissance maximale 1 97 CV 1 47 kW 8500 t mn Vitesse de ralenti 2800 200 t mn Carburant M lange essence 50 huile 1 Lo...

Page 28: ...e et faciliter l entretien Prendre soin d observer les indications suivantes afin d viter les erreurs a Emplacement de remplissage du MELANGE Emplacement BOUCHON DU RESERVOIR DE CARBURANT b Position f...

Page 29: ...machine dangereuse AVERTISSEMENT 5 Consignes de securite 3 Portez le mat riel de protection suivant lorsque vous utilisez le produit a Un casque homologu pour vous prot ger des chutes d objets hasarde...

Page 30: ...t 3 Si la t te de coupe est la lame en m tal changez la protection et utilisez comme indiqu dans le mode d emploi voir p 18 4 V rifier constamment l tat de la zone de travail pour viter tout accident...

Page 31: ...duit 4 Ne faites pas le plein quand le moteur est chaud 5 Ne faites pas le plein quand le moteur tourne 6 Veillez ce que les manettes soient s ches propres et tenues l cart de l huile et du carburant...

Page 32: ...restent tr s chaudes imm diatement apr s l arr t du moteur 3 V rifiez r guli rement la a pour s assurer que les courroies ne sont pas desserr es et qu il n y a pas de pi ce rouill e ou endommag e V r...

Page 33: ...si re de protecteur SE2 1 Protecteur anti d bris 2 Boulons 3 Lisi re de protecteur INSTALLATION DE LA TETE DE COUPE SE3 1 Tout en bloquant l arbre d entra nement l aide de la tige fournie avec la mach...

Page 34: ...e avec un indice inf rieur 89 octanes risque d lever dangereusement la temp rature du moteur Les essences indice d octane inf rieur cette valeur ont tendance provoquer des d tonations explosions ce qu...

Page 35: ...t n cessaire afin de garantir une bonne marche du moteur pendant longtemps En effet en cas de m lange insuffisant un risque majeur de probl mes au niveau des cylindres peut appara tre en raison d un m...

Page 36: ...ails sur la garantie de qualit lire attentivement la section propos de la Garantie Limit e Il est galement important de rappeler que l usure et les d gradations normales de l appareil ne sont en aucun...

Page 37: ...cc l rateur tourner la vis dans le sens contraire des aiguilles d une montre 1 Vis de r glage du ralenti Laisser chauffer le moteur avant d effectuer le r glage du ralenti REMARQUE IMPORTANT REMARQUE...

Page 38: ...re de l objet de la coupe Une v g tation paisse demande une progression plus lente que de l herbe parse 4 Ne jamais pivoter trop rapidement en utilisant la machine au risque de perdre l quilibre ou le...

Page 39: ...is de r glage MOTEUR MACHINE TABLEAU D ENTRETIEN Assurez vous que le moteur est arr t et refroidi avant de commencer toute maintenance sur l appareil Un contact avec la lame tournante ou avec le silen...

Page 40: ...fuit arr ter d utiliser la machine et la faire r parer imm diatement Si l on continue d utiliser la machine dans cette condition le moteur risque de prendre feu PARE ETINCELLES Le silencieux est quip...

Page 41: ...de refroidissement et la zone des ailettes autour du cylindre toutes les 25 heures de fonctionnement et retirer tout bourrage de d tritus Prendre note qu il est n cessaire de d monter le capot moteur...

Page 42: ...it droite au niveau du sol OPT4 12 Utilisation de la lame optionnelle Lors de l aff tage du retrait ou de la pose de la lame porter des gants pais et utiliser des outils appropri s pour viter toute bl...

Page 43: ...que la lame a bien t mise en place suivant les instructions et qu elle tourne r guli rement sans faire de bruit anormal OPT7 AVERTISSEMENT AVERTISSEMENT 12 Utilisation de la lame optionnelle Les pi c...

Page 44: ...en saisir les poign es b Se tenir de mani re tr s stable les pieds l g rement cart s et pr t l ventualit d un coup de recul Limiter sa contre r action Garder l quilibre et une bonne assise ENTRETIEN L...

Page 45: ...u de 0 9 1 0 mm Bougie d allumage d brancher resserrer 2 me cas Le moteur d marre mais ne reste pas en marche ou est difficile red marrer VERIFICATION CAUSES PROBABLES ACTION r servoir de carburant ca...

Page 46: ...ire du petit moteur tout terrain vous devez cependant savoir que la SA RedMax peut nier la couverture de la garantie si votre petit moteur tout terrain ou une pi ce sont tomb s en panne cause d un abu...

Page 47: ...ervoir de carburant bouchon et tubes certains composants sont couverts de mani re limit e et sont sp cifi s dans le cadre de l entretien obligatoire CE QUI N EST PAS COUVERT La garantie ne s applique...

Page 48: ......

Page 49: ...qu micas conocidas por el Estado de California como causantes de c ncer malformaciones en reci n nacidos y otros problemas de reproducci n Antes de usar nuestros productos lea detenidamente este manua...

Page 50: ...esentes en la m quina 4 5 Instrucciones de seguridad 5 6 Montaje 9 7 Combustible 10 8 Uso 13 9 Mantenimiento 15 10 Almacenamiento 17 11 Eliminaci n 17 12 Uso de hoja opcional 18 13 Gu a de localizaci...

Page 51: ...or aire gasolina de 2 tiempos Modelo GZ40N Desplazamiento 40 1 cm3 Potencia m xima 1 97 Hp 1 47kW a 8500 rpm Velocidad de marcha en vac o 2800 200 rpm Combustible Mezcla Gasolina 50 Aceite 1 al utiliz...

Page 52: ...producto los s mbolos han sido estampados en relieve en la m quina Siga siempre estas indicaciones y tenga cuidado de no cometer un error a Orificio de llenado de MEZCLA DE GASOLINA Posici n TAP N DEL...

Page 53: ...mentas ADVERTENCIA 5 Instrucciones de seguridad el ctricas tormentas de viento o en cualquier otra circunstancia en que las condiciones clim ticas puedan hacer inseguro el uso del producto 3 Utilice e...

Page 54: ...i detecta cualquier da o en la tuber a de combustible en la tuber a de escape de gases o en el cableado de encendido no use el producto hasta haber reparado el desperfecto 2 Antes de empezar a utiliza...

Page 55: ...fuertes a la unidad durante la conducci n o durante la carga y la descarga existe la posibilidad de da arse o de causar aver as IMPORTANTE Seguridad en el uso del combusible 1 Maneje el combustible c...

Page 56: ...ncionamiento realice las operaciones de mantenimiento y revisi n descritas en el manual a intervalos regulares 2 Aseg rese siempre de desconectar el motor y desconectar la buj a antes de realizar cual...

Page 57: ...ctor contra desechos 2 Tornillos 3 Fald n de protecci n INSTALACI N DEL CABEZAL DE HILO SE3 1 Mientras bloquea el eje de engranaje insertando la herramienta suministrada dentro de la agarradera superi...

Page 58: ...a de operaci n de los motores La gasolina de bajo octanaje ocasionar detonaciones golpeteo y como resultado los pistones se disparar n y se producir n aver as serias en los componentes internos del mo...

Page 59: ...eites puede resultar dif cil dependiendo de los ingredientes del aceite es necesaria una agitaci n suficiente para beneficio de la duraci n del motor Tenga cuidado si la agitaci n es insuficiente exis...

Page 60: ...cuidadosamente la descripci n que est en la secci n de garant a limitada Por otra parte el desgaste y cambio normal en el producto sin influencia funcional no est cubierto por la garant a Tambi n ten...

Page 61: ...vez que se ha liberado el gatillo gire el tornillo de ajuste en el sentido contrario a las agujas del reloj 1 Tornillo de ajuste de marcha m nima Caliente el motor antes de ajustar la velocidad de ma...

Page 62: ...ntos fuertes requerir n una acci n m s lenta que los crecimientos ligeros 4 No balancee nunca la unidad tanto que pueda perder el equilibrio o el control de la misma 5 Intente controlar el movimiento...

Page 63: ...e de los extremos finos para liberarlos de la ranura 7 Alinee la ranura de la tapa inferior con el gancho del bastidor presione la tapa contra el bastidor hasta que enganche ADVERTENCIA ADVERTENCIA El...

Page 64: ...de parar el motor El motor puede alcanzar altas temperaturas mientras funciona por lo que tal acci n podr a causarle graves quemaduras ADVERTENCIA ADVERTENCIA MA6 9 Mantenimiento Aseg rese de que el...

Page 65: ...de aire de refrigeraci n y la zona alrededor de las aletas de refrigeraci n del cilindro cada 25 horas de uso para determinar si est n bloqueadas y retire todos los desechos que se hayan adherido al...

Page 66: ...o de hoja opcional 1 2 3 4 A B C D OPT2 OPT4 1 3 2 OPT3 Retire el fald n de protecci n si desea montar la hoja en el producto y utilizarla OPT1 1 Fald n de protecci n ADVERTENCIA 1 OPT1 MONTE LA HOJA...

Page 67: ...to ni presente corrosi n 2 Aseg rese de que la hoja y el soporte hayan sido fijados de acuerdo con las ADVERTENCIA ADVERTENCIA 12 Uso de hoja opcional instrucciones y que la hoja gire con suavidad sin...

Page 68: ...ar eventuales contragolpes Mantenga su mano derecha e izquierda completamente alrededor de los respectivos mangos b Mantenga los pies separados en una postura c moda estando preparado al mismo tiempo...

Page 69: ...recta Corregir DISTANCIA INTERELECTR DICA 0 9 1 0 mm Buj a Desconectada Reajustarlo Caso 2 El motor arranca pero no se mantiene en marcha Dificultad para volver a arrancar el motor COMPROBAR POSIBLES...

Page 70: ...o como propietario del motor todo terreno debe tener presente que RedMax puede negar la cobertura de la garant a si el motor peque o todo terreno o una pieza del mismo falla debido al abuso negligenci...

Page 71: ...ombustible 3 Sistema de ignici n 4 Dep sito de combustible tap n y conductos si es aplicable algunos componentes solamente est n cubiertos hasta el punto especificado en el programa de mantenimiento L...

Page 72: ...les produits de RedMax peuvent tre enregis tr s en ligne ind pendamment de leur ann e mod le Enregistrez les produits en ligne l adresse www redmax com cliquez Help Support et puis cliquez sur le lien...

Reviews: