background image

Summary of Contents for RBEL79740

Page 1: ...ELAYS PLEASE CALL D_RECT TO OUR TOLL FREE CUSTOMER HOT LINE The trained technicians on our customer hot line will provide immediate assistance free of charge to you CUSTOMER HOT LINE 1 877 994 4999 Mo...

Page 2: ...REEBOK and the Vector Logo _ _ f_are registered trademarks and service marks of Reebok This product is manufactured and distributed under license from Reebok international 2...

Page 3: ...ect and property tighten aH parts regu larly Replace any worn parts immediateJy 6o Keep children under age 12 and pets away from the elli ptical exerciser at aH times 7 The eHiptica exerciser should n...

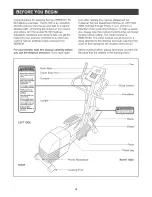
Page 4: ...pleasenotetheproduct modelnumber andserial number before calling Themodel number is RBEL79740 Theserialnumber canbefoundona decalattached to theelliptical exerciser seethefront coverof thismanual for...

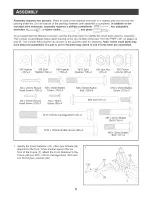
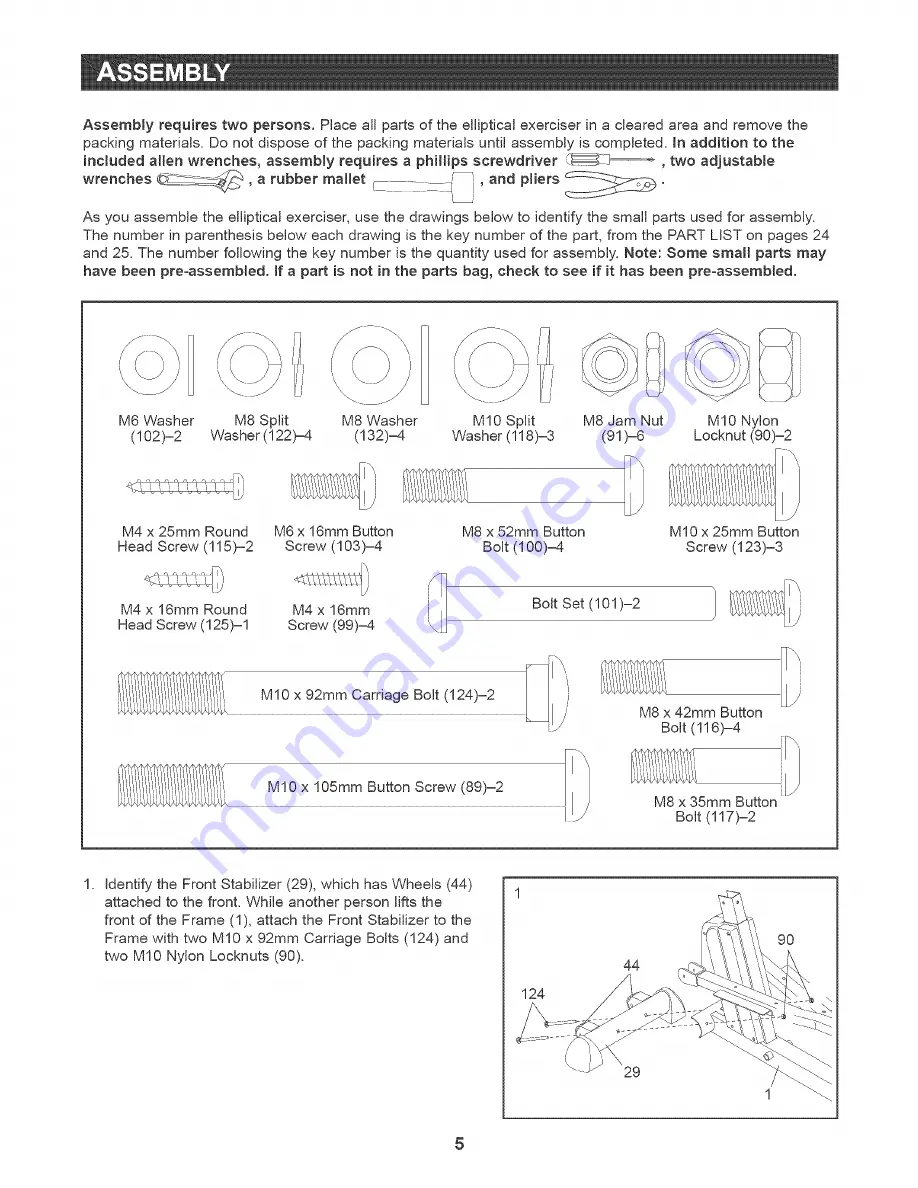
Page 5: ...he key number is the quantity used for assembly Note Some smatl parts may have been pre assembled If a part is not in the parts bag check to see if it has been pre assembled M6 Washer M8 Split M8 Wash...

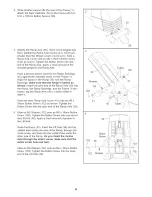
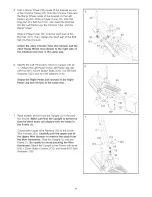
Page 6: ...Axle 39 into theRamp theRampBushings andtheFrame if nec z essary taptheRamp Axlewitha rubber malletto insertit SlidetheotherRamp AxleCover 41 ontoanM6x 16mmButton Screw 103 asshown Tighten the Button...

Page 7: ...ch is marked with an L Attach the Left Pedal to the Left Pedal Leg 46 with two M8 x 52mm Button Bolts 100 two M8 Split Washers 122 and two M8 Washers 132 Attach the Right Pedal not shown to the Right...

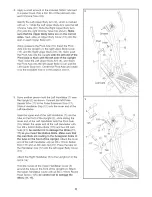
Page 8: ...eanother person holdtheLeftHandlebar 7 near theUpright 2 asshown Connect theleftPulse Sensor Wire 11 tothePulseExtension Wire 17 Slidea Handlebar Cap 12 ontothelowerendofthe LeftHandlebar Slidetheuppe...

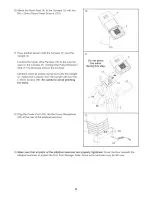
Page 9: ...ess wiringdownintotheUpright 2 AttachtheConsole 3 to theUpright withfourM4 x 16mm Screws 99 Becarefulto avoidpinching thewires 12 PlugthePower Cord 83 intothePower Receptacle 82 at therearof theellipt...

Page 10: ...ar lug or the like extending from the adapter must be connected to a permanent ground such as a properly grounded outlet box cover Whenever the adapter is used it must be held in place by a metal scre...

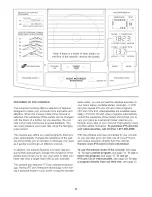
Page 11: ...dition the console features two heart rate pro grams that automatically change the resistance of the pedals and prompt you to vary your pace to keep your heart rate near a target heart rate as you exe...

Page 12: ...xercise the indicators around the track will light in succession until the entire track is lit The track will then dark en and the indicators will again begin to light in SU ccession The upper display...

Page 13: ...art rate is not shown make sure that your hands are positioned as described Avoid moving your hands excessively or squeezing the metal contacts too tightly For optimal performance periodically clean t...

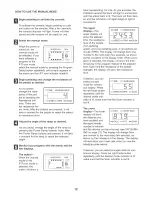
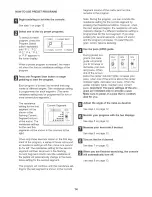
Page 14: ...dals will automatically change to the resis tance setting for the second segment The program will continue until the resistance set ting for the last segment is shown in the Current Segment column of...

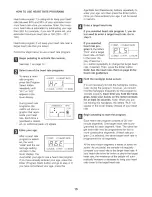
Page 15: ...ve entered your age it will be saved in memory Enter a target heart rate If you selected heart rate program 1 you do not need to enter a target heart rate Go to step 8 ff you selected heart rate pro g...

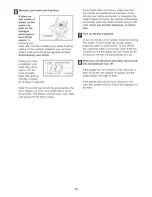
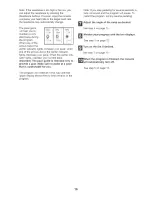
Page 16: ...center indi cator lights maintain your current pace Important The pace guide is intended only to provide a goal Make sure to pedam at a pace that is comfortable for you The program will continue in th...

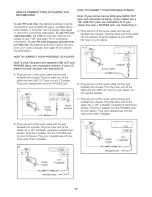
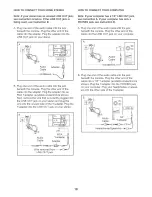
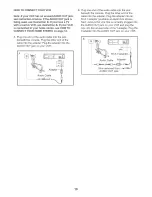
Page 17: ...CT YOUR PORTABLE STEREO Note if your stereo has an RCA type AUDIO OUT jack see instruction A below if your stereo has a 1 8 LiNE OUT jack see instruction B if your stereo has only a PHONES jack see in...

Page 18: ...into the LINE OUT jack on your stereo and plug the wire into the unused side of the Yzadapter Plug the Y adapter into the LiNE OUT jack on your stereo RCA Audio Y adapter Cable Adapter Wire removed fr...

Page 19: ...Plug the other end of the cable into the adapter Plug the adapter into the AUDIO OUT jack on your VCR A Adapt __ __ B Plug one end of the audio cable into the jack beneath the console Plug the other...

Page 20: ...is pressed your personal trainer will begin guiding you through your workout Simply follow your personal trainer s instructions The program will function in almost the same way as a preset program se...

Page 21: ...b browser if necessary and go to our Web site at wwwJF_T com Follow the desired linkson our Web site to select a program Read and follow the onqine instructions for using a program Follow the on line...

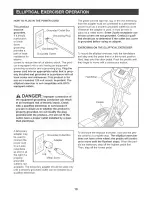
Page 22: ...ERCISER If the elliptical exerciser rocks during use turn one or both of the leveling feet under the rear stabilizer until the rocking motion is elimi nated Leveling J Foot HOW TO MOVE THE ELLIPTICAL...

Page 23: ...the first few minutes of exercise does your body begin to use stored fat calories for energy If your goal is to burn fat adjust the intensity of your exercise until your heart rate is near the lowest...

Page 24: ...Pedal Leg Right Pedal Leg Left Pedal Right Pedal Ramp Wheel Wheel Cover Pedal Leg Bearing 24 Key No Qty 53 1 54 2 55 2 56 2 57 1 58 1 59 1 6O 2 61 1 62 1 63 1 64 1 65 1 66 2 67 1 68 1 69 1 7O 1 71 1 7...

Page 25: ...2 M4x 50mm Screw 120 1 M4x 25mmScrew 121 10 M4x 14mm Screw 122 4 M8SplitWasher Note indicates a nondJiustrated part Specifications aresubject to ofthismanual for information aboutordering replacement...

Page 26: ...117_ 99 116 14 91 14 118 _ 123 12 14 1 16 114 i 17 t I 14 i i J 118 ____ 22 127 _ 19 I 119 99 123 118 j 11_ 120 121 24 121 26 127 99 121 125 127 26...

Page 27: ...34 101 49 38 103 102 t1 48 101 4O 29 103 02 74 113 46 41 4O 42 72 6O 103 73 95 131 52 101 62 109 47 0c 106 56 86 6O 113 J 99 79 89 83 52 86 8O 110 81 32 54 1O0 27...

Page 28: ...ormal usage or repairs not provided by an ICON authorized serwce center products used for commer cial or rental purposes or products used as store display models No other warranty beyond that specifi...

Reviews: