


10
Any revisions must first be approved by the product designer. Version: 201808
Revision By: JST
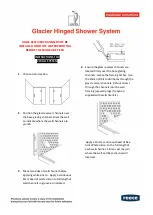
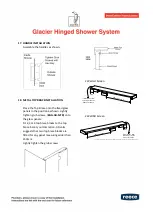
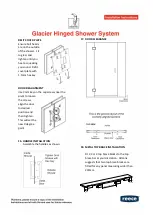
Apply a 10mm continuous bead of Sika
Artic White silicon, to the full length of
each wall channel. Silicon seal the join
where the wall and base channel will
intersect.
TILED WALLS -
apply an additional bead of
silicon to the inside of the waterproofing
ELLURE WALLS / ACRYLIC LINER -
apply an
additional bead of silicon to the outside of
the acrylic liner.
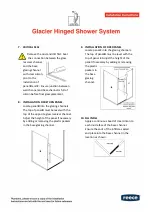
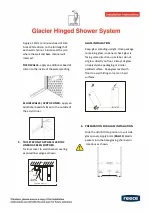
5.
THIS STEP ONLY APPLIES IF ACRYLIC
LINER HAS BEEN SUPPLIED.
Fix liner cover to wall channel covering
exposed liner edge as shown.
Wall
Cover
Silicon
Top view of wall channel
Double
Sided Tape
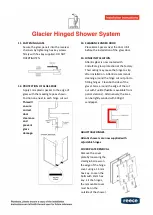
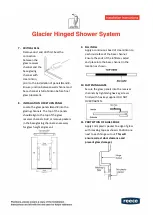
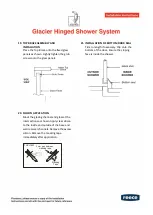
GLASS INSTALLATION
Keep glass standing upright. Once package
containing glass is opened, check glass is
facing same direction up as label, do not
sit glass directly on floor, always sit glass
on polystyrene packaging or similar
padded surface. Keep glass level with
floor to avoid hitting corners on hard
surfaces.
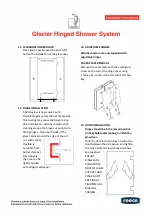
6.
PREPARATION FOR GLASS INSTALLATION
Slide the sill infill into position to suit side
glass panels. Apply 6mm (
BAG 11)
plastic
packers into the base glazing channels in
locations as shown.
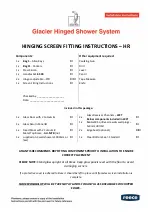
Summary of Contents for Atlantis Glacier SFK-GL-HR
Page 1: ...SFK GL HR...


