


11
Any revisions must first be approved by the product designer. Version: 201808
Revision By: JST
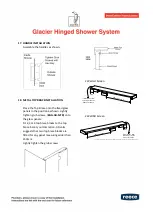
7.
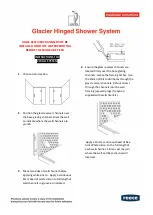
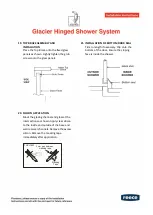
CRITICAL SEAL
Remove dust and dirt first. Seal the
connection
between the
glass receiver
channel and the
base glazing
channel with
clear silicon,
prior to the installation of panels
B
and
C.
Ensure junction between wall channel and
base channel is full of silicon before final
glass placement.
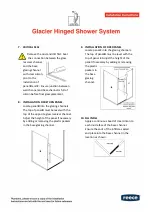
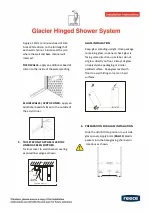
8.
INSTALLATION OF RETURN PANEL
Locate the glass panels
B
and
C
into the
glazing channels. The top of the panels
should align to the top of the glass
receiver channels. Add or remove packers
in the base glazing channel as necessary
for glass height alignment.
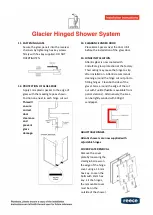
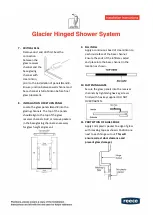
9.
SILL INFILL
Apply a continuous bead of clear silicon to
each inside face of the base channel.
Ensure the ends of the infill are sealed
and place into the base channel in the
location as shown.
10.
FASTENING GLASS
Secure the glass panels into the receiver
channels by tightening hex key screws
firmly with hex key supplied. DO NOT
OVERTIGHTEN.
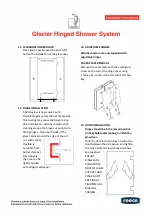
11.
PROTECTION OF GLASS EDGE
Apply 1mm plastic packer to edge of glass
with masking tape as shown. Position one
next to each hinge cut out.
This will
ensure correct door clearance and
prevent glass damage).
Summary of Contents for Atlantis Glacier SFK-GL-HR
Page 1: ...SFK GL HR...


