71
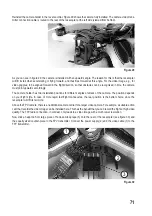
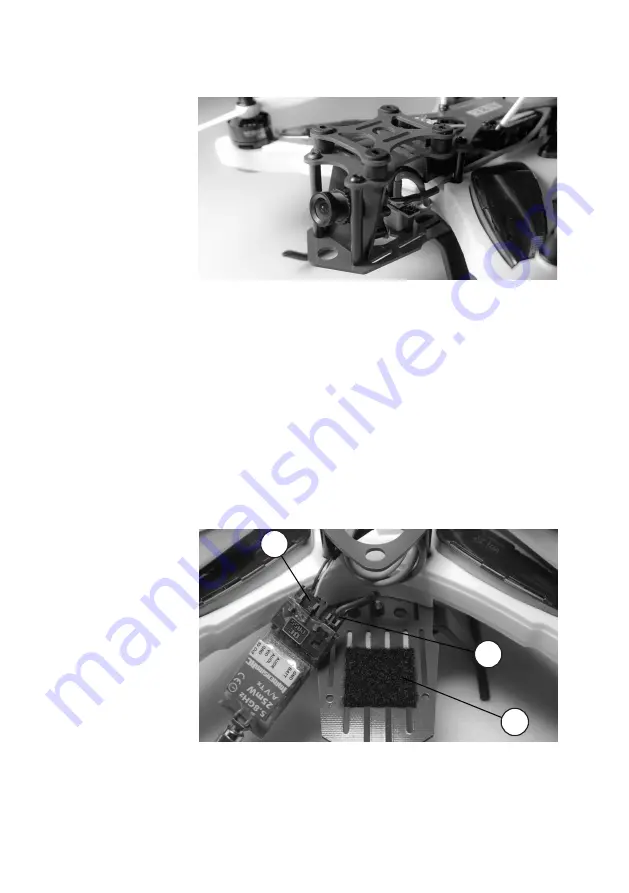
Reinstall the camera holder in the reverse order. Figure 29 shows the camera fully installed. The camera video trans-
mitter connection cable is routed to the rear of the racecopter at the left side (viewed from behind).
As you can see in figure 29, the camera is installed with an upwards angle. The reason for this is that the racecopter
will lift its tail when accelerating or flying forward, and thus flies forward at this angle. For the video image, e.g., for
video goggles, to be aligned forward in the flight direction, so that obstacles can be recognised in time, the camera
must point upwards accordingly.
The camera holder has two installation positions for different angles of attack of the camera. The position depends
on your flight style. In case of more rapid, fast flight manoeuvres, the rear position is the better choice, since the
racecopter will lift its tail more.
Above the FPV-camera, there is an additional camera carrier for a larger video camera. For example, a suitable action
cam that records the video image can be installed here. This has the benefit that you can record the flight at high video
quality. The FPV radio connection, in contrast, only leads to a video image with a much lower resolution.
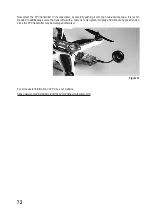
Now stick an approx. 5cm large piece of hook-and-loop tape (3) onto the rear of the racecopter (see figure 30) and
the equally sized counter-piece to the FPV transmitter. Connect the power supply (2) and the video cable (1) to the
FPV transmitter.
Figure 29
Figure 30
1
2
3

