background image

27

1

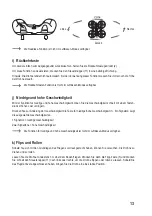
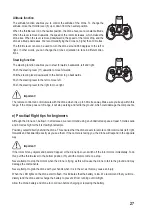
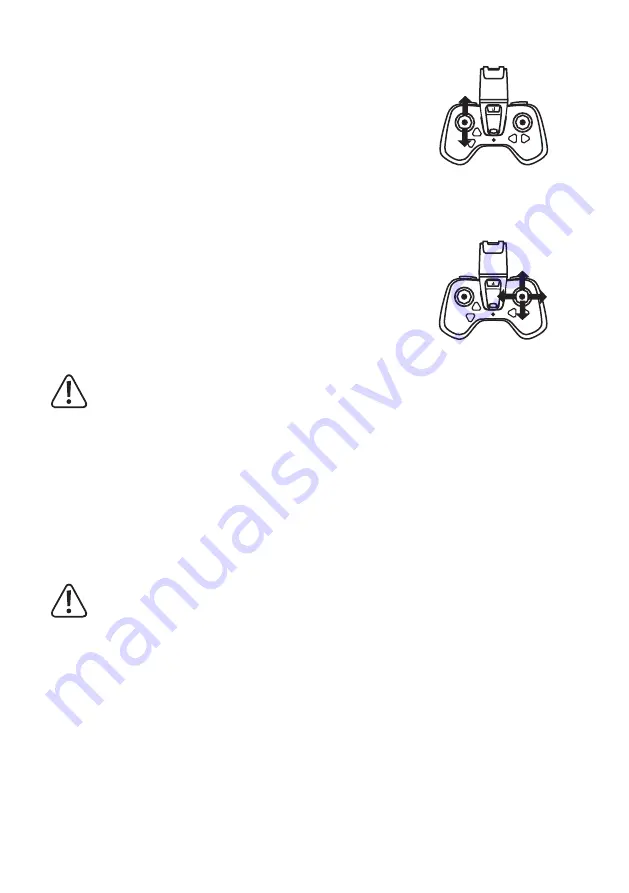
Altitude function 

The altitude function enables you to control the altitude of the drone. To change the 

altitude, move the throttle lever (8) up or down from the neutral position.  
When the throttle lever is in the neutral position, the drone hovers at a constant altitude. 

When the lever is moved upwards, the speed of the rotors increases, which makes the 

drone rise. When the lever is moved downwards, the speed of the rotors drop, and the 

drone’s altitude decreases. We recommend flying the drone no higher than 10 metres. 

The throttle lever can also be used to turn the drone around 360 degrees to the left or 

right. In other words, you can change the drone’s orientation to face in different direc-

tions.   

2

Steering function 

The steering function enables you to steer forwards, backwards, left and right.  
Push the steering lever (11) upwards to move forwards. 
Pull the steering lever downwards to the bottom to go backwards. 
Push the steering lever to the left to move left. 
Push the steering lever to the right to move right.


Important!

The remote control can communicate with the drone when it is up to 30 metres away. Make sure you keep within this 

range. If the drone goes out of range, it will stop working and fall to the ground, which could damage the components.  

e) 

Practical flight tips for beginners

Although the drone can be flown in small areas, we recommend using an unobstructed space at least 5 metres wide 

and 3 metres high for the first few flight attempts. 

Position yourself directly behind the drone. This ensures that the drone reacts to remote control commands (left, right, 

forwards and backwards) exactly as you see them. If the camera is facing you, the drone will respond in the opposite 

way.  


Important!

If the rotors hit any objects and become trapped, or the drone tips over, switch off the rotor motors immediately. To do 

this, pull the throttle lever to the bottom position (13) until the motors come to a stop. 

Never attempt to stop the motors when the drone is flying, as this will cause the drone to fall to the ground and may 

damage the components.  
Never attempt to grab the drone with your hands when it is in the air, as this may cause an injury.  

When the LED lights on the drone start to flash, this indicates that the battery is low. We recommend that you imme

-

diately land the drone and recharge the battery to prevent it from running out mid-flight.  

Allow the drone battery and drone to cool down before charging or replacing the battery. 

Summary of Contents for 2147018

Page 1: ...Bedienungsanleitung VORTEX MINI 2 in 1 Drohne und Luftkissenfahrzeug FPV Best Nr 2147018 Seite 2 17 Operating Instructions VORTEX MINI 2 in 1 drone and hovercraft FPV Item No 2147018 Page 18 33...

Page 2: ...ichten des Drohnenakkus 9 c Koppelung der Drohne mit der Fernsteuerung 10 d Grunds tzliche Informationen zum Steuern von Drohnen 11 e Praktische Flugtipps f r Anf nger 11 f Drohne starten 12 g Trimmen...

Page 3: ...habung Daran sollten Sie auch denken wenn Sie dieses Produkt an Dritte weitergeben Heben Sie deshalb diese Bedienungsanleitung zum Nachlesen auf Bei technischen Fragen wenden Sie sich bitte an Deutsch...

Page 4: ...zeichen der jeweiligen Inhaber Alle Rechte vorbehalten 4 Lieferumfang Drohne Luftkissenbasis Sender USB Ladekabel Schraubendreher 2 x Ersatz Rotoren Smartphone Halter Bedienungsanleitung 1Aktuelle Bed...

Page 5: ...ennbaren Gasen D mpfen und L sungsmitteln Setzen Sie das Produkt keiner mechanischen Beanspruchung aus Sollte kein sicherer Betrieb mehr m glich sein nehmen Sie das Produkt au er Betrieb und sch tzen...

Page 6: ...ierenden Teilen wie z B Rotoren fern Fliegen Sie mit Ihrem Modell nur dann wenn Ihre Reaktionsf higkeit uneingeschr nkt gegeben ist M digkeit Alkohol oder Medikamenten Einfluss k nnen zu Fehlreaktione...

Page 7: ...e nur mit Nicht WLAN Kameras kompatibel 5 Taste f r Flipp Funktion 6 Vorw rts Trimmtaste 7 R ckw rts Trimmtaste 8 Gashebel zum Auf und Abstieg zur Bewegung nach links rechts und zum Stoppen der Rotore...

Page 8: ...lich Batterien und keine Akkus zu verwenden Zum Einlegen der Batterien gehen Sie wie folgt vor L sen Sie an der Senderr ckseite die Halteschrauben der Batteriefachdeckel und heben Sie die Batteriefac...

Page 9: ...nicht ausreichend ist Das Betriebssystem erkennt beim Anschluss des Ladekabels keine neue Hardware da der USB Port nur f r die Ladefunktion verwendet wird Bitte beachten Sie dass die meisten USB Port...

Page 10: ...n Stabilisierungskomponenten werden w hrend des Kopplungsvorgangs kalibriert Bewegen oder drehen Sie die Drohne w hrenddessen nicht Wenn die LED Anzeige auf der Fernsteuerung weiterhin blinkt zeigt di...

Page 11: ...ch links und nach rechts lenken Dr cken Sie den Steuerkn ppel 11 nach oben um vorw rts zu fliegen Ziehen Sie den Steuerkn ppel nach unten um r ckw rts zu fliegen Dr cken Sie den Steuerkn ppel nach lin...

Page 12: ...die Taste f r die Trimmung nach links 13 gedr ckt bis die Drohne aufh rt sich nach rechts zu drehen Dreht sich die Rumpfspitze nach links so ist eine Trimmkorrektur mit der Drucktaste f r die Trimmun...

Page 13: ...schnell mit einem Tasten druck erh hen oder verringern Dr cken Sie zur nderung der Geschwindigkeit die Taste f r niedrige hohe Geschwindigkeit 1 Ein Signalton zeigt die ausgew hlte Geschwindigkeit an...

Page 14: ...hlie en Sie die Installation ab Schalten Sie die Drohne durch Einlegen der Batterie ein und stellen Sie sicher dass die Fernsteuerung ausgeschaltet ist Aktivieren Sie auf Ihrem Smartphone oder Tablet...

Page 15: ...ohnenmodus Wenn die Batterie in die Drohne eingesetzt ist ziehen Sie die beiden hinteren Rotoren vorsichtig in eine aufrechte Position Befestigen Sie die Drohne auf der Luftkissenbasis Das Luftkissenf...

Page 16: ...ra e 1 D 92240 Hirschau dass dieses Produkt der Richtlinie 2014 53 EU entspricht Der vollst ndige Text der EU Konformit tserkl rung ist unter der folgenden Internetadresse verf gbar www conrad com dow...

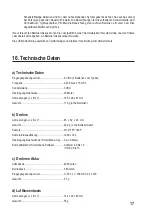
Page 17: ...en und leisten Ihren Beitrag zum Umweltschutz 16 Technische Daten a Technische Daten Eingangsspannung strom 6 V DC 4 Batterien vom Typ AA Frequenz 2 405 bis 2 475 GHz Sendeleistung 3 dBm bertragungsre...

Page 18: ...g the drone battery 25 b Inserting the drone battery 25 c Pairing the drone with the remote control 25 d Basic information on controlling drones 26 e Practical flight tips for beginners 27 f Starting...

Page 19: ...product to any third party Therefore retain these operating instructions for reference If there are any technical questions please contact International www conrad com contact United Kingdom www conr...

Page 20: ...served 4 Delivery content Drone Hovercraft base Remote control USB charging cable Screwdriver Spare rotors x 2 Smartphone holder Operating instructions 1Up to date operating instructions Download the...

Page 21: ...lammable gases steam and solvents Do not place the product under any mechanical stress If it is no longer possible to operate the product safely take it out of operation and protect it from any accide...

Page 22: ...ght Keep your body and hair away from rotating parts such as rotors Only fly the model if you are fully alert and able to respond Fatigue alcohol and medication can affect your ability to respond Also...

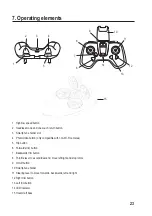
Page 23: ...oto video button only compatible with non Wi Fi cameras 5 Flip button 6 Forwards trim button 7 Backwards trim button 8 Throttle lever to ascend descend move left right and stop rotors 9 On off button...

Page 24: ...remote control To insert the batteries proceed as follows Loosen the screws from the battery compartment covers on the back of the remote control and then remove the battery compartment covers Insert...

Page 25: ...B port is only used to charge the battery Please note that most USB ports on computers laptops are only active when the computer laptop is switched on We therefore recommend that you only connect the...

Page 26: ...the pairing process has failed Repeat the process again with the throttle lever 8 as described above If the problem persists try turning both devices off and on and initiate pairing with the throttle...

Page 27: ...u keep within this range If the drone goes out of range it will stop working and fall to the ground which could damage the components e Practical flight tips for beginners Although the drone can be fl...

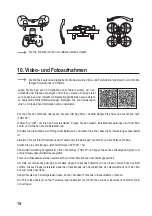
Page 28: ...t you do not have to worry about where the front of the drone is as the drone will respond from your perspective For example when headless mode is enabled and you turn the drone left the drone will mo...

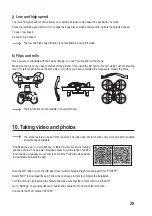
Page 29: ...lip function is not available in hovercraft mode 10 Taking video and photos The drone features a built in Wi Fi camera The video and photo functions only work with Wi Fi enabled smartphones and tablet...

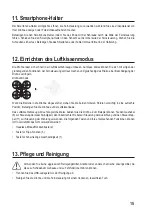
Page 30: ...screw through the centre of the remote control Slide the smartphone holder into the slot on the top of the remote control Tighten the screw to secure it in place Fix the smart phone or tablet into th...

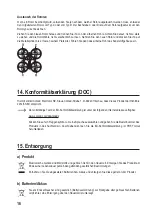
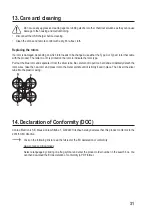
Page 31: ...he blue rotor and separate it from the silver tube Be careful not to pull too hard and accidentally detach the rotor wires Take the new rotor and press it onto the metal spindle until it is firmly fix...

Page 32: ...ies are labelled with this symbol to indicate that disposal in the domestic waste is forbidden The designations for the heavy metals involved are Cd Cadmium Hg Mercury Pb Lead as shown on the batterie...

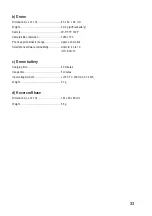
Page 33: ...tion 1280 x 720 Phone app transmission range Approx 20 metres Smartphone software compatibility Android 4 0 to 10 iOS 6 0 to 13 c Drone battery Charging time 40 minutes Usage time 5 minutes Input volt...

Page 34: ......

Page 35: ......

Page 36: ...likation entspricht dem technischen Stand bei Drucklegung Copyright 2020 by Conrad Electronic SE This is a publication by Conrad Electronic SE Klaus Conrad Str 1 D 92240 Hirschau www conrad com All ri...

Reviews: