40
9. Commissioning
a) Removing the Car Body
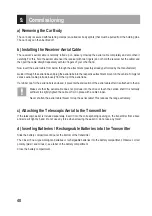
The car body is secured with fastening clamps (so-called car body splints) that must be pulled from the holding pins.
The car body can then be lifted off.
b) Installing the Receiver Aerial Cable
The receiver’s aerial cable is normally rolled up on delivery. Unwrap the aerial cable completely and smoothen it
carefully. For this, hold the aerial cable near the receiver with two fingers (do not hold the receiver but the cable) and
then pull the cable straight repeatedly with two fingers of your other hand.
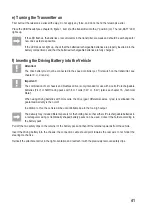
Now insert the aerial cable from below through the attachment (possibly already performed by the manufacturer).
Guide it through the aerial tube and plug the aerial tube into the respective attachment mount on the vehicle. Simply let
excess aerial cable protrude loosely from the tip of the aerial tube.
If a rubber cap for the aerial tube is enclosed, it prevents the dislocation of the aerial cable after it is attached to the tip.
Make sure that the aerial cable does not protrude into the drive or touch the cardan shaft! It is normally
sufficient to slightly tighten the cable or fix it in place with a cable binder.
Never shorten the aerial cable! Never roll up the aerial cable! This reduces the range extremely.
c) Attaching the Telescopic Aerial to the Transmitter
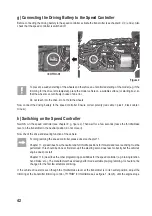
If the telescopic aerial is included separately, insert it into the corresponding opening on the transmitter from above
and screw it tight by hand. Do not use any force when screwing the aerial in; do not use any tools!
d) Inserting Batteries / Rechargeable Batteries into the Transmitter
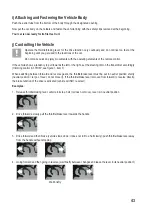
Slide the battery compartment lid out at the bottom of the transmitter.
Then insert 8 new type AA/mignon batteries or rechargeable batteries into the battery compartment. Observe correct
polarity (plus/+ and minus/-), see label on the battery compartment.
Close the battery compartment.
Summary of Contents for 23 73 30
Page 119: ...118 ...
Page 120: ...119 ...

