background image

10

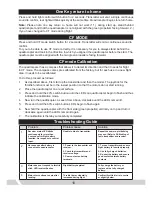
Press and hold light control switch button for 2 seconds. Transmitter will emit a single continuous 

sound to confirm, rear light will blink quickly at the same time. Quadrocopter begins to return home.

Note:

  Please  note  one  key  return  to  home  will  not  work  if  1.)  during  start  up,  stand  behind 

quadrocopter and that the quadrocopter is not aligned with the green propellers facing forward. 2.) 

If you have changed to CF mode during flight.

Press and hold CF mode switch button for 2 seconds. Transmitter will emit a continuous sound to 

confirm.

For you to be able to use CF mode correctly, it is necessary for you to always stand behind the 

quadrocopter and look in the direction in which you aligned the quadrocopter before the start. The 

quadrocopter must be aligned with the two green propellers facing forward.

The quadrocopter has a compass that allows it to detect its direction and that it needs for flight 

in CF mode. The compass comes pre-calibrated from the factory, but for each use in a new flight 

area, it needs to be recalibrated.
To do this, proceed as follows:
1.  As described above, first start up the transmitter and then the model. The joystick for the 

throttle function must be in the lowest position so that the motors do not start running.

2.  Place the quadrocopter on a level surface.
3.  Press and hold the 40% switch button until the LEDs on quadrocopter begin to flash and thus 

indicate the calibration mode.

4.  Now turn the quadrocopter, as seen from above, clockwise until the LEDs remain lit.
5.  Press and hold the 60% switch button LEDs begin to flash again.
6.  Now hold the quadrocopter with the front side (green propeller) vertically on top and turn it 

clockwise again until the LEDs remain lit again.

7.  The calibration is thereby successfully completed.

One Key return to home

CF MODE

CF mode Calibration

Troubleshooting Guide

Problem

Problem cause


Solution

1

Receiver status LED blinks 

continuously for more than 

4 seconds after flight battery


Inserted. No response to control 

Input.

Unable to bind to transmitter.

Repeat the power up initializing 

process. (Refer to P.6:Binding of 

radio transmitter and receiver.

2

No response after battery is 

connected to quadrocopter.

1. Power to the transmitter and 

receiver.  
2. Check the transmitter and 

receiver voltage.  
3. Poor contact on battery 

terminals.

1. Turn on transmitter and ensure 

flight battery Is Inserted properly.
2. Use fully charged batteries.
3. Re-seat the battery and ensure 

good contact between battery 

contacts.

3

Motor does not respond to throttle 

stick, LED receiver flashes.

Flight battery depleted.

Fully charge the battery, or 

replace with a fully charged 

battery.

4

Main rotor continue to spin after 

landing.

Throttle trim accidentally 

Increased during flight.

Confirm throttle trim is in centre 

or slightly below.

Summary of Contents for Cyclone245 FPV

Page 1: ...Item No 1378384 t FPV Quadrocopter Cyclone 245 RtF WiFi Version 12 15 ...

Page 2: ......

Page 3: ...INSTRUCTION MANUAL CYCLONE 245 FPV ...

Page 4: ... Part name Carbon fibre spindle Part name Lithium Battery Part name Rotor blade Part name Bearing Part name CW motor red and blue wire Part name CCW motor black and white wire Part name Green light Part name Red light Part name Tail light panel Part name Main gear Accessories list sold separately ...

Page 5: ...Standard Accessories NO PART NAME QUANTITY 1 2 3 4 5 6 V686 Instruction Manual V686 Aircraft Charger Li Po battery Blade Remote control 1 1 1 1 4 1 Delivery content 3 7 V 730 mAh Li Po battery x 1 Charger x1 WIFI FPV Optional Parts sold separately MONITOR FPV ...

Page 6: ...roduct without their knowledge and consent Observe the provisions and regulations of the country in which you use this product Read the ENTIRE instruction manual to become familiar with the features of the product before operating Failure to operate the product correctly can result in damage to the product personal property and cause serious injury This is a sophisticated hobby product It must be ...

Page 7: ...t information which will help your first flight to be a great success Accessories list Standard Accessories Delivery Content Optional parts Warning Additional Safety Precautions and Warnings Introduction Table of Contents Warning and the guide of using battery Battery Charging First Flight Preparation CAUTION Binding instruction Transmitter Controls First Flight instruction 3D Rolling One key retu...

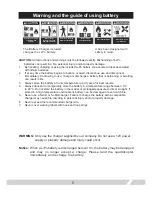
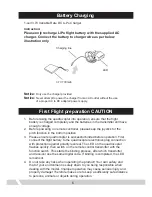
Page 8: ... high temperature environment battery can be damaged or even catch fire 5 Never use a Ni CD or Ni MH charger Failure to charge the battery with a compatible charger may cause fire resulting in personal injury and or property damage 6 Never exceed the recommended charge rate 7 Never cover warning labels with hook and loop strips Only use the charger supplied by our company Do not use a 12V power su...

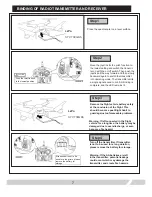
Page 9: ...nd receiver use the same digital code If binding is completed the LED remains lit 4 Do not take any risks when operating the product Your own safety and that of your environment is solely down to you being responsible when dealing with the model Improper operation may cause serious injury and property damage Therefore make sure to keep a sufficiently safe distance to persons animals or objects dur...

Page 10: ...me a post flight habit to guard against unforeseeable problems Warning If left connected in the flight vehicle for a long time the battery may be damaged due to over discharge or even become a fire hazard Turn off the transmitter If transmitter is not to be used for a long duration please remove the battery for storage Warning If the AA batteries are left in the transmitter potential leakage could...

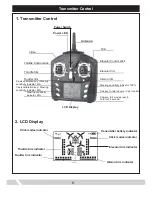
Page 11: ...rottle trim indicator Rudder trim indicator Transimitter battery indicator Stick modes indicator Transmitter Control 2 LCD Display Video Throttle Control stick Throttle trim Rudder trim Y axis calibration key Steering sensitivity indicator 60 Elevator Control stick Elevator trim Steering sensitivity indicator 100 One key to return home Light control Stick modes indicator Elevator trim indicator Ai...

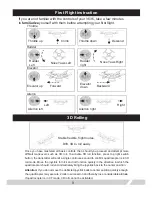
Page 12: ...rm quadrocopter is in 3D roll mode Move the joystick for nick and roll function quickly in the direction in which the quadrocopter should roll and immediately bring the joystick back to the center position Attention If you do not move the deflected joystick back to center position quickly enough the quadrcopter may execute 2 rolls in succession and thereby lose considerable altitude If quadrocopte...

Page 13: ...surface 3 Press and hold the 40 switch button until the LEDs on quadrocopter begin to flash and thus indicate the calibration mode 4 Now turn the quadrocopter as seen from above clockwise until the LEDs remain lit 5 Press and hold the 60 switch button LEDs begin to flash again 6 Now hold the quadrocopter with the front side green propeller vertically on top and turn it clockwise again until the LE...

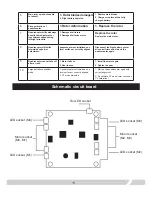
Page 14: ...uette 1 Damaged tall rotors 2 Damaged tail drive motor Replace the rotor Replace the main motor 8 Quadrocopter still drifts forward despite trim adjustment quadrocopter not initialized on a level surface or correctly aligned Disconnect the flight battery center all control trims and start up the quadrocopter again 9 Quadrocopter cannot take off after a crash 1 Motor fall out 2 Gear loosen 1 Instal...

Page 15: ...12 Green B Green A Black B Black A forward Exploding View ...

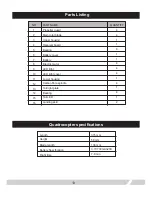
Page 16: ...earing Battery cover Battery Electric motor LED light LED light cover Lower housing Carbon fibre spindle Tail light plate Bearing Tail LED Landing skid 4 4 1 1 8 1 1 4 4 4 1 4 1 4 1 2 Parts Listing Quadrocopter specifications Length Height Blade length Battery Specification Flight time 375 mm 58 mm 136 mm 3 7V 730mAh23C 7 8 min ...

Page 17: ...into the socket live video streaming feature will not work and may fail Power on your transmitter and the quadrocopter and then the app on your smartphone From the Wi Fi settings control on your smartphone search for WiFi network name beginning with WiFiUFO and enable connect ion Start the app and then press play on screen The default app setting allows only for video transmission but is disabled ...

Page 18: ...Phone Holder assembly WIFI Webcam Phone Holder Illustration QR code for IOS WIFI UFO QR code for GooglePlay Android WIFI UFO GooglePlay ...

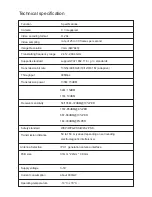
Page 19: ...dard Transmission distance 50 to 150 m varies depending on surrounding electromagnetic interference Antenna Selection PCB size 33mm 22mm 0 8mm Supply voltage Current consumption Operating temperature H 264 0 3 megapixel Specifications rate of 25 to 30 frames per second VGA 640 840 2 412 2 484 GHz support WI FI 802 11 b g n standards 135 54 48 36 24 18 12 9 6 1M adaptive 90Mbps 135M 15dBM 54 135M 7...

Reviews: